Forget the Store-Bought: Your Guide to Irresistible Homemade Chocolate Peanut Butter Cups
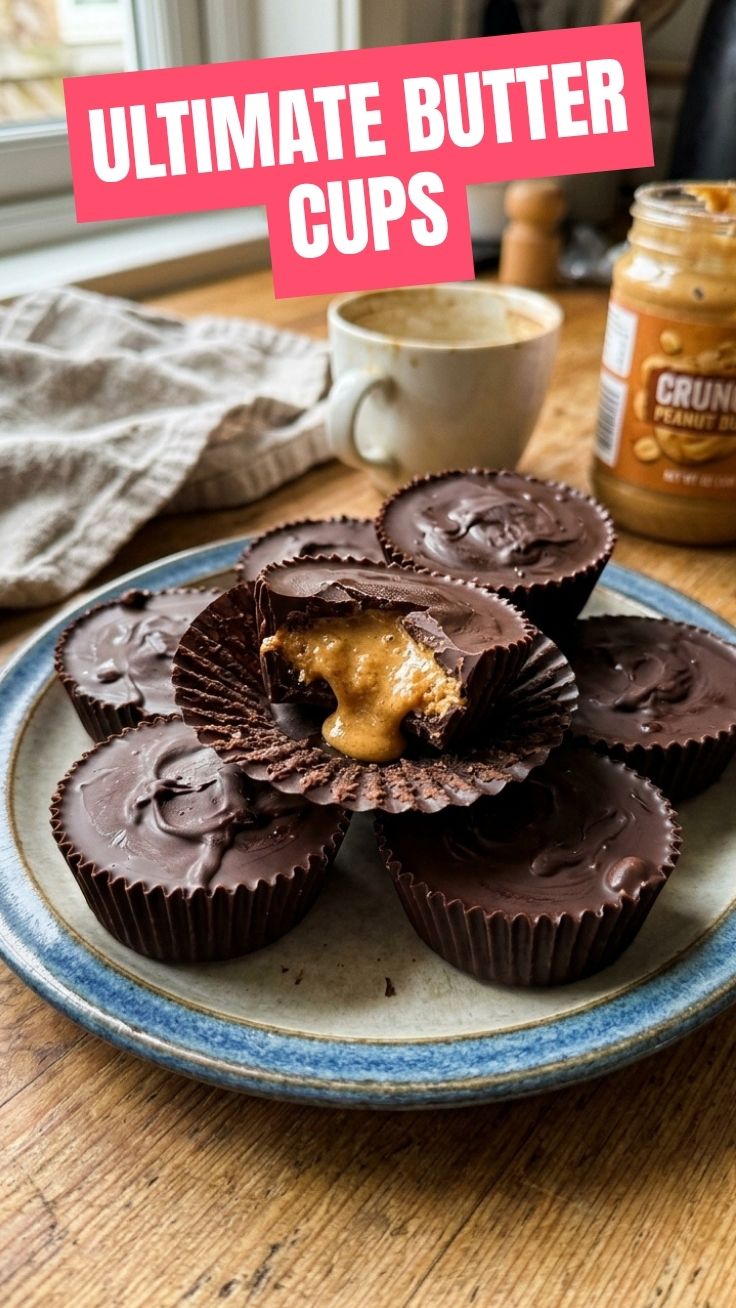
Ever bitten into a store-bought Reese’s Peanut Butter Cups and thought, “I could do this better”? You’re in luck! This comprehensive guide will empower you to craft the most delectable homemade Chocolate Peanut Butter Cups right in your own kitchen. Not only are these treats incredibly satisfying to make, but they also offer a superior flavor profile and the flexibility to customize ingredients to your liking. Imagine the rich, creamy peanut butter center enveloped in a silky chocolate shell – a truly unparalleled indulgence that far surpasses anything you’ll find pre-packaged. Get ready to elevate your dessert game and discover the unparalleled joy of crafting this beloved confection from scratch.
Ingredients & Kitchen Tools
- 1 cup Peanut Butter (creamy, natural, unsweetened preferred): The star of our show! Natural peanut butter provides a less sweet and more authentic flavor.
- 1/2 cup Powdered Sugar (confectioners’ sugar): Ensures a smooth, lump-free peanut butter filling.
- 1/4 cup Unsalted Butter (melted): Adds richness and helps bind the peanut butter mixture.
- 1 teaspoon Vanilla Extract: Enhances the overall flavor profile.
- 1/4 teaspoon Salt: Balances the sweetness and brings out the peanut butter flavor.
- 12-16 ounces Semi-Sweet Chocolate Chips (or your preferred chocolate): The chocolate coating! Use high-quality chocolate for the best results.
- 1-2 tablespoons Coconut Oil (optional): Helps thin the chocolate for a smoother coating and gives it a glossy finish.
- Mini Muffin Liners (paper or silicone): Essential for shaping our cups.
- Muffin Pan (12-cup): Provides stability for the muffin liners.
- Microwave-Safe Bowls (2 large): For melting chocolate and mixing ingredients.
- Rubber Spatula: For mixing and scraping.
- Small Spoon or Cookie Scoop: For portioning the peanut butter filling.
- Tongs or Fork: For dipping the peanut butter centers in chocolate.
- Parchment Paper-Lined Baking Sheet: For setting the finished cups.
Prep Time & Cooking Schedule
- Prep Time: 20 minutes
- Chill Time: 45-60 minutes (this is crucial for setting the peanut butter filling and the chocolate coating)
This recipe is perfect for an afternoon project or a quick dessert creation. The chill time can be divided, with a 30-minute chill for the peanut butter centers and another 15-30 minutes for the finished cups to set. Make ahead for gatherings, or whip up a batch for a spontaneous sweet craving!
Step-by-Step Instructions
1. Prepare Your Molds: Line a 12-cup muffin pan with mini muffin liners. This will ensure your Chocolate Peanut Butter Cups come out easily and look professional.
2. Make the Peanut Butter Filling: In a medium microwave-safe bowl, combine the peanut butter, powdered sugar, melted butter, vanilla extract, and salt. Mix thoroughly with a rubber spatula until smooth and well combined. The mixture should be firm enough to roll.
3. Form the Peanut Butter Centers: Roll the peanut butter mixture into small balls, about 1 teaspoon each. Flatten them slightly into disc shapes that will fit comfortably inside your mini muffin liners. Place these discs onto a parchment paper-lined plate or small baking sheet and chill in the freezer for 15-20 minutes, or until firm. This step is essential for easy handling when dipping.
4. Melt the Chocolate: In another microwave-safe bowl, melt the semi-sweet chocolate chips in 30-second intervals, stirring after each, until smooth and fully melted. If using, stir in the coconut oil to achieve a smoother, more fluid consistency. Be careful not to overheat the chocolate, as it can seize. You want a beautifully tempered and glossy texture, much like you’d find in a quality Reese’s Peanut Butter Cups.
5. Assemble the Cups: Spoon a small amount of melted chocolate into the bottom of each mini muffin liner, just enough to cover the base.
6. Add Peanut Butter Centers: Remove the chilled peanut butter discs from the freezer. Gently place one disc on top of the chocolate in each liner.
7. Cover with Chocolate: Spoon more melted chocolate over each peanut butter disc, ensuring it’s completely covered. Gently tap the muffin pan on the counter a few times to release any air bubbles and create a smooth top.
8. Chill to Set: Transfer the muffin pan to the refrigerator and chill for at least 30 minutes, or until the chocolate is completely set and firm.
Nutritional Benefits & Advantages
Homemade Chocolate Peanut Butter Cups offer several advantages. By using natural peanut butter, you can significantly reduce added sugars and unhealthy fats compared to store-bought versions. Peanut butter provides a good source of protein, healthy monounsaturated fats, and essential nutrients like Vitamin E, magnesium, and potassium. Dark chocolate, if chosen, adds powerful antioxidants. You’re in control of the quality of ingredients, making this a more wholesome dessert option that is still incredibly satisfying.
Tips, Variations & Cooking Advice
- Chocolate Choices: Experiment with milk chocolate, dark chocolate, or even white chocolate for different flavor profiles.
- Nut Butter Alternatives: Almond butter or cashew butter can be used instead of peanut butter for a different twist.
- Add-ins: Stir in a pinch of sea salt, chopped nuts, or a dash of espresso powder into the peanut butter filling for extra flavor.
- Dairy-Free/Vegan: Use dairy-free chocolate chips and a plant-based butter alternative to make this recipe vegan-friendly.
- Gluten-Free: This recipe is naturally gluten-free!
- Temperature Control: When melting chocolate, use a double boiler for more precise temperature control if you’re concerned about overheating it in the microwave.
Common Mistakes to Avoid
- Overheating Chocolate: This can cause the chocolate to seize and become thick and clumpy. Melt in short intervals, stirring frequently.
- Not Chilling Enough: Insufficient chilling of the peanut butter centers will make them difficult to handle and prone to falling apart when dipping.
- Too Much Coconut Oil: While a little helps, too much coconut oil can make the chocolate coating too soft and prone to melting quickly.
- Uneven Chocolate Coating: Ensure you have enough melted chocolate to fully cover the peanut butter centers for a complete and visually appealing finish.
Storage & Meal Prep Tips
Store your homemade Chocolate Peanut Butter Cups in an airtight container in the refrigerator for up to 2 weeks. They can also be frozen for up to 3 months. If freezing, separate layers with parchment paper to prevent sticking. Thaw in the refrigerator for a few hours or enjoy straight from the freezer for a firmer treat. These are fantastic for meal prepping desserts or for having a quick, portion-controlled snack ready!
Conclusion
There you have it – your definitive guide to creating truly exceptional Chocolate Peanut Butter Cups at home. This recipe goes beyond just mimicking store-bought varieties like Reese’s Peanut Butter Cups; it offers a superior, customizable, and incredibly satisfying experience. Don’t be afraid to experiment with variations and make these treats truly your own. We encourage you to try this recipe and share your delicious creations with us! Happy baking!
FAQs
Q: Can I use crunchy peanut butter?
A: While creamy natural peanut butter is recommended for a smoother consistency, crunchy peanut butter can be used for added texture.
Q: How do I prevent the chocolate from seizing?
A: Melt chocolate slowly, either in short bursts in the microwave or over a double boiler, and avoid introducing any water into the mixture.
Q: Can I skip the coconut oil?
A: Yes, you can. The coconut oil helps create a smoother, shinier coating, but it’s not strictly necessary.
Q: Why are my peanut butter centers falling apart?
A: This usually means they haven’t been chilled long enough. Ensure they are firm before attempting to dip them in chocolate.
Q: Can I use cupcake liners instead of mini muffin liners?
A: Yes, but your cups will be much larger, and you’ll yield fewer cups from the recipe. Adjust the size of your peanut butter discs accordingly.