Craving Crispy Perfection? Uncover the Secret to Homemade Chicken Tenders Like Never Before!
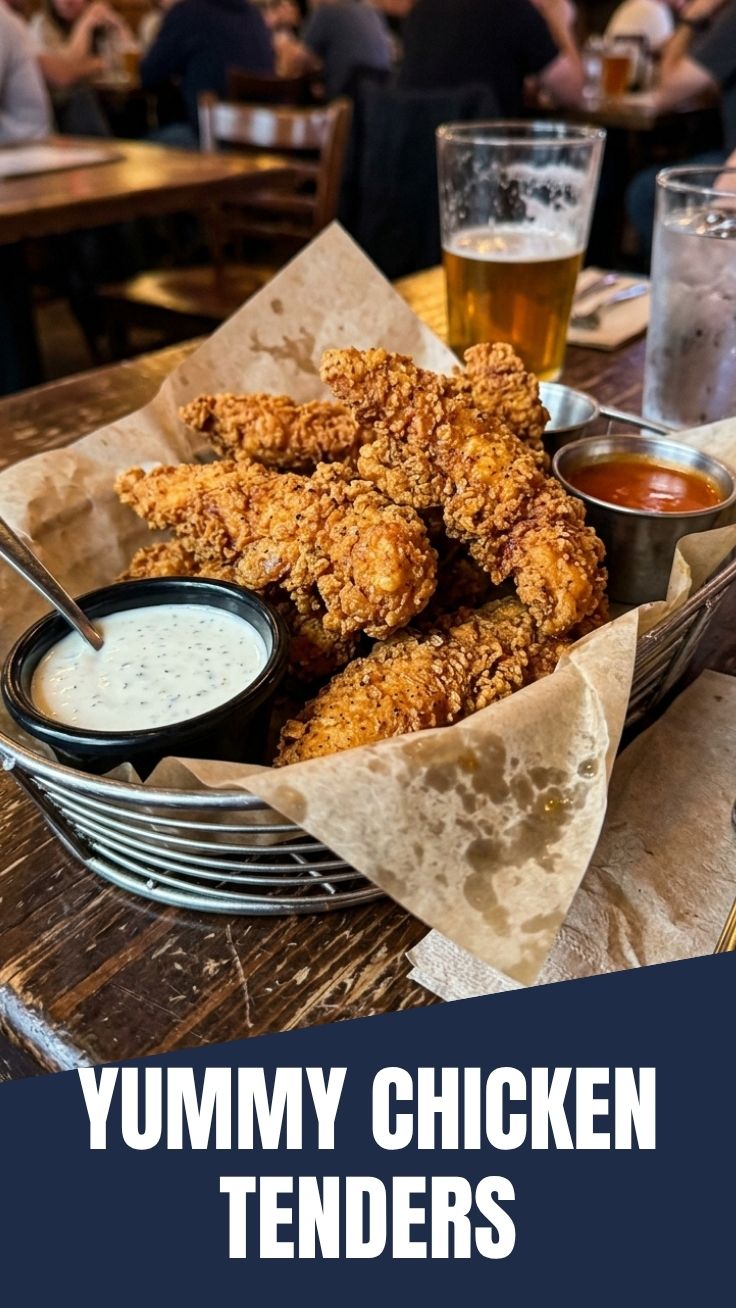
Tired of those bland, store-bought frozen options? Imagine biting into perfectly golden, unbelievably juicy Chicken Tenders, seasoned just right, with a satisfying crunch that makes your tastebuds sing. This isn’t just about recreating a restaurant favorite; it’s about elevating your home cooking game and enjoying a healthier, more flavorful version of a beloved classic. Forget those questionable processing methods; we’re diving into crafting the ultimate crispy chicken experience right in your own kitchen, a dish that outshines even the best chicken nuggets. Get ready to transform ordinary ingredients into an extraordinary meal that will have everyone asking for more!
Ingredients & Kitchen Tools
- 1 ½ lbs Boneless, Skinless Chicken Breast Tenderloins: The star of our show! These are naturally tender and cook quickly. You can also slice full chicken breasts into 1-inch strips for a homemade feel.
- 1 cup All-Purpose Flour: Creates the base for our crispy coating. For a gluten-free option, substitute with a 1-to-1 gluten-free baking flour blend.
- 1 tsp Smoked Paprika: Adds a delightful, smoky depth of flavor and a beautiful golden hue.
- ½ tsp Garlic Powder: Essential for an aromatic savory kick.
- ½ tsp Onion Powder: Complements the garlic powder for a balanced flavor profile.
- ¼ tsp Cayenne Pepper (optional): For a subtle hint of heat. Adjust to your spice preference!
- 1 tsp Salt: Enhances all the flavors. Use kosher salt for best results.
- ½ tsp Black Pepper: Freshly ground is always best.
- 2 Large Eggs: Acts as the binding agent for our breading.
- ¼ cup Milk (any kind): Helps create an egg wash consistency for better adhesion.
- 2 cups Panko Breadcrumbs: The secret to an extra-crispy exterior! Regular breadcrumbs can be used in a pinch, but Panko delivers superior crunch.
- Vegetable Oil or Canola Oil: For frying. Choose a high smoke point oil.
- Large Shallow Bowls (3): For your dredging station (flour, egg wash, breadcrumbs).
- Heavy-Bottomed Pot or Dutch Oven: Ideal for deep frying, maintaining consistent oil temperature.
- Tongs: For safely handling chicken in hot oil.
- Wire Rack with Paper Towels underneath: For draining excess oil and maintaining crispiness.
- Meat Thermometer: Crucial for ensuring the chicken is cooked through to a safe internal temperature (165°F / 74°C).
Prep Time & Cooking Schedule
- Prep Time: 15-20 minutes (includes slicing and setting up the dredging station).
- Cook Time: 15-20 minutes (in batches, about 3-4 minutes per side).
- Resting Time: 5 minutes after cooking, allowing juices to redistribute for maximum tenderness.
This recipe is perfect for a weeknight dinner or a weekend gathering. The quick cooking time means you can have a delicious meal on the table in under an hour. Plan to start your oil heating while you’re breading the last batch of Chicken Tenders to optimize your timeline.
Step-by-Step Instructions
1. Prepare the Chicken: Pat the chicken tenderloins dry with paper towels. This is crucial for the breading to adhere properly. If using full chicken breasts, slice them into uniform 1-inch width strips.
2. Set Up Dredging Stations: In the first shallow bowl, whisk together the flour, smoked paprika, garlic powder, onion powder, cayenne pepper (if using), salt, and black pepper. In the second bowl, whisk the eggs and milk until well combined. In the third shallow bowl, spread out the Panko breadcrumbs.
3. Bread the Chicken: Working one at a time, dredge each chicken tender first in the seasoned flour, shaking off any excess. Then, dip it into the egg wash, allowing any extra to drip off. Finally, thoroughly coat it in the Panko breadcrumbs, gently pressing to ensure the breading sticks. Place the breaded Chicken Tenders on a clean plate or baking sheet. This systematic process ensures uniform coating, leading to outstanding texture, far superior to many mass-produced chicken nuggets.
4. Heat the Oil: Pour about 2-3 inches of vegetable or canola oil into your heavy-bottomed pot or Dutch oven. Heat over medium-high heat until it reaches 350°F (175°C). Use a thermometer to verify the temperature. If you don’t have a thermometer, drop a tiny pinch of Panko in – it should sizzle vigorously but not burn instantly.
5. Fry the Chicken: Carefully lower 3-4 breaded tenders into the hot oil, ensuring not to overcrowd the pot, which would drop the oil temperature. Fry for 3-4 minutes per side, or until deeply golden brown and cooked through. The internal temperature, checked with a meat thermometer at the thickest part, should be 165°F (74°C).
6. Drain and Rest: Using tongs, transfer the cooked tenders to the wire rack set over paper towels to drain excess oil. This helps maintain crispiness. Repeat with the remaining chicken, letting the oil come back up to temperature between batches.
7. Serve: Serve immediately with your favorite dipping sauces!
Nutritional Benefits & Advantages
Homemade Chicken Tenders offer significant nutritional advantages over their fast-food counterparts. You’re in control of the oil quality and quantity, reducing unhealthy trans fats. Chicken breast is an excellent source of lean protein, essential for muscle repair and satiety. By using fresh ingredients and mindful cooking, you avoid the excessive sodium and artificial additives often found in processed versions. Plus, pairing them with homemade dipping sauces or a fresh salad further enhances their wholesome appeal.
Tips, Variations & Cooking Advice
- Air Fryer Option: For a lighter take, preheat your air fryer to 375°F (190°C). Lightly spray the breaded tenders with cooking oil and air fry for 12-15 minutes, flipping halfway, until golden and cooked through.
- Baked Version: Preheat oven to 400°F (200°C). Place breaded tenders on a lightly greased baking sheet and bake for 20-25 minutes, flipping once, until golden and cooked.
- Spicy Kick: Add a pinch more cayenne pepper to the flour mixture, or include a dash of your favorite hot sauce to the egg wash.
- Herbaceous Flavor: Mix dried Italian herbs, thyme, or rosemary into the Panko breadcrumbs for an aromatic twist.
- Gluten-Free: As mentioned, use a 1-to-1 gluten-free flour blend and ensure your Panko breadcrumbs are certified gluten-free.
- Dairy-Free: Use a non-dairy milk alternative (like almond or soy milk) in the egg wash.
Common Mistakes to Avoid
- Overcrowding the Pot: This lowers the oil’s temperature, leading to greasy, less crispy chicken. Cook in small batches.
- Not Patting Chicken Dry: Moisture prevents the breading from sticking, resulting in a soggy coating.
- Oil Not Hot Enough/Too Hot: Too cool, and the chicken absorbs too much oil. Too hot, and the outside burns before the inside cooks. Use a thermometer!
- Skipping the Wire Rack: If you drain on paper towels directly, the bottom can steam and lose its crispiness.
- Underseasoning: Don’t be shy with the salt and pepper in the flour mixture – it’s your main seasoning layer.
Storage & Meal Prep Tips
Leftover Chicken Tenders can be stored in an airtight container in the refrigerator for up to 3-4 days. To reheat and restore crispiness, place them on a baking sheet in a preheated oven (375°F/190°C) for 10-15 minutes, or in an air fryer for 5-7 minutes. Freezing is also an option! Arrange cooled, cooked tenders in a single layer on a baking sheet and freeze until solid, then transfer to a freezer-safe bag or container for up to 2-3 months. Reheat from frozen in the oven or air fryer.
Conclusion
There you have it – the definitive guide to creating the most delectable, homemade Chicken Tenders right in your own kitchen. By following these steps and incorporating our tips, you’ll be able to consistently produce a dish that rivals any restaurant offering, packed with flavor and that irresistible crunch that puts ordinary chicken nuggets to shame. Don’t just dream of crispy perfection; make it a reality! Give this recipe a try and share your golden-brown masterpieces with us! What’s your go-to dipping sauce? Let us know in the comments below.
FAQs
1. Can I use frozen chicken tenderloins?
* Yes, but ensure they are fully thawed and patted very dry before breading.
2. What’s the best way to dispose of used frying oil?
* Let the oil cool completely, then pour it back into its original container or an old milk jug and dispose of it in the regular trash. Never pour it down the drain!
3. How do I prevent the breading from falling off?
* Ensure the chicken is very dry, coat thoroughly in flour first (shaking off excess), then ensure a good, even egg wash and firm press with the Panko breadcrumbs. Don’t overcrowd the pot when frying.
4. Can I make these in advance for a party?
* You can bread the tenders up to an hour in advance and keep them refrigerated. For best results, fry them fresh just before serving. However, they reheat well (see storage tips).
5. What are some great homemade dipping sauces?
* Classic honey mustard, spicy sriracha mayo, tangy barbecue sauce, or a refreshing dill ranch are all fantastic options!