Smoke Your Way to Thanksgiving Glory: The Ultimate Guide to Perfect Smoked Turkey
The aroma of a perfectly cooked turkey filling your home on Thanksgiving or any special occasion is truly unbeatable. But what if we told you there’s a method that elevates this classic to a whole new level of flavor and succulence? We’re talking about crafting a magnificent Smoked Turkey right in your own backyard! Forget dry, uninspired birds; this guide will walk you through every step to achieve a moist, smoky, and unbelievably delicious centerpiece that will have everyone reaching for seconds. And before we even begin, understanding the art of Brining Turkey is crucial for that truly juicy result. Preparing this at home isn’t just about saving money; it’s about customizing the flavor profile to your exact preferences and creating a culinary masterpiece that will become a cherished tradition.
Ingredients & Kitchen Tools
Here’s everything you’ll need to embark on your smoky culinary adventure:
- 1 Whole Turkey (12-16 lbs): Fresh or thawed. This size is ideal for even smoking and serves a good number of guests.
- For the Brine:
* 1 cup Kosher Salt: Essential for tenderizing and infusing moisture.
* 1/2 cup Brown Sugar (packed): Adds sweetness and aids in browning.
* 4 sprigs Fresh Rosemary: Aromatic herb that complements poultry beautifully.
* 1 tbsp Black Peppercorns: Adds a subtle earthy spice.
* 1 gallon Vegetable Broth: Provides a flavorful liquid base for the brine.
* 2 oranges, quartered: Adds a bright, citrusy note.
* 2 gallons Water: Dilutes the brine and ensures full turkey submersion.
- For the Rub:
* 2 tbsp Smoked Paprika: Deep, smoky flavor and a beautiful reddish hue.
* 1 tbsp Garlic Powder: Pungent aroma that enhances the savory notes.
* 1 tbsp Onion Powder: Sweet and savory, a perfect complement to garlic.
* 1 tbsp Dried Thyme: Earthy, slightly minty herb that pairs well with poultry.
* 1 tsp Black Pepper: Freshly ground for best flavor.
* 1 tsp Cayenne Pepper (optional): For a touch of heat.
* 1/2 cup Unsalted Butter, melted: Helps the rub adhere and promotes crispy skin.
- Kitchen Tools:
* Large Brining Bag or Food-Grade Bucket (5-gallon minimum): To submerge the turkey in brine.
* Smoker (Pellet, Electric, or Charcoal): Essential for imparting smoky flavor.
* Wood Chips or Chunks (Apple, Pecan, or Cherry recommended): Choose your preferred smoke flavor profile.
* Meat Thermometer (probe thermometer with remote display is ideal): CRITICAL for monitoring internal temperature.
* Aluminum Foil Roasting Pan: Catches drippings and makes for easy cleanup.
* Carving Knife & Fork: For serving your masterpiece.
* Heat-Resistant Gloves: For handling the hot turkey.
Prep Time & Cooking Schedule
- Brining Time: 12-24 hours. Plan this step well in advance to ensure maximum flavor and moisture.
- Prep Time: 30 minutes (not including brining). This includes making the rub and preparing the smoker.
- Smoking Time: 4-6 hours (approximately 30 minutes per pound at 225°F). This will vary based on turkey size and smoker efficiency.
- Resting Time: 30-45 minutes. Absolutely essential for juicy results.
Total “hands-on” time is relatively low, but the brining and smoking require significant passive time, so plan your schedule accordingly. For a Thanksgiving feast, start your brining on Tuesday evening or Wednesday morning!
Step-by-Step Instructions
1. Prepare the Brine (12-24 hours ahead): In a large pot, combine 1 gallon of water, kosher salt, brown sugar, rosemary, peppercorns, and orange quarters. Bring to a boil, stirring until salt and sugar dissolve. Remove from heat and add vegetable broth. Let cool completely. Once cool, add the remaining 2 gallons of water. Place the turkey in a brining bag or food-grade bucket and pour the cooled brine over it, ensuring the turkey is fully submerged. Refrigerate for 12-24 hours. This initial step of Brining Turkey is paramount for moisture and flavor.
2. Rinse and Pat Dry: After brining, remove the turkey from the brine and rinse it thoroughly under cold running water, inside and out. Pat it completely dry with paper towels. A dry surface is key for crispy skin and better smoke penetration for your Smoked Turkey.
3. Apply the Rub: In a small bowl, combine smoked paprika, garlic powder, onion powder, dried thyme, black pepper, and cayenne (if using). Melt the butter. Brush the entire turkey with melted butter, then generously sprinkle the rub over the turkey, making sure to coat all surfaces.
4. Preheat Your Smoker: Preheat your smoker to a consistent temperature of 225-250°F (107-121°C). Add your chosen wood chips or chunks according to your smoker’s instructions.
5. Smoke the Turkey: Place the turkey on a rack in an aluminum foil roasting pan (or directly on the grates if you prefer, with a drip pan underneath). Insert a probe thermometer into the thickest part of the thigh, avoiding the bone. Close the smoker lid and maintain a consistent temperature.
6. Monitor and Cook: Cook until the internal temperature reaches 165°F (74°C) in the thickest part of the thigh. This will typically take 4-6 hours, depending on turkey size and smoker type. Resist the urge to open the smoker frequently, as this releases heat and smoke.
7. Rest the Turkey: Once cooked, carefully remove the smoked turkey from the smoker. Tent it loosely with aluminum foil and let it rest for 30-45 minutes. This allows the juices to redistribute, ensuring a tender and moist final product.
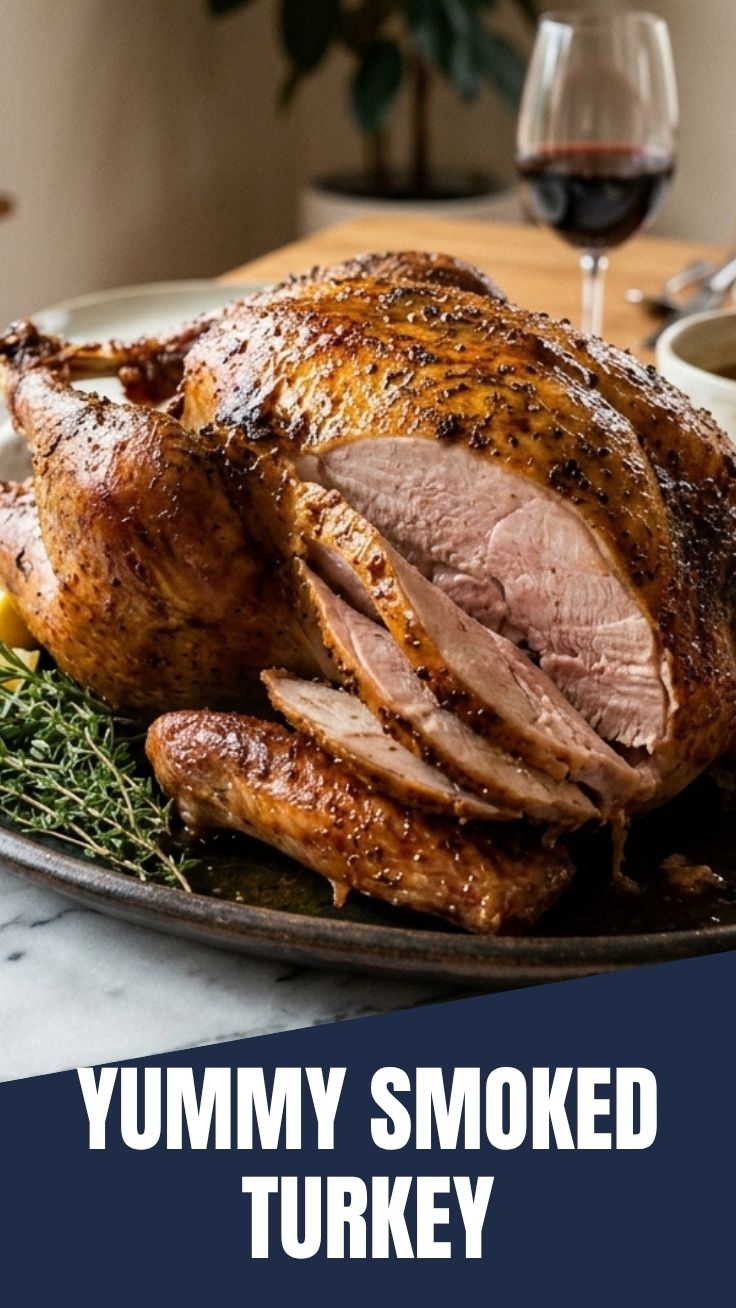
8. Carve and Serve: Carve your perfectly smoked turkey and serve immediately. Enjoy!
Nutritional Benefits & Advantages
Turkey, especially when lean, is a fantastic source of protein, essential for muscle repair and growth. It’s also rich in B vitamins, particularly niacin and B6, which are vital for energy metabolism. Smoking, when done correctly, adds flavor without adding excessive fat, making it a healthier alternative to deep-frying. The process also helps break down connective tissues, leading to a more tender and digestible product.
Tips, Variations & Cooking Advice
- Wood Selection: Apple wood offers a milder, sweeter smoke, while pecan provides a richer, nuttier flavor. Cherry wood gives a beautiful mahogany color and a slightly fruity smoke. Experiment to find your favorite!
- Flavor Boosters: Stuff the turkey cavity with aromatics like halved onions, garlic heads, and additional herbs during smoking for extra interior flavor.
- Injecting: For an even juicier bird, consider injecting a savory liquid (like chicken broth with herbs) into the breast and thigh meat before smoking.
- Crispy Skin: While smoked turkey skin won’t be as crispy as roasted, patting it very dry before applying the rub helps significantly. You can also finish for 15-20 minutes in a hot oven (400°F/200°C) if you desire crispier skin, but watch carefully to prevent burning.
- Spatchcocking: For faster, more even cooking, consider spatchcocking (removing the backbone) before brining and smoking. This flattens the bird, allowing for more consistent heat distribution.
Common Mistakes to Avoid
- Not Brining: This is the biggest mistake you can make. Without brining, your turkey risks being dry and lacking flavor.
- Not Patting Dry: Wet skin prevents the rub from adhering properly and results in rubbery skin.
- Opening the Smoker Too Often: Every time you open the smoker door, heat and smoke escape, prolonging cooking time and impacting the smoke flavor. “If you’re lookin’, it ain’t cookin’!”
- Overcooking: The number one culprit for dry turkey. Always rely on a meat thermometer, not just cooking time. Remove the turkey promptly when it reaches 165°F.
- Not Resting: Skipping the resting period means all those delicious juices will run out when you carve, leaving you with less tender meat. Patience is a virtue here!
Storage & Meal Prep Tips
Leftover Smoked Turkey is a treasure! Store carved turkey in airtight containers in the refrigerator for up to 3-4 days. For longer storage, freeze portions in freezer-safe bags or containers for up to 3 months. When reheating, gently warm in the oven (covered with foil to prevent drying) or microwave, adding a splash of chicken broth to maintain moisture. It’s fantastic in sandwiches, salads, soups, or even turkey pot pie!
Conclusion
Mastering the art of Smoked Turkey transforms an ordinary meal into an extraordinary culinary experience. By understanding the principles of proper Brining Turkey and controlled smoking, you’re not just cooking; you’re crafting a centerpiece that will be remembered long after the last bite. We encourage you to try this recipe, experiment with different wood types, and share your glorious results with us! Get ready for the juiciest, most flavorful turkey you’ve ever had.
FAQs
Q1: Can I use a charcoal grill to smoke a turkey?
A1: Yes, you can! You’ll need to set up your charcoal grill for indirect heat and use a smoke box or foil packet with wood chips to generate smoke. Maintaining a consistent low temperature will be your biggest challenge, so continuous monitoring is essential.
Q2: What’s the best wood for smoking turkey?
A2: Apple, pecan, and cherry are highly recommended for turkey as they provide a mild to medium smoke flavor that complements the poultry without overpowering it. Hickory can also be used but in smaller amounts, as it can be quite strong.
Q3: My smoked turkey skin isn’t crispy. What went wrong?
A3: Smoked turkey skin rarely gets as crispy as roasted skin due to the low, moist heat environment. Ensure you pat the turkey very dry before smoking. For crispier skin, you can finish it in a hot oven (400°F/200°C) for 15-20 minutes, keeping a close eye on it.
Q4: How do I know when my turkey is fully thawed?
A4: A turkey is fully thawed when there are no ice crystals remaining in the cavity and the turkey feels soft to the touch. Thawing can take several days in the refrigerator (about 24 hours per 4-5 lbs). Always thaw in the refrigerator, never at room temperature.
Q5: Can I brine a pre-brined turkey?
A5: No, you should not brine a pre-brined (or kosher) turkey. These turkeys have already been treated with a salt solution, and re-brining would make them excessively salty. Always check the label before brining.