Unlock the Secret to the Juiciest Turkey: A Brining Masterclass
Ever wondered how some home cooks consistently achieve that incredibly tender, flavor-packed turkey, leaving everyone at the dinner table speechless? The secret, my friends, often lies in one transformative technique: brining. Today, we’re diving deep into crafting the perfect Brined Turkey, a culinary masterpiece that will elevate your holiday meals and special occasions. Preparing this at home isn’t just about saving money; it’s about infusing love, precision, and unparalleled taste into every succulent bite. We’ll demystify the art of Wet Brining, ensuring your turkey is not only moist but also bursting with savory notes.
Ingredients & Kitchen Tools
Crafting the perfect brined turkey requires a thoughtful selection of ingredients and the right culinary arsenal.
- Whole Turkey (12-16 lbs): Fresh or thawed. Look for a high-quality bird for the best results.
- Kosher Salt (1 cup): Essential for the brining process. Avoid iodized salt as it can impart a metallic taste.
- Brown Sugar (1/2 cup): Balances the saltiness and aids in browning.
- Apple Cider Vinegar (1/4 cup): Adds a subtle tang and helps tenderize the meat.
- Whole Peppercorns (2 tbsp): For a gentle, aromatic spice.
- Bay Leaves (4-5): Earthy notes that complement poultry beautifully.
- Fresh Rosemary Sprigs (4-5): Pungent herb that pairs wonderfully with turkey.
- Fresh Thyme Sprigs (4-5): Delicate, savory notes.
- Oranges (2, sliced): Adds a bright, citrusy aroma and flavor.
- Garlic (1 head, halved horizontally): Injects a deep, savory foundation.
- Vegetable Broth (4 cups): Forms the base of your wet brine solution.
- Ice Water (1 gallon): Crucial for chilling the brine rapidly.
- Large Brining Bag or Food-Grade Bucket: Must be large enough to fully submerge the turkey.
- Roasting Pan with Rack: For even cooking and crispy skin.
- Meat Thermometer: Non-negotiable for ensuring food safety and perfect doneness.
- Basting Brush: For applying butter or pan juices during roasting.
- Twine (optional): For trussing the turkey for even cooking.
Prep Time & Cooking Schedule
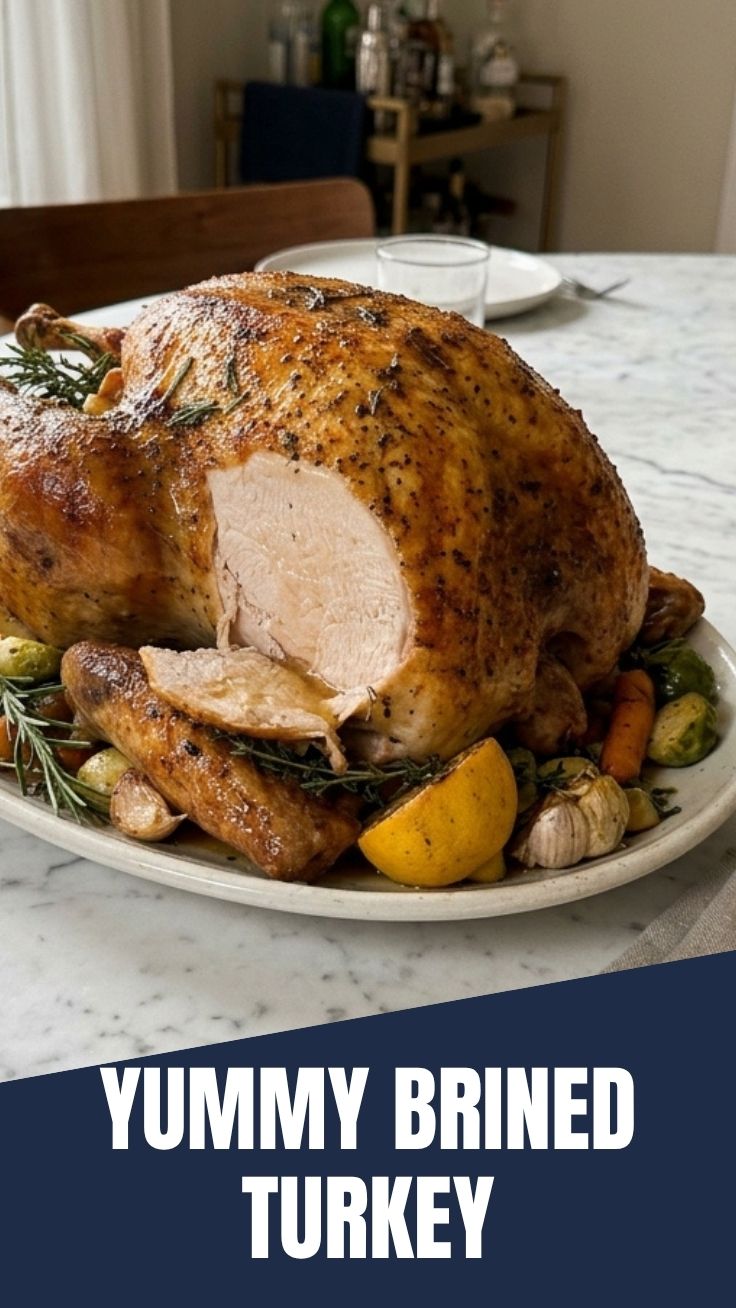
Planning is paramount for a perfectly cooked brined turkey.
- Brine Preparation: 20 minutes
- Brining Time: 12-24 hours (No less than 12, no more than 24 for optimal results). This is where the magic of tenderization happens!
- Resting Time (after brining): 1-2 hours (uncovered in the fridge for crispy skin).
- Roast Time: Approximately 3-4 hours for a 12-16 lb turkey, or about 13-15 minutes per pound, at 325-350°F (160-175°C). Always rely on internal temperature, not just time.
- Resting Time (after roasting): 30 minutes. Crucial for juices to redistribute, ensuring a moist end product.
Step-by-Step Instructions
Embark on your journey to a delectable Brined Turkey with these meticulous steps, ensuring every nuance of flavor and texture is perfected.
1. Prepare the Brine (The Foundation of Flavor): In a large pot, combine vegetable broth, kosher salt, brown sugar, peppercorns, bay leaves, rosemary, thyme, sliced oranges, and halved garlic. Bring to a simmer over medium heat, stirring until the salt and sugar are fully dissolved. Remove from heat.
2. Cool the Brine Completely: This is critical! Add the gallon of ice water to the hot brine mixture. Stir well. The brine must be completely cold before introducing the turkey, otherwise, you risk cooking the exterior. This process facilitates effective Wet Brining without compromising food safety.
3. Prepare the Turkey: Remove the giblets and neck from the turkey cavities. Pat the turkey dry with paper towels. You can rinse it if you wish, but ensure it’s thoroughly dried afterward.
4. Submerge the Turkey: Carefully place the turkey into a large brining bag or a food-grade bucket. Pour the cooled brine over the turkey, ensuring it is completely submerged. If needed, place a plate on top to keep it down. Seal the bag securely or cover the bucket.
5. Brine in Refrigeration: Place the brining turkey in the refrigerator for 12 to 24 hours. Maintain a consistent temperature below 40°F (4°C).
6. Rinse and Dry: After brining, remove the turkey from the brine. Discard the brine. Rinse the turkey thoroughly under cold running water, both inside and out, to remove excess salt. Pat the turkey extremely dry with paper towels. This step is vital for crispy skin.
7. Air Dry (Optional but Recommended): Place the rinsed, dried turkey on a rack in a roasting pan, uncovered, in the refrigerator for 1-2 hours (or even overnight). This further dries the skin, leading to exceptional crispiness.
8. Roast the Turkey: Preheat your oven to 350°F (175°C). Rub the turkey all over with butter or olive oil. Season lightly with black pepper (no need for more salt after brining). You can stuff the cavity with aromatics like onion, celery, and herbs.
9. Cook to Perfection: Roast until a meat thermometer inserted into the thickest part of the thigh (without touching bone) reads 165°F (74°C). If the skin browns too quickly, tent it loosely with foil.
10. Rest Before Carving: Once done, remove the turkey from the oven, transfer it to a carving board, and tent loosely with foil. Let it rest for at least 30 minutes before carving. This resting period allows the juices to redistribute throughout the meat, ensuring maximum tenderness and flavor.
Nutritional Benefits & Advantages
Our Brined Turkey offers more than just exceptional taste. Turkey is a lean protein source, rich in B vitamins (niacin, B6, B12), selenium, and zinc, all crucial for energy production, immune function, and overall health. Brining, particularly through the controlled environment of Wet Brining, helps retain moisture, which can make the meat feel more satisfying and prevent overcooking, preserving those vital nutrients. It also means you’re less likely to slather on high-fat gravies to compensate for dry meat.
Tips Variations & Cooking Advice
- Flavor Variations: Experiment with different aromatics in your brine. Try lemons, star anise, ginger, or even chili flakes for a unique twist.
- Herbs: Instead of rosemary and thyme, consider sage, marjoram, or a poultry seasoning blend.
- Sugar Alternatives: Maple syrup or honey can be used in place of brown sugar for a different underlying sweetness.
- Spices: Add whole cloves, juniper berries, or coriander seeds to the brine for added depth.
- Smoked Brined Turkey: For an extraordinary flavor, consider smoking your brined turkey. The brine will help keep it moist during the longer smoking process.
- Portion Control: Slice thinly to enjoy the rich flavor without over-indulging.
- Gluten-Free/Dairy-Free: This recipe is naturally gluten-free. For dairy-free, simply use olive oil instead of butter for rubbing the turkey before roasting.
- Smaller Turkey: Adjust brining time downward for smaller birds (e.g., 8-10 hours for a 6-8lb turkey).
Common Mistakes to Avoid
- Not Cooling the Brine: Adding a warm turkey to a hot brine is a fast track to food safety issues and a cooked turkey exterior. Always ensure the brine is completely chilled.
- Over-Brining: While brining is good, too much of a good thing can make your turkey excessively salty or mushy in texture. Stick to the 12-24 hour window.
- Not Rinsing Thoroughly: Failure to rinse off excess brine can result in a turkey that’s just too salty. Don’t skip this step.
Not Drying the Skin: A moist skin won’t crisp up. Pat it very* dry and consider the air-drying step in the fridge.
- Not Using a Meat Thermometer: Guessing doneness is a recipe for either dry poultry or undercooked, unsafe meat. Invest in and use a reliable thermometer.
- Skipping the Resting Period: This is probably the most common mistake. Resting allows the juices to redistribute, making the turkey significantly more tender and moist.
Storage & Meal Prep Tips
Leftover Brined Turkey is a treasure!
- Refrigeration: Carve the turkey meat off the bone and store it in airtight containers in the refrigerator for up to 3-4 days. This is great for sandwiches, salads, or quick dinners.
- Freezing: For longer storage, freeze carved turkey meat in freezer-safe bags or containers for up to 2-3 months. Thaw overnight in the refrigerator before reheating.
- Reheating: To maintain moisture, reheat turkey gently. For slices, a quick sauté in a pan with a splash of broth or gravy, or a microwave on low power, works well. For larger portions, reheat covered in a casserole dish with a little broth in the oven at 300°F (150°C) until warmed through. Avoid high heat as it dries out the meat.
- Bone Broth: Don’t discard the turkey carcass! Use it to make a flavorful homemade turkey stock or bone broth, perfect for soups and gravies.
Conclusion
Mastering the art of the Brined Turkey is a game-changer for any home cook, transforming an ordinary roast into an extraordinary culinary experience. By embracing the simple yet powerful technique of Wet Brining, you guarantee a bird that’s not just perfectly cooked, but incredibly juicy, flavorful, and memorable. So, gather your ingredients, follow these steps with confidence, and prepare to impress your guests with the most succulent turkey they’ve ever tasted. Don’t just make dinner; create an occasion. Share your brining triumphs in the comments below – we’d love to hear how your masterpiece turned out!
FAQs
Q1: Can I use a frozen turkey directly for brining?
A1: No, the turkey must be completely thawed before brining. A frozen turkey will not absorb the brine effectively, and it poses a food safety risk. Allow sufficient time for thawing in the refrigerator (about 24 hours per 4-5 lbs).
Q2: What if I don’t have a brining bag or a large bucket?
A2: You can use a very large stockpot or even a clean cooler (ensure it’s food-grade and kept at a safe temperature with ice packs, replenishing as needed). The key is to fully submerge the turkey and keep it cold.
Q3: Can I brine my turkey for longer than 24 hours?
A3: It’s not recommended. Brining for too long can result in a turkey that is overly salty and can even change the texture of the meat, making it mushy. Stick to the 12-24 hour window for optimal results.
Q4: Do I need to rinse the turkey after brining?
A4: Yes, absolutely! Rinsing the turkey thoroughly under cold water after brining is crucial to wash off excess salt and prevent the final product from being too salty. Pat it very dry afterward for crispy skin.
Q5: My turkey is already pre-brined or self-basting. Can I still brine it?
A5: No, if your turkey is labeled as “pre-brined,” “kosher,” “enhanced,” or “self-basting,” it has already been treated with a saline solution. Brining it again will likely result in an excessively salty turkey. Always check the label.