Bake the Perfect Pumpkin Cheesecake: A Fall Favorite Made Easy
Ever wondered how to bring that coveted, velvety Pumpkin Cheesecake experience from a fancy bakery straight into your home kitchen? Imagine the rich, creamy texture perfectly balanced with the warm spices of autumn. Preparing this delightful dessert yourself isn’t just about saving money; it’s about crafting a personalized masterpiece, controlling every ingredient, and filling your home with an irresistible aroma that store-bought simply can’t replicate. And for those who adore that seasonal flair, mastering a homemade pumpkin spice cheesecake will elevate your dessert game, making you the undisputed champion of fall entertaining.
Ingredients & Kitchen Tools
Crafting an extraordinary Pumpkin Cheesecake requires a thoughtful selection of ingredients and the right tools.
- For the Crust:
* 1 ½ cups Graham cracker crumbs: About 10–12 full sheets, crushed finely. Provides a classic, slightly sweet base.
* ¼ cup granulated sugar: Enhances sweetness and helps bind the crust.
½ cup unsalted butter, melted: Binds the crumbs together, creating a firm base. Substitution: Plant-based butter for a dairy-free option.*
- For the Filling:
3 (8-ounce) packages cream cheese, softened: Full-fat is crucial for that signature rich, creamy texture. Clarification: Ensure it’s at room temperature to prevent lumps.*
* 1 (15-ounce) can pumpkin puree: Not pumpkin pie filling! Provides the essential pumpkin flavor.
* 1 ½ cups granulated sugar: Sweetens the cheesecake.
* 2 teaspoons ground cinnamon: Warm, aromatic spice.
* 1 teaspoon ground ginger: Adds a subtle zing.
* ½ teaspoon ground nutmeg: Classic fall spice, complements pumpkin well.
* ¼ teaspoon ground cloves: A potent, warm spice; use sparingly.
* ¼ teaspoon salt: Balances the sweetness and enhances other flavors.
4 large eggs: Bind the filling and contribute to the smooth texture. Clarification: Room temperature eggs incorporate better.*
* 1 teaspoon vanilla extract: Enhances overall flavor.
- Kitchen Tools:
* 9-inch springform pan: Essential for easy release of the cheesecake.
* Large mixing bowls: For crust and filling preparation.
* Electric mixer (stand or hand-held): For achieving a smooth, lump-free cheesecake batter.
* Rubber spatula: For scraping down bowls and folding.
* Aluminum foil: For wrapping the springform pan if using a water bath.
* Baking sheet: To place the springform pan on, especially if not using a water bath, to catch any leaks.
Prep Time & Cooking Schedule
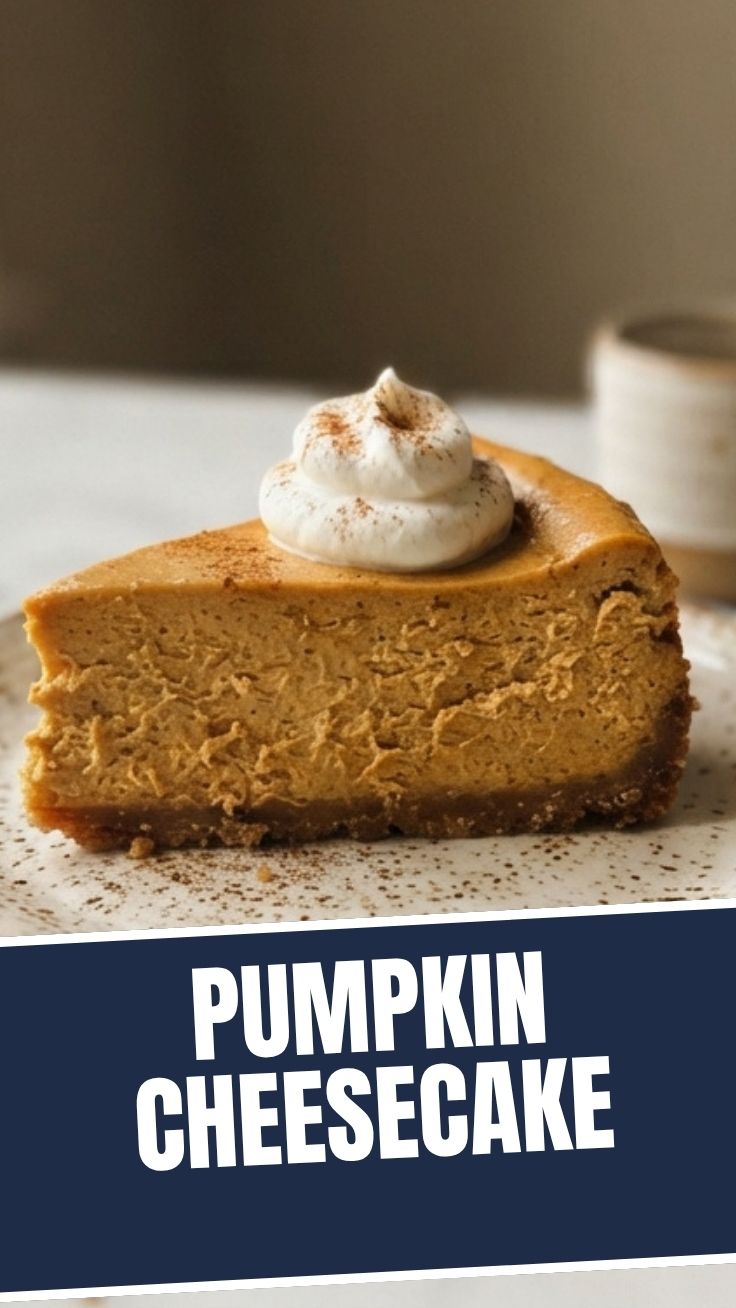
Planning is key for a perfectly structured and crack-free Pumpkin Cheesecake.
- Prep Time: 25 minutes (includes making the crust and mixing the filling).
- Cook Time: 60-75 minutes
- Cooling Time (initial): 2 hours at room temperature
- Chill Time (minimum): 4 hours (ideally overnight) in the refrigerator. This is non-negotiable for proper setting and flavor development.
Context: Start your prep at least one day before you plan to serve, as the extensive chill time is crucial. Allow cream cheese and eggs to come to room temperature for at least 30-60 minutes before you begin mixing.
Step-by-Step Instructions
Follow these precise steps to bake an exceptional Pumpkin Cheesecake that rivals any bakery creation, infusing your home with the delightful aroma of a homemade pumpkin spice cheesecake.
1. Preheat & Prep Pan: Preheat your oven to 350°F (175°C). Lightly grease the bottom of your 9-inch springform pan. If using a water bath (highly recommended for crack-free cheesecake), wrap the outside of the pan securely with several layers of heavy-duty aluminum foil to prevent water seepage.
2. Make the Crust: In a medium bowl, combine graham cracker crumbs, ¼ cup granulated sugar, and melted butter. Mix until well combined and the crumbs resemble wet sand. Press the mixture firmly and evenly into the bottom of the prepared springform pan. Bake for 8-10 minutes until lightly golden. Remove from oven and let cool slightly while you prepare the filling. Reduce oven temperature to 325°F (160°C).
3. Prepare the Filling: In a large mixing bowl, using an electric mixer, beat the softened cream cheese on medium speed until smooth and creamy, about 2-3 minutes. Scrape down the sides of the bowl.
4. Add Wet Ingredients: Add the pumpkin puree, 1 ½ cups granulated sugar, cinnamon, ginger, nutmeg, cloves, salt, and vanilla extract to the cream cheese mixture. Beat on low speed until just combined. Tip: Overmixing at this stage can incorporate too much air, leading to cracks.
5. Incorporate Eggs: Add the eggs one at a time, beating on low speed after each addition just until combined. Do not overmix. The mixture should be smooth and light orange in color.
6. Bake the Cheesecake: Pour the cheesecake filling over the cooled crust in the springform pan.
* If using a water bath: Carefully place the foil-wrapped springform pan into a larger roasting pan. Pour hot water into the roasting pan until it reaches halfway up the sides of the springform pan.
* If not using a water bath: Place the springform pan directly on a baking sheet.
7. Bake: Bake for 60-75 minutes, or until the edges are set but the center still jiggles slightly when gently shaken. This “jiggle” is key to a creamy texture.
8. Cool Gradually: Turn off the oven, prop the oven door open slightly with a wooden spoon, and allow the cheesecake to cool in the oven for 1 hour. This gradual cooling helps prevent cracks.
9. Final Chill: Remove the cheesecake from the oven and water bath (if used). Carefully remove the foil. Let it cool completely at room temperature for another 1-2 hours. Once cool, cover loosely with plastic wrap and refrigerate for at least 4 hours, or preferably overnight, for optimal setting and flavor development.
10. Serve: When ready to serve, run a thin knife around the edge of the pan before releasing the springform ring. Slice, serve, and enjoy!
Nutritional Benefits & Advantages
This Pumpkin Cheesecake isn’t just a treat for the taste buds; it offers some surprising nutritional perks. Pumpkin, the star ingredient, is rich in Vitamin A, an essential nutrient for vision, immune function, and skin health. It’s also a good source of fiber, which aids digestion and promotes satiety. While cream cheese contributes healthy fats vital for nutrient absorption, homemade versions allow you to control sugar levels more effectively than store-bought varieties. The blend of warming spices like cinnamon and ginger also boasts anti-inflammatory properties, adding a healthful dimension to this decadent dessert.
Tips, Variations & Cooking Advice
- Spice It Up: For an extra kick, add a pinch of black pepper or a dash of cardamom to your pumpkin spice cheesecake filling.
- Crust Variations: Instead of graham crackers, try gingersnap cookies or crushed shortbread for a different flavor profile.
- Topping Ideas: Serve with a dollop of whipped cream, a sprinkle of toasted pecans, a drizzle of caramel sauce, or a dusting of extra cinnamon.
- Mini Cheesecakes: Pour the batter into cupcake liners in a muffin tin for individual servings. Adjust baking time to 25-30 minutes.
- Dairy-Free: Use vegan cream cheese and plant-based butter for a dairy-free version. Ensure your graham crackers are also vegan.
Common Mistakes to Avoid
- Overmixing the Batter: This incorporates too much air, leading to a puffy cheesecake that falls and cracks as it cools. Mix until just combined.
- Not Softening Cream Cheese/Eggs: Cold ingredients don’t emulsify properly, resulting in a lumpy batter. Always use room temperature ingredients.
- Skipping the Water Bath: A water bath creates a moist environment in the oven, ensuring even cooking and preventing cracks.
- Opening the Oven Door Frequently: This causes temperature fluctuations, which can lead to cracking. Resist the urge to peek!
- Not Chilling Long Enough: The cheesecake needs ample time to set and firm up. Patience is a virtue here!
Storage & Meal Prep Tips
Your Pumpkin Cheesecake can be conveniently stored to enjoy for days. After chilling, cover the cheesecake loosely with plastic wrap or transfer slices to an airtight container.
- Refrigeration: It will stay fresh for up to 5-7 days in the refrigerator.
- Freezing: For longer storage, freeze whole or in individual slices. Wrap tightly in plastic wrap and then in aluminum foil. It can be frozen for up to 1 month. Thaw overnight in the refrigerator before serving.
- Reheating: Cheesecake is best served chilled. Avoid reheating, as this will alter its delicate texture.
Conclusion
Baking your own Pumpkin Cheesecake is a deeply satisfying experience, transforming simple ingredients into a truly spectacular dessert. By following these detailed steps, you’ll create a rich, creamy, and perfectly spiced treat that embodies the warmth of autumn. This isn’t just baking; it’s crafting a celebration of flavors, especially when you master that irresistible homemade pumpkin spice cheesecake. Don’t be shy – try this recipe, share your delicious creations with us in the comments, and let the aroma of fall fill your kitchen!
FAQs
Q1: Can I use sugar substitutes in the recipe?
A1: Yes, you can substitute granulated sugar with a sugar alternative, but be aware that it might slightly alter the texture and taste. Start with a smaller amount and adjust to your preference.
Q2: My cheesecake cracked! What went wrong?
A2: Cracks are usually caused by overmixing, rapid temperature changes during baking or cooling, or insufficient moisture. A water bath and slow cooling are your best defenses against cracks.
Q3: Can I make this cheesecake in advance for a holiday meal?
A3: Absolutely! Cheesecake is an excellent make-ahead dessert. You can prepare it up to 2-3 days in advance and store it in the refrigerator.
Q4: What if I don’t have a springform pan?
A4: While a springform pan is ideal for neat slices, you can use a regular 9-inch round cake pan lined with parchment paper, leaving an overhang to lift the cheesecake out after chilling. Be very careful during removal.
Q5: How can I ensure my crust doesn’t get soggy?
A5: Pressing the crust firmly, pre-baking it sufficiently, and cooling it before adding the filling will help prevent sogginess, especially if you’re using a water bath.