Sweet Autumn Delight: The Ultimate Homemade Pumpkin Bars Recipe
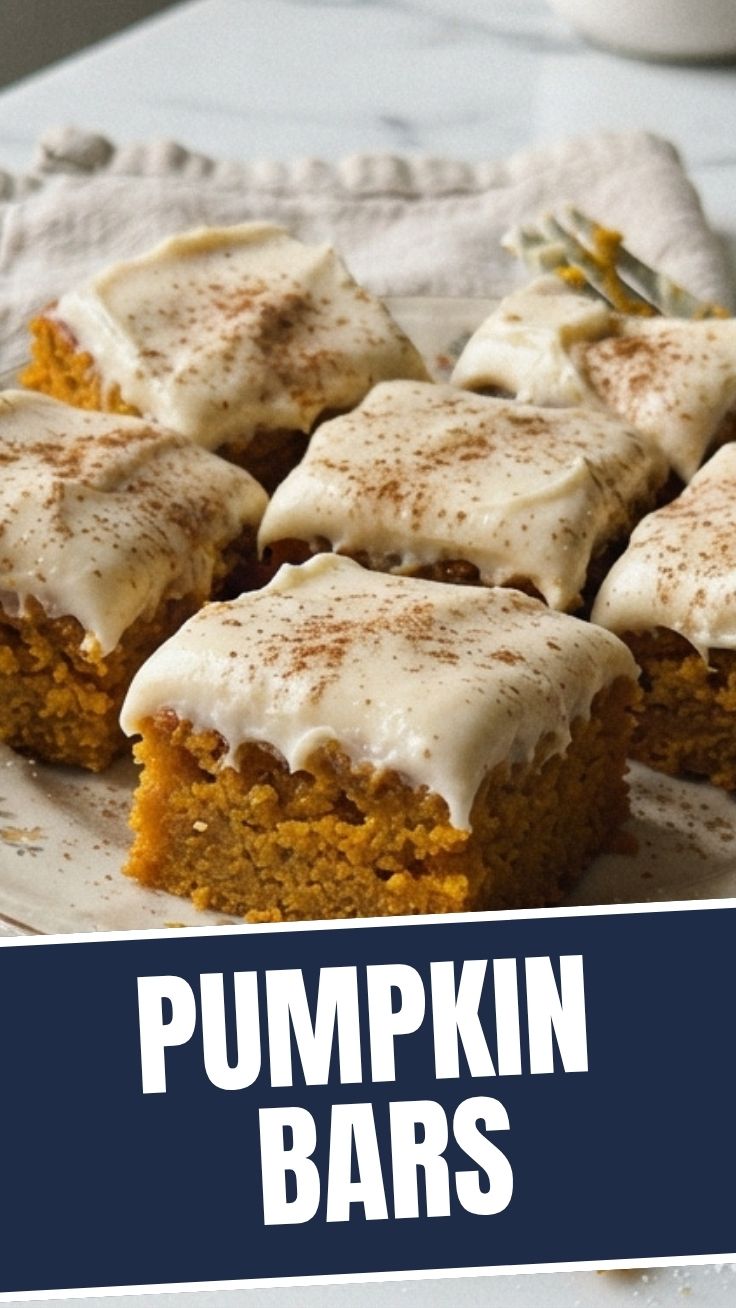
Ever found yourself craving a dessert that perfectly captures the cozy essence of autumn? A treat that’s not too sweet, wonderfully moist, and bursting with fall flavors? Look no further than homemade Pumpkin Bars! Preparing these delightful bars at home offers a remarkable sense of satisfaction, not to mention the incredible aroma that will fill your kitchen. Beyond the joy of baking, homemade versions allow you to control the quality of ingredients, ensuring a wholesome and delicious treat for your family and friends. This recipe, infused with the warm embrace of Pumpkin pie spices, is surprisingly easy to make and guarantees a decadent experience.
Ingredients & Kitchen Tools
Here’s what you’ll need to create these irresistible festive bars:
- All-purpose flour (2 cups): The structural base for your bars. You can use a gluten-free blend for a dietary alternative.
- Granulated sugar (1 ¾ cups): Provides sweetness and helps with moisture retention.
- Baking powder (2 teaspoons): A leavening agent that helps the bars rise and become airy.
- Baking soda (1 teaspoon): Another leavening agent, crucial for tenderness when combined with acidic ingredients.
- Salt (1 teaspoon): Enhances all the other flavors.
- Ground cinnamon (2 teaspoons): A primary warming spice in Pumpkin pie spices.
- Ground ginger (1 teaspoon): Adds a zesty, slightly spicy note.
- Ground nutmeg (½ teaspoon): Contributes depth and a classic autumnal aroma.
- Ground cloves (¼ teaspoon): A powerful, sweet, and aromatic spice that rounds out the blend.
- Canned pumpkin puree (15 oz can): The star ingredient, providing moisture, color, and that distinctive pumpkin flavor. Ensure it’s not pumpkin pie filling.
- Large eggs (4): Act as a binder and add richness to the batter.
- Vegetable oil (1 cup): Keeps the bars incredibly moist and tender.
- Cream cheese (8 oz, softened): For the luscious frosting.
- Unsalted butter (½ cup, softened): Adds richness and creaminess to the frosting.
- Powdered sugar (3 cups): Sweetens and thickens the frosting.
- Vanilla extract (1 teaspoon): Enhances the flavor of both the bars and the frosting.
Kitchen Tools:
- 9×13 inch baking pan: The ideal size for baking these bars evenly.
- Large mixing bowls (2): For wet and dry ingredients, and then for the frosting.
- Electric mixer (stand or hand-held): Essential for thoroughly combining ingredients and achieving a smooth frosting.
- Whisk: For dry ingredients.
- Spatula: For scraping bowls and spreading frosting.
- Measuring cups and spoons: For accurate ingredient quantities.
- Parchment paper: Optional, but highly recommended for easy removal and cleanup.
Prep Time & Cooking Schedule
- Prep Time: 20 minutes
- Cook Time: 25-30 minutes
- Cooling Time: 1-2 hours (essential before frosting to prevent melting)
- Total Time: Approximately 1 hour 45 minutes to 2 hours 15 minutes.
This schedule makes these Pumpkin Bars an excellent choice for an afternoon baking project or preparing ahead for a gathering.
Step-by-Step Instructions
1. Preheat & Prepare: Preheat your oven to 350°F (175°C). Grease and flour a 9×13 inch baking pan, or line it with parchment paper for easier removal.
2. Combine Dry Ingredients: In a large bowl, whisk together the flour, granulated sugar, baking powder, baking soda, salt, ground cinnamon, ground ginger, ground nutmeg, and ground cloves. These classic Pumpkin pie spices are what give the dessert its unmistakable autumn flair.
3. Combine Wet Ingredients: In a separate large bowl, whisk together the canned pumpkin puree, eggs, and vegetable oil until thoroughly combined and smooth.
4. Combine Wet and Dry: Pour the wet ingredients into the dry ingredients. Mix with a spatula or an electric mixer on low speed until just combined. Be careful not to overmix, as this can lead to tough bars. The batter for these Pumpkin Bars should be smooth but not overworked.
5. Bake: Pour the batter into your prepared baking pan and spread it evenly. Bake for 25-30 minutes, or until a wooden skewer inserted into the center comes out clean.
6. Cool: Allow the bars to cool completely in the pan on a wire rack before attempting to frost them. This is crucial for a smooth frosting application.
7. Prepare Frosting: While the bars are cooling, beat the softened cream cheese and butter together in a mixing bowl with an electric mixer until smooth and creamy.
8. Add Frosting Ingredients: Gradually add the powdered sugar, one cup at a time, beating well after each addition. Mix in the vanilla extract until the frosting is light and fluffy.
9. Frost & Serve: Once the pumpkin bars are completely cool, spread the cream cheese frosting evenly over them. Cut into squares and serve!
Nutritional Benefits & Advantages
Pumpkin is a powerhouse of nutrition. It’s rich in Vitamin A (from beta-carotene), which is vital for vision, immune function, and skin health. It’s also a good source of Vitamin C, potassium, and fiber, promoting digestive health and satiety. While these are a treat, the inclusion of real pumpkin adds a beneficial boost not often found in other desserts.
Tips, Variations, & Cooking Advice
- Spice it Up: For an extra kick, add a pinch of black pepper or cardamom to your Pumpkin pie spices blend.
- Gluten-Free: Substitute the all-purpose flour with a 1:1 gluten-free baking blend.
- Dairy-Free Frosting: Use dairy-free cream cheese and butter alternatives for a vegan-friendly option.
- Nutty Crunch: Fold in ½ cup of chopped pecans or walnuts into the batter for added texture.
- Cream Cheese Frosting Variations: Stir a tablespoon of maple syrup into the frosting for a maple cream cheese frosting, or a teaspoon of orange zest for a citrusy twist.
- Mini Bars: Bake in an 8×8 inch pan for thicker bars, adjusting baking time as needed, or use a mini muffin tin for bite-sized delights.
Common Mistakes to Avoid
- Overmixing the Batter: This develops the gluten in the flour, resulting in tough, dense bars. Mix until just combined.
- Using Pumpkin Pie Filling: Pumpkin puree is pure pumpkin; pie filling has added sugars and spices. Always double-check your can!
- Frosting Warm Bars: The frosting will melt and become a runny mess if applied to warm bars. Patience is key!
- Not Greasing the Pan Properly: Can lead to bars sticking, making them difficult to remove and potentially ruining their appearance.
Storage & Meal Prep Tips
Store leftover Pumpkin Bars in an airtight container in the refrigerator for up to 5 days due to the cream cheese frosting. For longer storage, freeze unfrosted bars wrapped tightly in plastic wrap and then foil for up to 3 months. Thaw overnight in the refrigerator before frosting and serving. Frosted bars can also be frozen, though the frosting’s texture might change slightly after thawing.
Conclusion
These homemade Pumpkin Bars offer the perfect blend of moist cake and creamy frosting, making them an ideal treat for fall gatherings or a comforting indulgence. The harmonious blend of Pumpkin pie spices creates an aroma and flavor profile that truly embodies the essence of the season. We encourage you to try this recipe and experience the joy of baking these delightful autumn squares. Share your creations in the comments below!
FAQs
Q: Can I use fresh pumpkin puree instead of canned?
A: Yes, absolutely! Just ensure it’s well-drained to avoid excess moisture in your bars.
Q: How do I know when the bars are done baking?
A: A wooden skewer or toothpick inserted into the center should come out clean, with no wet batter attached.
Q: Can I make these ahead of time?
A: Yes! You can bake the bars a day in advance and store them covered at room temperature. Frost them just before serving or the day of the event.
Q: My frosting is too thin/thick. How can I fix it?
A: If it’s too thin, gradually add more powdered sugar. If it’s too thick, add a tiny splash of milk or cream (1 teaspoon at a time) until it reaches the desired consistency.