The Ultimate Guide to Homemade Peanut Butter Fudge: A Decadent Delight!
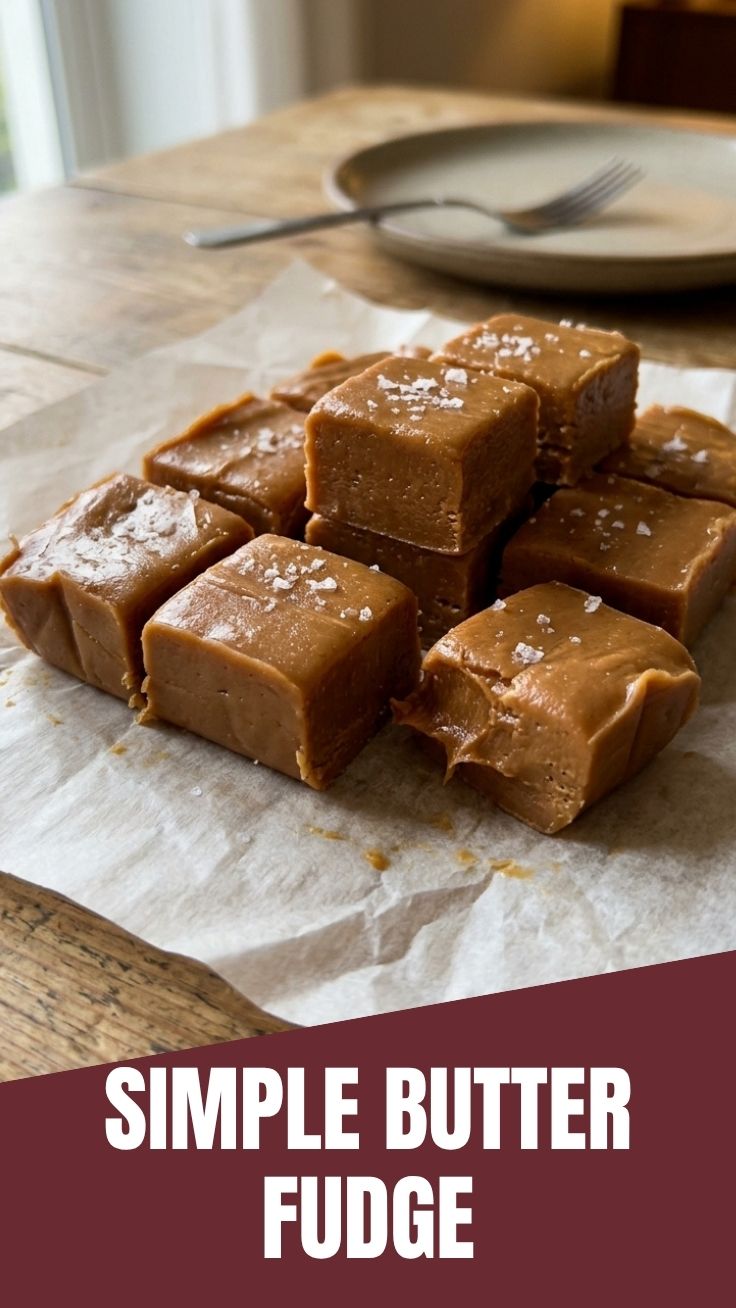
Ever wondered how to create that perfectly creamy, melt-in-your-mouth Peanut Butter Fudge you dream about? Forget store-bought imitations; crafting this delectable dessert at home is not only incredibly satisfying but also allows you to control the quality of ingredients and tailor the sweetness to your preference. This comprehensive guide will walk you through every step of making this irresistible treat, ensuring a flawless outcome even for novice bakers. Get ready to elevate your dessert game and discover the joy of homemade confections, as we dive into one of the most beloved Fudge Recipes out there.
Ingredients & Kitchen Tools
- 2 cups granulated sugar: Provides the primary sweetness and structure for our fudge.
- 1/2 cup (1 stick) unsalted butter: Adds richness, tenderness, and helps create that smooth texture.
- 1/2 cup milk (whole or 2% recommended): Contributes to the fudge’s creaminess and moisture.
- 1 cup creamy peanut butter: The star ingredient, delivering that authentic peanut flavor and velvety mouthfeel. Opt for a good quality creamy variety for best results.
- 1 teaspoon vanilla extract: Enhances and balances the overall flavor profile.
- Pinch of salt (optional): A tiny sprinkle can intensify the peanut butter flavor and cut through the sweetness.
- Heavy-bottomed saucepan (3-quart minimum): Essential for even heat distribution and preventing scorching.
- Candy thermometer: Crucial for achieving the perfect soft-ball stage for ideal fudge consistency.
- 8×8 inch baking pan: For setting your delicious fudge. Line with parchment paper for easy removal.
- Rubber spatula or wooden spoon: For stirring and scraping.
Prep Time & Cooking Schedule
- Prep Time: 10 minutes (gathering ingredients, lining the pan)
- Cook Time: 15-20 minutes (boiling and stirring the mixture)
- Resting/Setting Time: 2-3 hours at room temperature, or 1 hour in the refrigerator.
This Peanut Butter Fudge comes together relatively quickly on the stovetop, but the setting time is paramount. Plan your baking session accordingly, perhaps making it in the morning to enjoy in the afternoon, or in the evening to have a delightful treat ready for the next day.
Step-by-Step Instructions
1. Prepare the Pan: Line an 8×8 inch baking pan with parchment paper, leaving an overhang on the sides for easy lifting. Lightly grease the parchment paper if desired.
2. Combine Ingredients (Initial Boil): In a heavy-bottomed saucepan, combine the granulated sugar, butter, and milk. Heat over medium heat, stirring constantly until the sugar dissolves and the butter melts.
3. Bring to a Boil & Monitor Temperature: Continue to cook, stirring occasionally, until the mixture comes to a rolling boil. Insert your candy thermometer, ensuring it doesn’t touch the bottom of the pan. Boil, without stirring, until the mixture reaches 234-236°F (112-113°C), also known as the “soft-ball stage.” This precise temperature is key to perfect texture in Fudge Recipes.
4. Remove from Heat & Add Flavorings: Once the target temperature is reached, immediately remove the saucepan from the heat. Stir in the creamy peanut butter, vanilla extract, and optional pinch of salt until thoroughly combined and smooth.
5. Beat for Creaminess: This is a crucial step! Allow the mixture to cool slightly (around 120°F or 50°C, about 5-10 minutes) without stirring. Once slightly cooled, beat the mixture vigorously with a rubber spatula or electric mixer on low speed until it thickens, loses its glossy sheen, and becomes creamy – usually 5-7 minutes. This aeration process prevents graininess.
6. Pour and Set: Quickly pour the thickened Peanut Butter Fudge into the prepared baking pan. Spread evenly with a spatula.
7. Cool and Cut: Let the fudge cool completely at room temperature for 2-3 hours, or for about 1 hour in the refrigerator, until firm. Once set, use the parchment paper overhangs to lift the fudge out of the pan. Cut into desired squares and enjoy!
Nutritional Benefits & Advantages
While Peanut Butter Fudge is undeniably a treat, making it at home offers control over ingredients. Peanuts themselves are a good source of protein, healthy fats (monounsaturated and polyunsaturated), and essential minerals like magnesium, potassium, and zinc. Homemade versions allow you to opt for natural peanut butter with fewer added sugars and no hydrogenated oils, making it a slightly better indulgence than many commercial alternatives.
Tips, Variations & Cooking Advice
- For a lighter flavor: Use a natural, unsweetened peanut butter and adjust sugar to taste.
- Chocolate Swirl: Melt 1/2 cup of chocolate chips and swirl them into the fudge right before setting for a peanut butter chocolate marbling.
- Crunchy Texture: Fold in 1/2 cup of chopped roasted peanuts after removing the fudge from heat for an added crunch.
- Spice It Up: A tiny pinch of cinnamon or nutmeg can surprisingly complement the peanut butter flavor.
- Dairy-Free: Substitute milk with a plant-based milk alternative (like full-fat oat milk or cashew milk) and use a dairy-free butter alternative. Ensure your creamy peanut butter is also dairy-free.
Common Mistakes to Avoid
- Not reaching the correct temperature: This leads to either grainy fudge (too high) or fudge that won’t set (too low). A candy thermometer is non-negotiable!
- Stirring while boiling: Once boiling, resist the urge to stir. Stirring can cause sugar crystals to form, resulting in grainy fudge.
- Not beating the mixture enough: Insufficient beating after taking it off the heat results in a sticky, gooey mess instead of firm, creamy fudge.
- Cutting too soon: Premature cutting will result in misshapen pieces and a sticky mess. Patience is key!
Storage & Meal Prep Tips
Store Peanut Butter Fudge in an airtight container at room temperature for up to one week, or in the refrigerator for up to two weeks. If refrigerated, allow it to come to room temperature for 10-15 minutes before serving for the best texture. For longer storage, freeze individual pieces in an airtight container for up to 2-3 months. Thaw at room temperature. This recipe makes excellent small gifts or an impressive addition to a dessert platter.
Conclusion
Creating your own batch of creamy Peanut Butter Fudge at home is a rewarding experience that yields an undeniably delicious treat. With precise temperature control and a little patience, you’ll master this classic confection, leaving those mass-produced versions in the dust. Whether you’re a seasoned baker or just starting your culinary adventures, this recipe provides a foolproof path to sweet success. Don’t hesitate to dive into the world of homemade Fudge Recipes; your taste buds will thank you! We encourage you to try this recipe, share your creations, and delight in the simple pleasure of handcrafted sweets.
FAQs
Q1: Why is my fudge grainy?
A1: Grainy fudge is often caused by either not reaching the correct temperature (boiling too long) or by stirring the mixture while it’s boiling, which introduces sugar crystals.
Q2: Can I use crunchy peanut butter?
A2: While creamy is recommended for a smooth texture, you can use crunchy peanut butter if you prefer bits of peanut in your fudge.
Q3: My fudge is too soft and won’t set. What happened?
A3: This usually means the fudge mixture didn’t reach the “soft-ball stage” temperature (234-236°F). Ensure your candy thermometer is accurate and properly placed during cooking.
Q4: How can I tell if the fudge is done without a candy thermometer?
A4: While a thermometer is highly recommended, you can test by dropping a small amount of the boiling mixture into cold water. If it forms a soft, pliable ball that can be flattened between your fingers, it’s ready.
Q5: Can I reduce the sugar in this recipe?
A5: Sugar is crucial for the structure and setting of fudge. Significantly reducing it might alter the texture and prevent it from firming up correctly. Some minor adjustments (e.g., 1/4 cup less) might work, but it’s not guaranteed.