The Ultimate Guide to Crafting the Ultimate Cheesecake: New York vs. Philadelphia Edition
Have you ever dreamt of a dessert so rich, so creamy, so utterly decadent, that it melts in your mouth and leaves you yearning for more? That, my friends, is the magic of a perfectly baked cheesecake. While store-bought versions offer convenience, there’s an unparalleled satisfaction in creating this culinary masterpiece from scratch. Imagine the aroma filling your kitchen, the anticipation building as it cools, and finally, that first glorious bite. In this comprehensive guide, we’ll delve into the art of making an exceptional cheesecake, exploring the nuances that differentiate a New York Cheesecake from a Philadelphia Cheesecake. Get ready to elevate your baking skills and impress everyone with your homemade creation!
Ingredients & Kitchen Tools
Crafting the perfect cheesecake requires a precise combination of ingredients and the right culinary arsenal.
Ingredients:
- For the Crust:
* 1 ½ cups Graham cracker crumbs: The classic base for both types of cheesecake, providing a slightly sweet and crumbly foundation. (You can also use digestive biscuits or shortbread for a different flavor profile.)
* ¼ cup granulated sugar: Enhances the sweetness of the crust.
* ½ cup unsalted butter, melted: Binds the crumbs together, ensuring a firm and even crust.
- For the Filling:
* 3 (8-ounce) packages cream cheese, softened: Crucial for the creamy texture. Ensure it’s at room temperature to prevent lumps. For a true New York Cheesecake, full-fat cream cheese is non-negotiable.
* 1 ½ cups granulated sugar: Sweetens the filling. Adjust to your preference.
* ¼ cup all-purpose flour: A secret ingredient in many New York style cheesecakes, providing a subtle structural element that helps prevent cracking.
* 1 teaspoon vanilla extract: Enhances the overall flavor. Use good quality extract for the best results.
* 4 large eggs, at room temperature: Adds richness and helps set the cheesecake. Room temperature eggs emulsify better.
* ½ cup sour cream (for New York style) OR ½ cup heavy cream (for Philadelphia style): This is where the distinct textures diverge. Sour cream in New York Cheesecake adds a slight tang and dense creaminess, while heavy cream in Philadelphia Cheesecake contributes to a lighter, airier consistency.
* Pinch of salt: Balances the sweetness.
Kitchen Tools:
- 9-inch springform pan: Essential for easy removal of the cheesecake. A water bath is recommended for even baking and crack prevention.
- Large mixing bowls: For separate preparation of the crust and filling.
- Electric mixer (stand or hand-held): For efficient blending of the cream cheese and other ingredients.
- Rubber spatula: For scraping down the sides of the bowl and folding ingredients.
- Measuring cups and spoons: For accurate ingredient portions.
- Aluminum foil (heavy-duty): To wrap the springform pan if using a water bath.
Prep Time & Cooking Schedule
- Prep Time: 25-30 minutes (including crust preparation and filling mixing)
- Bake Time: 60-75 minutes (dependent on oven and specific recipe variations)
- Cooling Time (in oven): 1 hour (crucial for gradual cooling and preventing cracks)
- Chilling Time (in refrigerator): 6-8 hours, or preferably overnight (essential for the cheesecake to firm up and flavors to meld).
Plan Ahead: This recipe requires significant chilling time, making it an ideal make-ahead dessert for special occasions. Begin preparation the day before you plan to serve it.
Step-by-Step Instructions
1. Preheat & Prepare Crust: Preheat your oven to 325°F (160°C). In a medium bowl, combine Graham cracker crumbs, granulated sugar, and melted butter. Press firmly into the bottom of a 9-inch springform pan. Bake for 10 minutes, then let cool completely.
2. Prepare Water Bath (Optional but Recommended): Wrap the outside of your springform pan with two layers of heavy-duty aluminum foil to prevent water from seeping in. Place the wrapped pan inside a larger roasting pan.
3. Cream Cheese Filling: In a large mixing bowl, beat the softened cream cheese with an electric mixer until smooth and creamy, about 2-3 minutes. Gradually add the granulated sugar, beating until well combined. Scrape down the sides of the bowl frequently. Incorporate the flour (if using) and vanilla extract.
4. Add Eggs: Beat in the eggs one at a time, mixing just until combined after each addition. Do not overmix, as this can introduce too much air, leading to cracks.
5. The Defining Ingredient: Gently fold in the sour cream for a classic New York Cheesecake or the heavy cream for a lighter Philadelphia Cheesecake, and the pinch of salt. Mix until the batter is smooth.
6. Pour & Bake: Pour the cheesecake batter over the cooled crust in the springform pan. If using a water bath, carefully pour hot water into the larger roasting pan until it reaches about halfway up the sides of the springform pan.
7. Bake: Bake for 60-75 minutes, or until the edges are set and a 2-3 inch circle in the center still jiggles slightly when gently shaken. This jiggle indicates the cheesecake is cooked through but not overbaked.
8. Cool Gradually: Turn off the oven, crack the door open slightly, and let the cheesecake cool in the oven for 1 hour. This slow cooling process helps prevent cracks.
9. Chill: Remove the cheesecake from the oven and water bath (if used). Carefully remove the foil. Let it cool completely on a wire rack at room temperature. Once cooled, cover loosely with plastic wrap and refrigerate for at least 6-8 hours, or overnight, for the best texture and flavor.
Nutritional Benefits & Advantages
Cheesecake, while a decadent treat, offers some surprising benefits thanks to its core ingredient, cream cheese. Cream cheese provides a source of calcium and phosphorus, important for bone health. Additionally, the eggs contribute protein and essential vitamins. While it’s certainly an indulgence, homemade cheesecake allows you to control the quality of ingredients, opting for natural vanilla extract and high-quality dairy, which can be a healthier alternative to highly processed store-bought versions often laden with artificial flavors and excessive sugars.
Tips, Variations & Cooking Advice
- Don’t Overmix: Overmixing introduces too much air, which expands during baking and then collapses, causing cracks. Mix just until ingredients are combined.
- Room Temperature Ingredients: Ensure all cold ingredients (cream cheese, eggs, sour cream/heavy cream) are at room temperature. This promotes smooth blending and prevents lumps.
- Prevent Cracks: The water bath and gradual cooling are your best friends for a crack-free cheesecake.
- Flavor Variations:
* Lemon: Add the zest of one lemon to the filling for a bright, tangy twist.
* Chocolate: Melt ¼ cup of unsweetened chocolate and fold it into the batter.
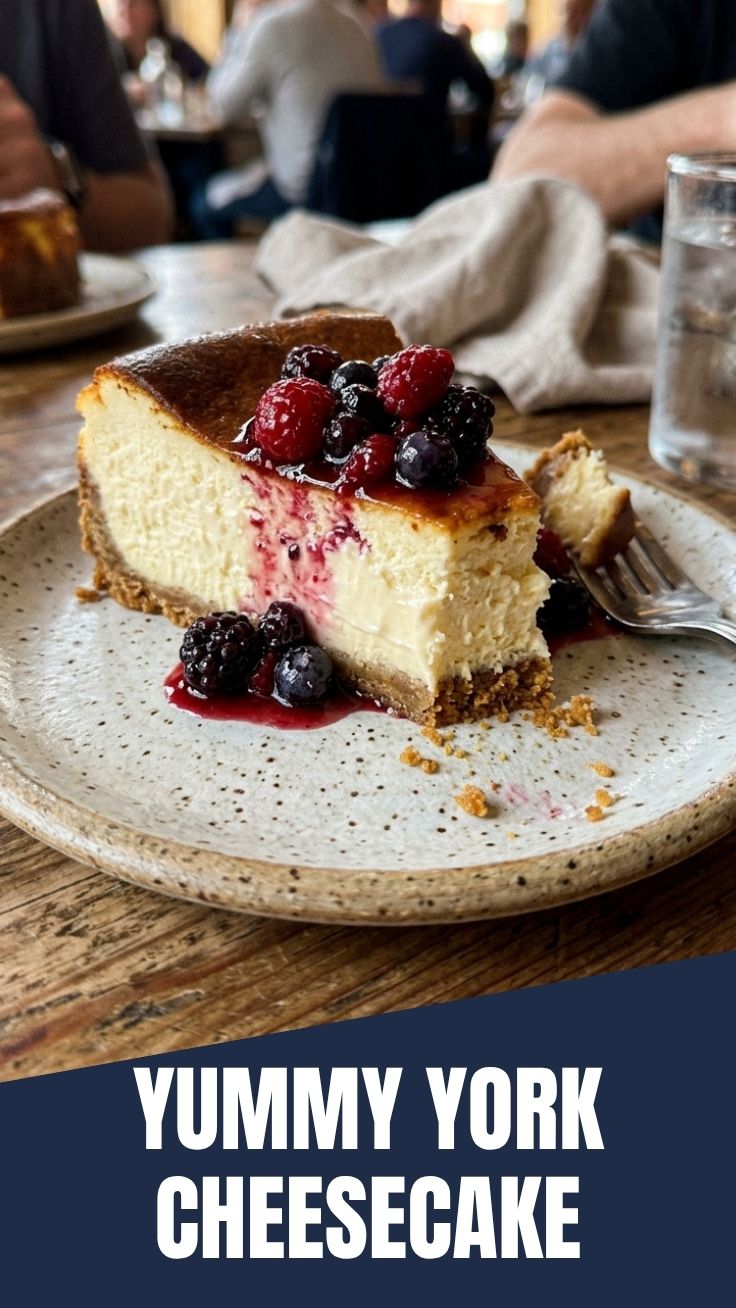
* Fruit Toppings: Fresh berries, cherry pie filling, or a vibrant mango coulis are classic accompaniments.
* Caramel/Chocolate Drizzle: A simple and elegant finish.
- Gluten-Free: Use gluten-free Graham crackers or a nut-based crust.
- Dairy-Free: Substitute dairy-free cream cheese, sour cream, and butter alternatives.
- Mini Cheesecakes: Bake in a muffin tin lined with paper liners for individual servings. Adjust baking time accordingly.
Common Mistakes to Avoid
- Using Cold Cream Cheese: Leads to lumpy batter and an uneven texture.
- Overbaking: Results in a dry, crumbly cheesecake with a high likelihood of cracking. The subtle jiggle in the center is key.
- Sudden Temperature Changes: Drastic cooling will cause the cheesecake to contract rapidly, leading to cracks. Always cool gradually.
- Opening the Oven Door Frequently: Disrupts the oven temperature and can cause the cheesecake to sink or crack. Resist the urge to peek!
- Not Chilling Long Enough: An under-chilled cheesecake will be soft, difficult to slice, and won’t have the desired firm texture.
Storage & Meal Prep Tips
Leftover cheesecake, if stored properly, is a delightful treat.
- Refrigeration: Cover sliced or whole cheesecake tightly with plastic wrap to prevent it from absorbing refrigerator odors and drying out. It will stay fresh for up to 5-7 days in the refrigerator.
- Freezing: For longer storage, freeze individual slices or the whole cheesecake (unadorned). Wrap tightly in plastic wrap, then an additional layer of aluminum foil. It can be frozen for up to 1-2 months. Thaw overnight in the refrigerator before serving.
- Reheating: Cheesecake is best served chilled. Reheating is not recommended as it can alter the texture.
Conclusion
Mastering the art of cheesecake baking is a truly rewarding experience. Whether you prefer the dense, tangy richness of a New York Cheesecake or the slightly lighter, creamier texture of a Philadelphia Cheesecake, the principles of careful mixing, precise baking, and patient cooling remain paramount. Now that you’re armed with this comprehensive guide, don’t hesitate to embark on your own cheesecake adventure! Share your magnificent creations in the comments below, and let us know your favorite variations.
FAQs
Q1: Why did my cheesecake crack?
A1: Cracking is most often caused by overbaking, sudden changes in temperature during cooling, or overmixing the batter, which incorporates too much air. Using a water bath and letting the cheesecake cool gradually in the oven can significantly reduce cracks.
Q2: Can I substitute different types of crackers for the crust?
A2: Yes! While Graham crackers are traditional, you can use digestive biscuits, shortbread cookies, or even crushed Oreos for a different flavor profile. Adjust the sugar content based on the sweetness of your chosen cracker.
Q3: My cheesecake is still wobbly after the recommended baking time. Is it undercooked?
A3: A slight jiggle in the center (about 2-3 inches in diameter) is actually a good sign that the cheesecake is perfectly cooked. It will continue to set as it cools and chills. If the entire cheesecake is very wobbly, it might need another 5-10 minutes.
Q4: Can I make this cheesecake ahead of time?
A4: Absolutely! Cheesecake is an excellent make-ahead dessert. It needs at least 6-8 hours of chilling time, but overnight is ideal for the best flavor and texture.
Q5: What are some good toppings for cheesecake?
A5: Classic toppings include fresh berries, cherry pie filling, chocolate ganache, caramel sauce, lemon curd, or a simple dollop of whipped cream.