Unlock the Secret to Creamy, Homemade Hummus: Your Kitchen, Your Creation
Ever wondered if that velvety smooth, irresistibly flavorful Hummus you adore could be made even better right in your own kitchen? Absolutely! Preparing this Middle Eastern staple at home isn’t just about saving a few dollars; it’s about unlocking fresher flavors, controlling ingredients, and personalizing it to perfection. Today, we’re diving deep into crafting the ultimate homemade Hummus recipe, transforming humble chickpeas into a culinary masterpiece. Get ready to impress your friends, nourish your body, and elevate your snack game.
Ingredients & Kitchen Tools
Crafting the perfect batch requires a few simple staples and foundational tools.
- Canned Chickpeas (15 oz can, 1 pc): The star of our show. Using canned chickpeas saves time, but dried ones, soaked and cooked, offer a superior texture.
- Tahini (1/4 cup): Ground sesame paste, essential for authentic flavor and creaminess. Choose a good quality, runny tahini for optimal results.
- Lemon Juice (2-4 tablespoons): Freshly squeezed is non-negotiable! Adds brightness and acidity. Adjust to your taste.
- Garlic (1-2 cloves): Fresh garlic, minced or crushed. Start with one and add more if you prefer a punchier flavor.
- Cold Water or Ice Water (2-4 tablespoons): The secret to super smooth hummus. The cold temperature helps emulsify the tahini and prevents the hummus from getting sticky.
- Olive Oil (1-2 tablespoons, plus more for garnish): Extra virgin olive oil for richness and a lovely drizzle on top.
- Cumin (1/2 teaspoon): Ground cumin adds warmth and a classic earthy note.
- Salt (1/2 teaspoon, or to taste): Enhances all the flavors.
- Optional Garnishes: Paprika, chopped parsley, a sprinkle of za’atar, whole chickpeas, or a swirl of chili oil.
- Food Processor: The most crucial tool for achieving that silky-smooth consistency.
- Spatula: For scraping down the sides of the food processor.
- Fine-Mesh Sieve (optional): For peeling chickpeas, if you’re aiming for ultimate smoothness.
Prep Time & Cooking Schedule
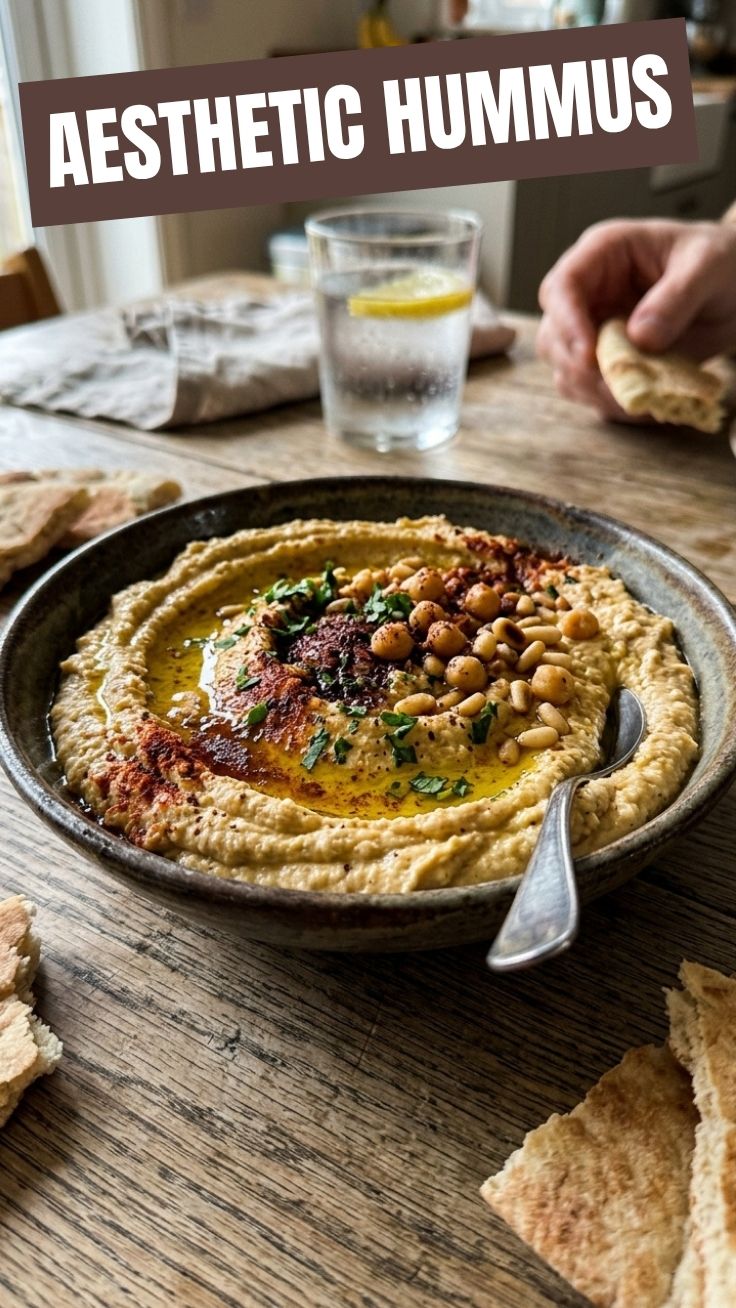
Making delightful Hummus is surprisingly quick!
- Prep Time: 10 minutes (if using canned chickpeas). Add 8-12 hours for soaking and 1-2 hours for cooking if using dried chickpeas.
- Cooking Time: 0 minutes (if using canned chickpeas).
- Processing Time: 5-7 minutes.
- Resting Time: 30 minutes (optional, but recommended to allow flavors to meld).
This entire process can easily be completed in under 20 minutes, making it an ideal last-minute appetizer or a quick addition to your meal prep.
Step-by-Step Instructions
Follow these simple steps for a consistently perfect outcome.
1. Prepare the Chickpeas: Drain and rinse the canned chickpeas thoroughly under cold water. For the absolute creamiest Hummus, some chefs recommend peeling the chickpeas. This can be done by gently rubbing them between your hands or using a fine-mesh sieve under running water. While optional, it makes a noticeable difference in texture.
2. Combine Tahini and Lemon Juice: In the food processor, combine the tahini and freshly squeezed lemon juice. Process for about 1-2 minutes until the mixture lightens in color and becomes thick and creamy. This step is critical for a smooth hummus; it emulsifies the tahini and releases its full flavor.
3. Add Garlic and Salt: Add the minced garlic and salt to the tahini mixture. Process for another 30 seconds to incorporate.
4. Introduce Chickpeas and Cumin: Add the drained chickpeas and ground cumin to the food processor. Process for 2-3 minutes, scraping down the sides occasionally. The mixture will be thick and paste-like at this stage.
5. Achieve Creaminess with Cold Water: With the food processor running, slowly drizzle in the cold water or ice water, 1 tablespoon at a time, until the Hummus recipe reaches your desired consistency – wonderfully smooth and spreadable. This might take 2-4 tablespoons.
6. Taste and Adjust: Taste the hummus and adjust seasonings as needed. You might want more salt, lemon juice, or even a touch more cumin.
7. Serve and Garnish: Transfer the hummus to a serving bowl. Drizzle generously with olive oil and add your preferred garnishes like a sprinkle of paprika or fresh parsley.
Nutritional Benefits & Advantages
This humble dip is a nutritional powerhouse! Chickpeas are an excellent source of plant-based protein and dietary fiber, promoting satiety and aiding digestion. Tahini provides healthy fats, calcium, and iron. Lemon juice adds a burst of Vitamin C and antioxidants. Overall, this makes hummus a heart-healthy, gut-friendly, and energy-boosting addition to any meal. It’s naturally gluten-free and can easily be made oil-free for those watching their fat intake.
Tips, Variations & Cooking Advice
- Roasted Garlic Hummus: For a milder, sweeter flavor, roast a head of garlic until soft before adding it to the processor.
- Spicy Hummus: Add a pinch of cayenne pepper, a dash of hot sauce, or a few roasted red pepper flakes.
- Herby Hummus: Incorporate fresh herbs like cilantro or parsley directly into the processor.
- Beet Hummus: For a vibrant color and earthy sweetness, blend in a small roasted beet.
- Thinner Consistency: Add a little more cold water or even some aquafaba (chickpea liquid) if you prefer a runnier dip.
Common Mistakes to Avoid
- Not Enough Tahini: Skimping on tahini results in a less authentic flavor and a drier texture.
- Warm Water: Using warm water can make the hummus pasty and gluey. Always opt for cold or ice water.
- Over-Processing: While you want it smooth, over-processing can heat the ingredients, affecting texture.
- Ignoring Seasoning: Don’t be afraid to taste and adjust! Hummus needs a good balance of salt and acidity.
- Not Scrapping Down Sides: Ensure all ingredients are thoroughly incorporated for an even consistency.
Storage & Meal Prep Tips
Store leftover hummus in an airtight container in the refrigerator for up to 5-7 days. A thin layer of olive oil on top can help prevent it from drying out and oxidizing. While it can be frozen for up to a month, the texture might change slightly upon thawing, becoming a bit grainier. To re-thaw, place it in the refrigerator overnight. You might need to give it a quick whisk and add a touch more olive oil or water to restore its desired consistency. This recipe is perfect for making a larger batch for weekly meal prep!
Conclusion
There you have it – the ultimate guide to creating a truly spectacular homemade Hummus. With fresh ingredients and a few simple techniques, you can achieve that sought-after creamy texture and rich flavor that store-bought versions simply can’t match. We encourage you to try this incredibly satisfying Hummus recipe, experiment with the variations, and share your delicious creations! Your taste buds will thank you.
FAQs
Q: Can I use dried chickpeas instead of canned?
A: Yes, absolutely! Soak 1 cup of dried chickpeas overnight, then boil them until very tender (about 1-2 hours). This often yields an even creamier hummus.
Q: Why is my hummus gritty?
A: This could be due to not processing long enough, insufficient cold water, or not peeling the chickpeas. Ensure you scrape down the sides of the food processor frequently.
Q: How can I make my hummus even smoother?
A: Beyond peeling chickpeas and using cold water, a powerful food processor really helps. Some chefs also add a pinch of baking soda to the chickpeas while boiling to help break down their skins.
Q: Can I make hummus without tahini?
A: While tahini provides essential flavor and texture, you can substitute it with a similar amount of cashew butter or sunflower seed butter for a nut-free version. The flavor profile will change.
Q: What are the best ways to serve hummus?
A: Hummus is incredibly versatile! Serve it with pita bread, fresh vegetables, spread it in sandwiches or wraps, or use it as a base for grain bowls.