The Ultimate Creamy Hummus: Your Guide to Homemade Perfection
Ever wondered if that velvety smooth, impossibly delicious Hummus you crave from your favorite Mediterranean spot is truly achievable in your own kitchen? The answer is a resounding YES! Preparing homemade Hummus isn’t just about saving a few dollars; it’s about unlocking a vibrant world of fresh flavors, customizable textures, and the immense satisfaction of creating a nutritious, versatile spread from scratch. Forget store-bought versions that often contain unwanted preservatives or lack that authentic zest. With our comprehensive guide, you’ll master the art of crafting genuinely superior Hummus that outshines the rest. And trust us, once you’ve experienced the fresh burst of flavor in homemade Guacamole, you’ll appreciate the difference quality ingredients make in dips.
Ingredients & Kitchen Tools
Crafting the perfect batch of Hummus requires a few essential items. Here’s what you’ll need:
- 1 (15-ounce) can chickpeas (garbanzo beans): Drained and rinsed thoroughly. Using dried chickpeas soaked overnight and cooked until very tender yields an even creamier result, but canned works wonderfully for convenience.
- 1/4 cup tahini: A sesame paste that is crucial for authentic flavor and silkiness. Stir well before measuring.
- 1/4 cup fresh lemon juice: About 1-2 lemons. Freshly squeezed is non-negotiable for bright, zesty notes.
- 1-2 cloves garlic: Minced. Adjust to your preference – more for a bolder flavor.
- 2 tablespoons extra virgin olive oil (+ more for drizzling): High-quality oil enhances the flavor profile significantly.
- 1/2 teaspoon ground cumin: Adds warmth and a classic Mediterranean touch.
- Salt to taste: Start with 1/2 teaspoon and adjust.
- 2-4 tablespoons ice-cold water: The secret to an ultra-creamy texture.
- Optional garnishes: Paprika, chopped fresh parsley, pine nuts, a drizzle of olive oil, or a spoonful of sumac.
Kitchen Tools:
- Food processor or high-speed blender: Essential for achieving a smooth, creamy consistency.
- Fine-mesh sieve (optional): For removing chickpea skins, which contributes to a silkier outcome.
- Spatula: For scraping down the sides of the food processor.
- Measuring cups and spoons: For accurate ingredient proportions.
Prep Time & Cooking Schedule
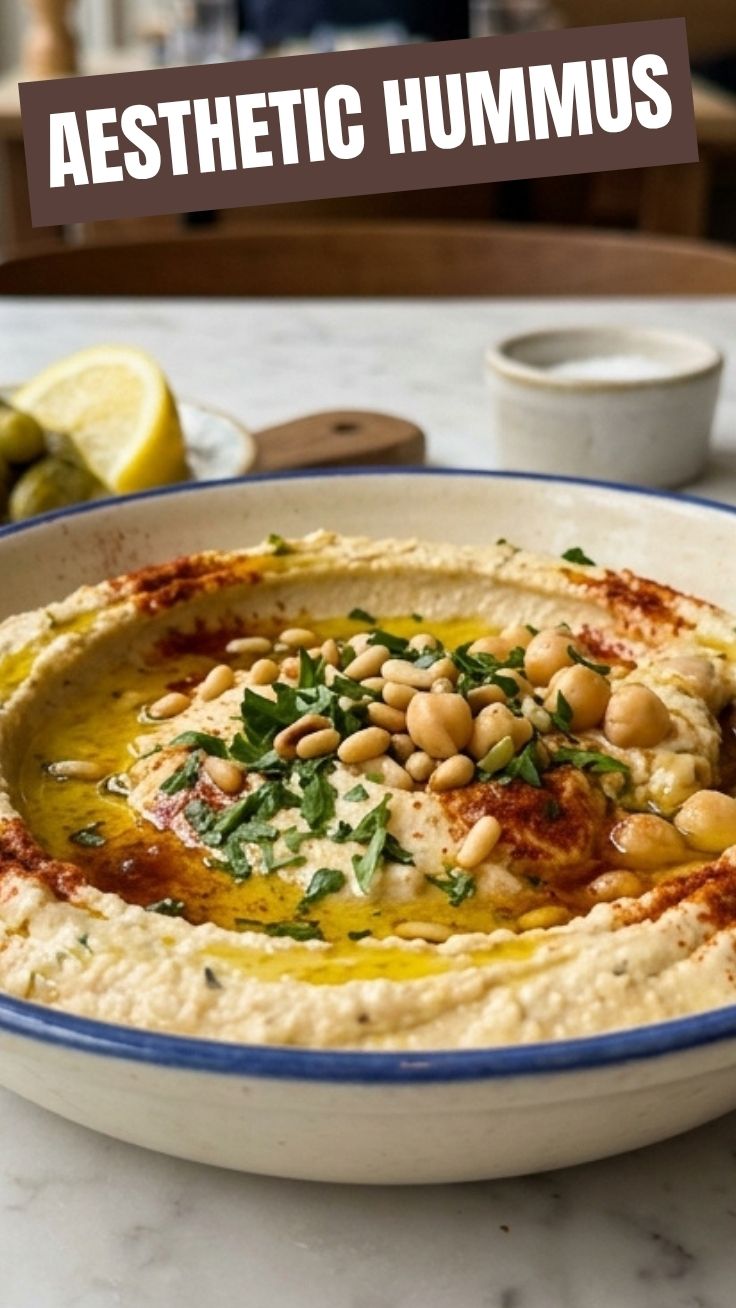
Making delightful homemade Hummus is surprisingly quick!
- Prep time: 10 minutes (if using canned chickpeas, 15-20 minutes if opting to remove skins).
- Cook time: 0 minutes (no cooking required!).
- Resting time: 30 minutes (optional, but allows flavors to meld beautifully).
Plan to make this dip shortly before serving, though it holds up well in the fridge for several days. If you’re hosting, whipping up a batch the day before can save you time and actually deepen the flavors.
Step-by-Step Instructions
Follow these steps for a guaranteed creamy Hummus:
1. Prepare Chickpeas: Drain and rinse the canned chickpeas thoroughly. For an exceptionally smooth Hummus, gently rub the chickpeas between two towels or with your fingers to remove the skins. This step is optional but highly recommended for a professional texture.
2. Combine Wet Ingredients (First): In your food processor, combine the tahini, fresh lemon juice, and minced garlic. Process for about 30-60 seconds until the mixture is light in color and fluffy. This emulsification is key to preventing a gritty texture and ensuring a luscious Hummus.
3. Add Chickpeas & Seasoning: Add the drained chickpeas, extra virgin olive oil, ground cumin, and salt to the food processor.
4. Process to Creaminess: Process for 1-2 minutes, scraping down the sides as needed, until the mixture starts to look smooth.
5. Achieve Ultimate Smoothness with Cold Water: While the food processor is running, slowly drizzle in the ice-cold water, one tablespoon at a time, until your Hummus reaches your desired creamy consistency. The cold water magically helps create a lighter, fluffier texture. Continue processing for another 2-3 minutes, ensuring all ingredients are fully incorporated and the paste is incredibly smooth.
6. Taste and Adjust: Taste the Hummus. Adjust seasonings as needed – perhaps a little more salt, lemon juice, or even a dash more cumin. Your homemade Guacamole follows a similar principle of tasting and adjusting.
7. Serve: Transfer the Hummus to a serving bowl. Drizzle with a good glug of extra virgin olive oil, sprinkle with paprika and chopped parsley, and enjoy with pita bread, fresh vegetables, or as a spread.
Nutritional Benefits & Advantages
Hummus is a nutritional powerhouse! Chickpeas are an excellent source of plant-based protein and dietary fiber, promoting satiety and aiding digestion. Tahini provides healthy fats, including monounsaturated and polyunsaturated fats, as well as minerals like calcium, magnesium, and iron. Lemon juice adds a burst of Vitamin C, an antioxidant. Collectively, Hummus is a low-glycemic, gluten-free, and often vegan-friendly dip that can support heart health, blood sugar regulation, and energy levels. It’s a smart choice for a healthy snack or meal component.
Tips, Variations & Cooking Advice
- Flavor Boosts: Experiment with roasted garlic, sun-dried tomatoes, roasted red peppers, or a pinch of smoked paprika for different flavor profiles.
- Spicy Kick: Add a dash of cayenne pepper or a tiny amount of a fresh chili like serrano for a fiery edge.
- Herbaceous: Blend in fresh herbs like cilantro or mint for a refreshing twist.
- Dietary Adaptations: This recipe is naturally vegan and gluten-free, ensuring it caters to a wide range of dietary needs.
- Thinner Consistency: If you prefer a thinner Hummus, add a bit more ice water or a splash of olive oil until desired pourability is achieved.
Common Mistakes to Avoid
- Not Processing Long Enough: Under-processing leads to a lumpy, grainy Hummus. Be patient and let the food processor do its job.
- Using Warm Water: Warm water can make the Hummus heavy. Always use ice-cold water for that airy, light texture.
- Omitting Tahini: Skipping tahini fundamentally changes the flavor and texture of authentic Hummus. Don’t skip it!
- Not Enough Lemon: Lemon juice is crucial for balance. If your Hummus tastes flat, it often needs more lemon.
Storage & Meal Prep Tips
Store homemade Hummus in an airtight container in the refrigerator for up to 5-7 days. A thin layer of olive oil on top can help prevent it from drying out and oxidizing. It’s an excellent staple for meal prep; portion it out for healthy snacks throughout the week. While you can freeze Hummus, its texture can become slightly grainy upon thawing. If freezing, thaw slowly in the refrigerator and re-whip with a splash of water or lemon juice to restore creaminess.
Conclusion
There you have it – your definitive guide to crafting the most exquisite, creamy homemade Hummus right in your own kitchen. This simple recipe proves that with a few quality ingredients and a little technique, you can elevate your culinary game and enjoy a nutritious, flavorful dip that rivals any restaurant offering. So go ahead, whip up a batch, and pair it with some fresh pita or crunchy veggies. You might even find yourself adding a dollop to your next homemade Guacamole to create a unique flavor fusion! Share your homemade Hummus triumphs in the comments below!
FAQs
Q1: Can I use dried chickpeas instead of canned?
A1: Absolutely! Dried chickpeas, soaked overnight and then cooked until very tender (almost mushy), will yield an even creamier Hummus.
Q2: My Hummus is too thick. How do I fix it?
A2: Slowly add more ice-cold water, one tablespoon at a time, while continuously processing, until it reaches your desired consistency. You can also add a little more lemon juice or olive oil.
Q3: How do I make my Hummus taste less bitter?
A3: Bitterness often comes from poor quality tahini or too much garlic. Ensure your tahini is fresh and adjust garlic to taste. A squeeze of extra lemon juice can also brighten the flavors and cut through any bitterness.
Q4: Can I make Hummus without a food processor?
A4: While a food processor is ideal, you can use a high-speed blender for similar results. A mortar and pestle or hand masher can work in a pinch for a rustic texture, but achieving true creaminess will be challenging.