Unlocking Flavor: Your Guide to Crafting the Perfect Homemade Salsa
Ever wondered why restaurant Salsa just hits different? The secret often lies in freshly prepared ingredients and a little know-how. In this comprehensive guide, we’re not just making a condiment; we’re creating an experience. Preparing your own vibrant homemade Salsa at home offers unparalleled freshness and control over ingredients, far surpassing store-bought options. This recipe is not only simple to master but also a fantastic way to elevate any meal, from a casual snack with chips to a vibrant topping for grilled meats. And speaking of vibrant, imagine serving this lively dip while enjoying a energetic Salsa dance party – the perfect pairing of flavor and rhythm!
Ingredients & Kitchen Tools
To embark on this culinary journey, gather the following essentials:
- Ripe Tomatoes (3 large, e.g., Roma or beefsteak): The foundation of our Salsa, providing a sweet-tart base. Choose firm, blemish-free tomatoes.
- Red Onion (1/2 medium): Adds a pungent, zesty kick. White or yellow onions can be substituted for a milder flavor.
- Jalapeño Pepper (1 medium): For a touch of heat. Adjust quantity or remove seeds for less spice. For more heat, try serrano peppers.
- Fresh Cilantro (1/2 cup, packed): Essential for that signature fresh, herbaceous aroma and taste.
- Lime (1 large): Provides crucial acidity and brightness.
- Garlic (2 cloves): Imparts a depth of savory flavor.
- Salt (1/2 teaspoon, or to taste): Enhances all the other flavors. Use sea salt or kosher salt.
- Cumin (1/4 teaspoon, ground): Adds an earthy, warm undertone. Optional, but highly recommended.
- Optional Add-ins: Diced avocado for creaminess, corn for sweetness, or a pinch of sugar to balance acidity.
Kitchen Tools:
- Cutting Board: For safe and efficient chopping.
- Sharp Knife: Crucial for precise dicing of vegetables.
- Food Processor (or large mixing bowl and masher): Ideal for achieving the desired consistency, from chunky to smooth.
- Citrus Juicer: To extract maximum juice from the lime effortlessly.
- Mixing Spoon: For combining ingredients thoroughly.
- Airtight Container: For storing your delectable creation.
Prep Time & Cooking Schedule
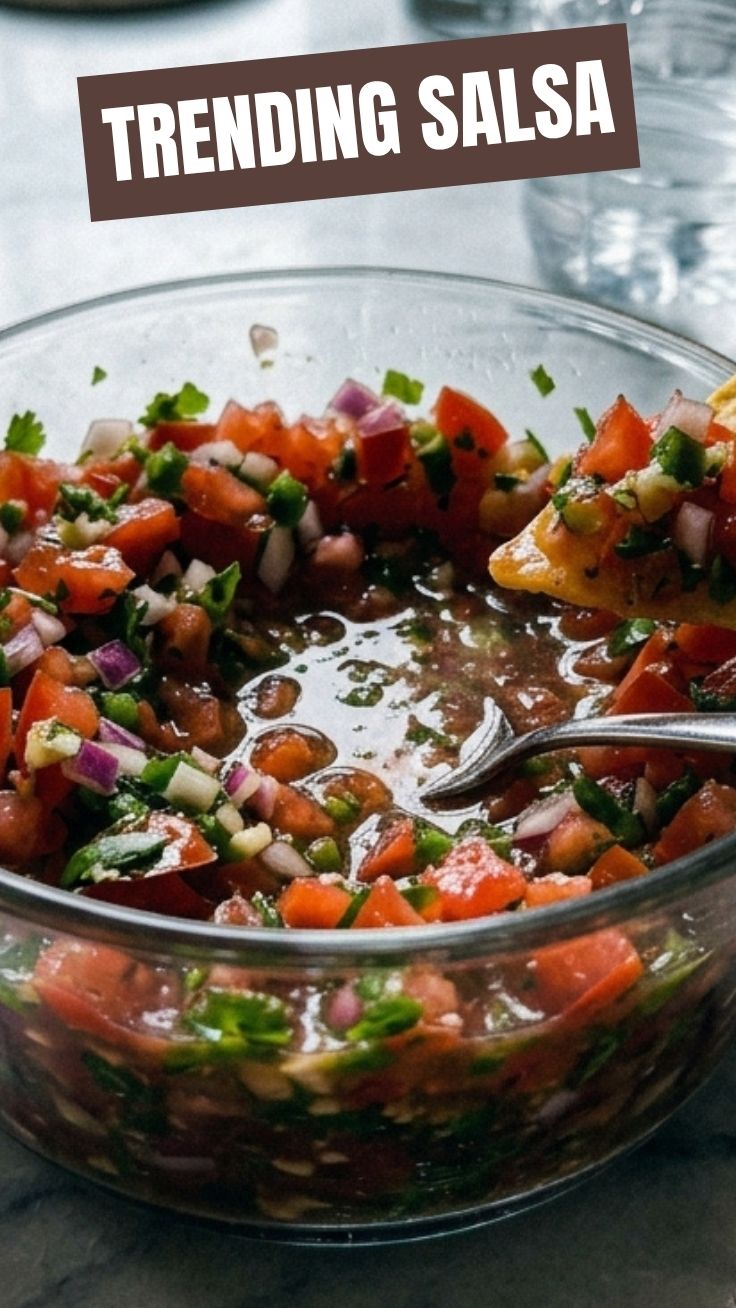
Our homemade Salsa is wonderfully quick to prepare, making it perfect for last-minute gatherings or weeknight meals.
- Prep Time: 15 minutes (This includes washing, chopping, and mincing ingredients.)
- Resting Time: 30 minutes (minimum) to 1 hour (recommended). Allowing the Salsa to rest lets the flavors meld and deepen, resulting in a more harmonious and delicious outcome. While not strictly “cooking” time, this is crucial for optimal flavor.
Step-by-Step Instructions
1. Prepare the Aromatics: Begin by finely dicing the red onion and mincing the garlic. For a truly smooth Salsa experience, ensure these are very small.
2. Dice the Tomatoes: Core the tomatoes and dice them into small, even pieces. The size you choose will determine the chunkiness of your Salsa. For a smoother consistency, you can deseed them, but we prefer the extra liquid for flavor.
3. Process the Jalapeño (and Herbs): Remove the stem from the jalapeño. For less heat, remove the seeds and white membrane. Roughly chop the jalapeño and fresh cilantro. If using a food processor, add these along with the onion and garlic and pulse a few times until finely chopped but not pureed. If making by hand, finely mince everything.
4. Combine and Season: In a large mixing bowl, combine the diced tomatoes, processed (or minced) onion, garlic, jalapeño, and cilantro. Squeeze the juice from the entire lime over the mixture. Add the salt and ground cumin.
5. Mix Thoroughly: Stir all the ingredients well to ensure everything is evenly distributed. Taste and adjust seasoning as needed. You might want more salt, a little more lime juice for tang, or even a pinch of sugar to balance the acidity.
6. Rest for Flavor Infusion: Transfer the Salsa to an airtight container and refrigerate for at least 30 minutes. This resting period allows the flavors to truly marry, transforming a simple mix of ingredients into a complex and delightful condiment. This is also a perfect time to put on some energetic music and practice your favorite Salsa dance moves!
Nutritional Benefits & Advantages
Our homemade Salsa is a beacon of health! Tomatoes are rich in lycopene, a powerful antioxidant, and Vitamin C. Onions and garlic offer immune-boosting properties, while jalapeños contain capsaicin, which can have metabolism-boosting effects. Cilantro is packed with essential vitamins and minerals. This low-calorie, nutrient-dense condiment is a fantastic way to add flavor and health benefits to any meal without extra fat or sugar often found in processed sauces.
Tips, Variations & Cooking Advice
- Roast for Depth: For a richer, smoky flavor, try roasting the tomatoes, onion, garlic, and jalapeño before dicing and combining. This deepens the complexity of the Salsa.
- Heat Control: For milder Salsa, remove all seeds and membranes from the jalapeño. For extra heat, leave them in or add another chili like a serrano or habanero.
- Flavor Boosters: A splash of apple cider vinegar can add another layer of tang. A pinch of smoked paprika can introduce a lovely smoky depth.
- Batch Cooking: This recipe doubles or triples easily, making it great for meal prepping or entertaining.
- Dietary Adaptations: Naturally gluten-free and vegan, this Salsa is broadly accessible.
Common Mistakes to Avoid
- Over-processing: If using a food processor, avoid pureeing your ingredients to oblivion. You want a fresh, slightly chunky texture, not a watery soup. Pulse intermittently.
- Skipping the Rest: While tempting to dive right in, allowing the Salsa to rest is crucial for optimal flavor. Patience is a virtue here!
- Under-seasoning: Don’t be afraid to taste and adjust. Salsa benefits from proper salt and acidity.
- Using Dull Ingredients: The quality of your ingredients directly impacts the final taste. Use ripe, fresh tomatoes and vibrant herbs.
Storage & Meal Prep Tips
Store your homemade Salsa in an airtight container in the refrigerator for up to 5-7 days. The flavors will continue to develop, often tasting even better the next day. Freezing fresh Salsa is generally not recommended as the fresh ingredients (especially tomatoes and onions) can become watery and lose their crisp texture upon thawing.
Conclusion
Crafting your own fresh, vibrant homemade Salsa is an incredibly rewarding culinary endeavor. It’s a testament to the fact that the simplest ingredients, when lovingly prepared, can yield the most extraordinary flavors. Whether you’re enhancing a quick weeknight dinner, impressing guests at your next gathering, or simply want to elevate your chip-and-dip game, this recipe will not disappoint. We encourage you to try this recipe, experiment with the suggested variations, and experience the unparalleled taste of truly fresh Salsa. And who knows, perhaps the lively spirit of this delicious condiment will inspire you to try a little Salsa dance as well! Share your creations and favorite pairings in the comments below!
FAQs
Q1: Can I use canned tomatoes for this recipe?
A1: While fresh tomatoes are highly recommended for the best flavor and texture, you can use high-quality canned diced tomatoes (drained) in a pinch. The flavor profile will be different, leaning towards a more cooked or roasted taste.
Q2: How can I make my Salsa less watery?
A2: To reduce wateriness, you can deseed the tomatoes before dicing. Additionally, allowing the Salsa to rest in the refrigerator will help some of the liquid settle, which you can then drain off if desired before serving.
Q3: What are some good substitutions for cilantro?
A3: If you’re not a fan of cilantro, fresh parsley or a combination of parsley and chives can be good alternatives, although they will alter the traditional Salsa flavor profile.
Q4: Can I make this Salsa ahead of time for a party?
A4: Absolutely! In fact, making it a few hours or even a day in advance allows the flavors to deepen and meld beautifully, making it an excellent option for meal prep or entertaining. Just give it a good stir before serving.
Q5: What’s the best way to serve this Salsa?
A5: This versatile classic is perfect with tortilla chips, as a topping for tacos, burritos, grilled chicken or fish, eggs, and even as a lively side dish for a steak.