Mastering the Art of Savory Garlic Bread from Scratch
Ready to elevate your weeknight meals or impress dinner guests with an irresistible side? Look no further than homemade Garlic Bread! There’s something undeniably comforting and utterly delicious about a perfectly golden, aromatic slice, and preparing it in your own kitchen guarantees unparalleled freshness and flavor. Forget the pre-packaged versions; creating incredible Garlic Bread from scratch, especially when infused with rich, homemade Garlic Butter, is surprisingly simple and deeply rewarding. This comprehensive guide will walk you through every step, ensuring you achieve that ideal balance of crispy crust, soft interior, and pungent garlicky goodness.
Ingredients & Kitchen Tools
Crafting the perfect loaf requires just a few key components and basic kitchen implements.
- 1 Loaf Crusty Bread: French baguette, Italian loaf, or sourdough work best for their sturdy crust and airy interior.
- 1/2 cup Unsalted Butter, softened: Essential for a rich, creamy base. Using unsalted butter allows you to control the sodium content.
- 4-6 cloves Garlic, minced: The heart of our Garlic Butter. Freshly minced garlic provides the best flavor; avoid jarred garlic if possible.
- 2 tablespoons Fresh Parsley, chopped: Adds a vibrant color and fresh, herbaceous note.
- 1/4 teaspoon Salt: Enhances the overall flavor profile. Adjust to taste.
- Pinch Black Pepper: A subtle kick to complement the garlic.
- Optional: 1/4 cup Grated Parmesan Cheese: For an extra layer of savory, umami flavor.
- Optional: 1/2 teaspoon Garlic Powder: Can boost garlic flavor if desired, but fresh is paramount.
Kitchen Tools:
- Baking Sheet: To hold your bread during baking.
- Aluminum Foil or Parchment Paper: For easy clean-up and even cooking.
- Small Mixing Bowl: To combine the Garlic Butter.
- Pastry Brush or Spoon: For spreading the butter mixture.
- Sharp Serrated Knife: For slicing the bread cleanly.
Prep Time & Cooking Schedule
- Prep Time: 10-15 minutes (includes mincing garlic and preparing butter).
- Cook Time: 10-15 minutes (until golden brown and fragrant).
- Total Time: 20-30 minutes.
This Garlic Bread recipe is perfect for last-minute additions to any meal. You can easily prepare the Garlic Butter mixture ahead of time and store it in the refrigerator, ready to slather onto bread whenever the craving strikes.
Step-by-Step Instructions
Follow these simple steps for perfectly crispy and flavorful Garlic Bread, complete with rich Garlic Butter.
1. Preheat Oven & Prepare Bread: Preheat your oven to 375°F (190°C). Line a baking sheet with aluminum foil or parchment paper. Using a serrated knife, slice your bread lengthwise through the middle, or cut it into thick, individual slices if preferred. Do not cut all the way through if making a pull-apart loaf.
2. Make the Garlic Butter: In a small mixing bowl, combine the softened unsalted butter, minced garlic, chopped fresh parsley, salt, and black pepper. If using, stir in the grated Parmesan cheese and garlic powder. Mix until thoroughly combined and creamy.
3. Spread the Garlic Butter: Evenly spread a generous amount of the prepared Garlic Butter mixture over the cut surfaces of your bread. Ensure every crevice gets some buttery goodness.
4. Bake to Perfection: Place the buttered bread halves onto the prepared baking sheet, buttered side up.
* For soft garlic bread: Bake for 10-12 minutes, until the butter is melted and bubbling, and the edges are lightly golden.
* For crispy garlic bread: Bake for 8-10 minutes, then switch the oven to broil (low setting) for 1-3 minutes, watching carefully until the top is golden brown and delightfully crispy. Do not walk away from the broiler!
5. Serve Immediately: Remove from the oven, slice into desired portions (if not already cut), and serve hot. Enjoy your aromatic and perfectly prepared Garlic Bread!
Nutritional Benefits & Advantages
Beyond its incredible taste, homemade Garlic Bread offers some surprising benefits. Garlic itself is a nutritional powerhouse, known for its immune-boosting properties, cardiovascular benefits, and anti-inflammatory compounds. Parsley adds vitamins K, C, and A, along with antioxidants. While butter adds healthy fats in moderation, crafting it at home allows you to control the quality of ingredients, opting for grass-fed butter or reducing sodium content, making it a more wholesome choice than many store-bought options. It’s a fantastic way to enjoy flavorful carbs with some added health perks.
Tips, Variations & Cooking Advice
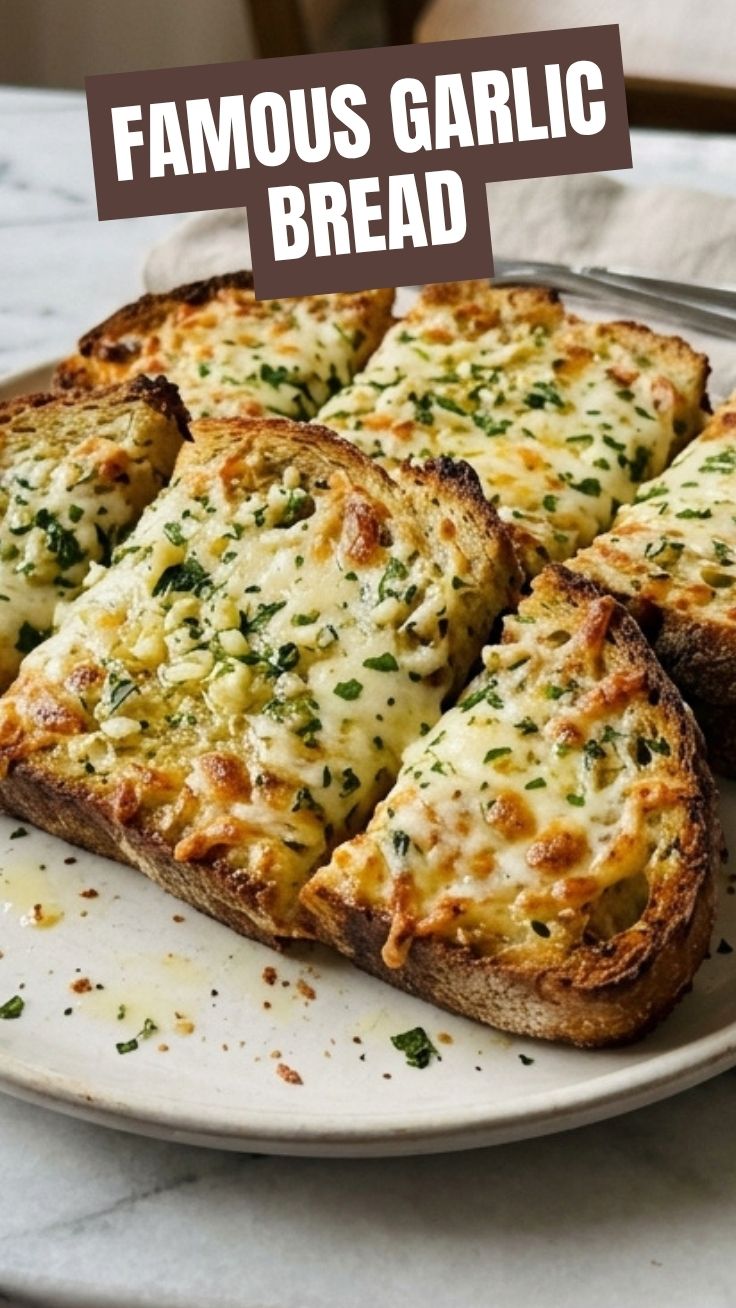
- Cheesy Delight: For extra indulgence, sprinkle mozzarella or a blend of Italian cheeses over the Garlic Butter before baking.
- Spicy Kick: Add a pinch of red pepper flakes to the Garlic Butter for a subtle heat.
- Herbal Infusion: Experiment with other herbs like oregano, basil, or chives for different flavor profiles.
- Grilled Garlic Bread: For a smoky twist, grill your buttered bread slices over medium heat for 2-3 minutes per side, or until golden and charred.
- Dietary Adaptations:
* Gluten-Free: Use a good quality gluten-free baguette or loaf.
* Dairy-Free/Vegan: Substitute dairy butter with a high-quality plant-based butter alternative.
- Temperature Control: Soft butter is key for a smooth, even spread. If your butter is too hard, microwave it for a few seconds (5-10) until just softened.
Common Mistakes to Avoid
- Using cold butter: Hard butter is difficult to mix and spread evenly, leading to unevenly flavored Garlic Bread.
- Undermincing garlic: Large chunks of garlic can be overpowering. Mince it finely for a more consistent flavor.
- Over-broiling: Broiling happens fast! Keep a close eye on the bread to prevent burning. A minute too long can turn perfect golden toast into charcoal.
- Not enough butter: Don’t be shy! A generous layer of Garlic Butter is essential for flavor and moisture.
- Using stale bread: While some bread is good, overly stale bread can become dry and hard when baked. Opt for a fresh, crusty loaf.
Storage & Meal Prep Tips
Leftover Garlic Bread can be stored in an airtight container or wrapped tightly in foil at room temperature for up to 2 days, or in the refrigerator for up to 4 days.
Reheating: For best results, reheat in a preheated oven at 350°F (175°C) for 5-7 minutes, or until warmed through and crispy again. You can also toast it in a toaster oven for a few minutes. Avoid microwaving, as it can make the bread soggy.
Meal Prep: Prepare a larger batch of Garlic Butter and store it in an airtight container in the refrigerator for up to a week, or freeze for up to a month. This makes fresh Garlic Bread a quick reality anytime!
Conclusion
Creating your own homemade Garlic Bread is a simple culinary pleasure that yields incredible results, far surpassing anything you can buy pre-made. With just a few ingredients and this straightforward guide, you can master the art of golden, aromatic slices slathered with rich Garlic Butter. We encourage you to try this recipe tonight and experience the irresistible aroma and flavor for yourself. Share your creations in the comments below, or explore our other recipes for perfect pairings!
FAQs
Q1: Can I use pre-minced garlic from a jar for the Garlic Butter?
A1: While convenient, fresh garlic offers superior flavor. If using jarred garlic, reduce the amount slightly as it can be stronger, and be aware the overall flavor will be less vibrant.
Q2: What’s the best type of bread for Garlic Bread?
A2: A crusty baguette, Italian loaf, or sourdough work wonderfully, providing a good texture contrast between the crispy exterior and soft, buttery interior.
Q3: Can I make this in advance and freeze it?
A3: Yes! You can prepare the buttered bread and freeze it unbaked. Wrap it tightly in foil and then in plastic wrap. When ready to bake, place directly from the freezer onto a baking sheet and bake at 375°F (190°C) for 15-20 minutes, or until golden and hot.
Q4: How do I prevent the garlic from burning?
A4: If you’re worried about the raw garlic burning during baking, you can lightly sauté it in a bit of butter for 1-2 minutes before mixing it into the softened butter. This mellows the flavor and reduces the risk of burning, especially if you plan to broil.