The Irresistible Allure of Homemade Apple Pie: Your Guide to a Flaky, Flavorful Masterpiece
Is there any aroma more comforting, more evocative of home, than a freshly baked apple pie? That golden crust, bubbling with sweet, spiced fruit — it’s a symphony for the senses. While store-bought options abound, mastering the art of a homemade Apple Pie (Classic) at home isn’t just about saving money; it’s about crafting an experience, a memory, and a dish that truly shines. This comprehensive guide will walk you through every step, ensuring your oven produces a pie rivaling even Grandma’s apple pie recipe. Prepare to impress everyone with your culinary prowess!
Ingredients & Kitchen Tools
Crafting the perfect apple pie requires a thoughtful selection of ingredients and the right tools at your disposal.
- For the Crust:
* 2 ½ cups all-purpose flour: The base for our flaky crust.
* 1 teaspoon salt: Enhances flavor and works with the butter.
* 1 cup (2 sticks) unsalted butter, very cold and cut into ½-inch cubes: Crucial for flakiness; cold butter creates steam pockets.
* ½ cup ice water (plus more as needed): Binds the dough without overdeveloping gluten.
- For the Filling:
* 6-8 medium apples (about 3 lbs total): A mix of tart (Granny Smith) and sweet (Honeycrisp, Fuji) offers the best flavor and texture.
* ¾ cup granulated sugar: Sweetens the apples. Adjust to apple sweetness.
* ¼ cup light brown sugar, packed: Adds depth and a hint of caramel.
* 2 tablespoons all-purpose flour or cornstarch: Thickens the filling. Cornstarch yields a clearer filling.
* 1 teaspoon ground cinnamon: The quintessential apple pie spice.
* ¼ teaspoon ground nutmeg: Complements the cinnamon beautifully.
* ⅛ teaspoon ground cloves (optional): Adds a warm, complex note.
* 1 tablespoon lemon juice: Brightens the flavor and prevents apple browning.
* 2 tablespoons unsalted butter, cut into small pieces: Adds richness to the filling.
- For the Egg Wash & Topping (Optional):
* 1 large egg yolk, beaten with 1 teaspoon water: Creates a golden, shiny crust.
* 1 tablespoon granulated sugar: Sprinkled on top for extra sparkle and crunch.
- Kitchen Tools:
* Large mixing bowls: For dough and filling preparation.
* Pastry blender or food processor: For cutting butter into flour.
* Rolling pin: Essential for rolling out the pie crust.
* 9-inch pie plate: The standard size for a delicious pie.
* Measuring cups and spoons: For precise ingredient quantities.
* Paring knife and apple peeler/corer: For efficient apple preparation.
* Whisk: To combine dry ingredients.
* Pastry brush: For applying egg wash.
Prep Time & Cooking Schedule
- Prep Time: 45 minutes (including chilling dough)
- Cook Time: 50-60 minutes
- Resting Time: 2-3 hours (crucial for setting the filling)
This recipe requires a bit of planning due to dough chilling and post-baking resting, but the hands-on active time is manageable. Start your pie a few hours before you plan to serve it to ensure optimal texture and flavor.
Step-by-Step Instructions
Follow these detailed steps to bake a truly remarkable pie.
1. Prepare the Pie Dough (Can be done ahead): In a large bowl, whisk together the flour and salt. Add the cold butter cubes and cut them into the flour using a pastry blender or your fingertips until the mixture resembles coarse meal with some pea-sized butter pieces remaining. Gradually add ice water, one tablespoon at a time, mixing until just combined and the dough comes together. Do not overmix. Divide the dough into two equal discs, wrap tightly in plastic, and refrigerate for at least 30 minutes (or up to 2 days). This chilling is vital for a flaky crust.
2. Prepare the Apple Filling: While the dough chills, peel, core, and slice the apples into ¼-inch thick pieces. In a large bowl, combine the sliced apples with granulated sugar, brown sugar, flour/cornstarch, cinnamon, nutmeg, cloves (if using), and lemon juice. Toss gently until the apples are evenly coated. Set aside.
3. Assemble the Pie: On a lightly floured surface, roll out one dough disc into a 12-inch circle. Carefully transfer it to your 9-inch pie plate. Trim the edges, leaving about a ½-inch overhang. Pour the apple filling into the pie crust, mounding it slightly in the center. Dot the top of the filling with the small pieces of butter.
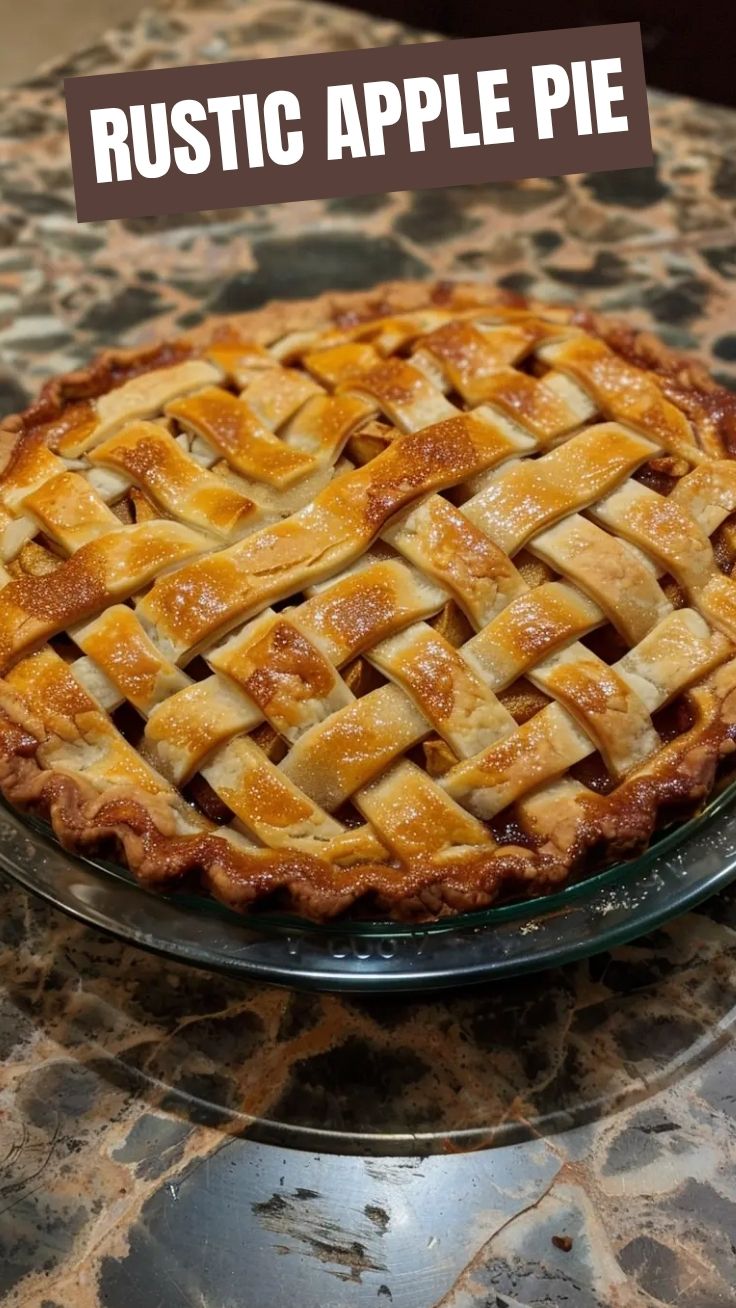
4. Top the Pie: Roll out the second dough disc into another 12-inch circle. You can place this directly over the filling, cut vents, or create a lattice top for a decorative finish. Trim the top crust to match the bottom overhang. Crimp the edges of both crusts together to seal, creating a decorative border. For a homemade Apple Pie (Classic), aim for even crimping; it’s a hallmark of a well-made pie that often outshines even Grandma’s apple pie recipe.
5. Bake the Pie: Preheat your oven to 425°F (220°C). If desired, brush the top crust with the egg wash and sprinkle with sugar. Place the pie on a baking sheet (to catch any drips) and bake for 15 minutes. Reduce the oven temperature to 375°F (190°C) and continue baking for another 35-45 minutes, or until the crust is golden brown and the filling is bubbly. If the crust browns too quickly, loosely tent with aluminum foil.
6. Cooling and Serving: Remove the pie from the oven and let it cool on a wire rack for at least 2-3 hours before slicing. This allows the filling to set properly, preventing a runny mess.
Nutritional Benefits & Advantages
Apple pie, especially when homemade, offers more than just indulgence. Apples are rich in dietary fiber, which aids digestion and can help regulate blood sugar. They also contain antioxidants like flavonoids, known for their anti-inflammatory properties. Using fresh, seasonal apples ensures maximum nutrient content. While not a health food, enjoying a slice in moderation can be part of a balanced diet, providing a delightful burst of fruit and warm spices.
Tips, Variations & Cooking Advice
- Apple Choice: Don’t limit yourself to just one type! A blend of Granny Smith (tart), Honeycrisp (sweet-tart), and Golden Delicious (sweet-mellow) creates a complex, balanced flavor and texture.
- Spice It Up: Beyond cinnamon and nutmeg, consider a pinch of cardamom for a sophisticated twist or a touch of allspice for added warmth.
- Gluten-Free Option: Substitute all-purpose flour in the crust with a 1:1 gluten-free baking flour blend (ensure it contains xanthan gum) and use cornstarch for the filling thickener.
- Dairy-Free Option: Use plant-based butter alternatives for the crust and filling.
- Lattice Top: For an impressive presentation, weave a lattice top with strips of dough. It’s easier than it looks!
- Make Ahead: Both the pie dough and the assembled (unbaked) pie can be frozen. Wrap the unbaked pie tightly in plastic wrap and foil; bake from frozen, adding an extra 20-30 minutes to the baking time.
Common Mistakes to Avoid
- Overworking the Dough: Leads to a tough, bready crust instead of a flaky one. Mix just until combined.
- Warm Butter: Will result in a greasy, less flaky crust. Keep that butter very cold!
- Not Chilling the Dough: Causes the butter to melt out too quickly, leading to shrinkage and a tough crust.
- Not Cooling the Pie: Slicing a warm pie results in a runny, messy filling. Patience is key!
- Too Many Apples: Can result in an overflow of juice during baking. Stick to the recommended amount.
Storage & Meal Prep Tips
Leftover apple pie can be stored at room temperature, loosely covered, for up to 2 days, or in the refrigerator for up to 5 days. For longer storage, wrap individual slices tightly in plastic wrap and then foil, and freeze for up to 3 months. Reheat slices gently in the microwave or oven (350°F/175°C for 10-15 minutes) until warmed through. Freezing an entire unbaked pie, as mentioned above, is also a great meal prep strategy for a future dessert.
Conclusion
Creating a homemade Apple Pie (Classic) is a truly rewarding culinary journey, yielding a dessert that embodies comfort, tradition, and pure deliciousness. With a little care and attention to detail, you can bake a pie that not only rivals but perhaps even surpasses cherished family recipes like Grandma’s apple pie recipe. Don’t be afraid to experiment with different apple varieties or spices to make this classic truly your own. Share your masterpieces with loved ones, and let the sweet, spiced aroma fill your home. Happy baking!
FAQs
1. What are the best apples for pie? A mix of tart (Granny Smith) and sweet (Fuji, Honeycrisp, Golden Delicious) is ideal for balanced flavor and texture.
2. Why is my pie crust tough? Typically, this is due to overworking the dough, which develops gluten too much. Handle the dough as little as possible.
3. How do I prevent a soggy bottom crust? Ensure your dough is cold, pre-bake (blind bake) the bottom crust for 10-15 minutes before adding the filling, or bake it on a preheated baking sheet for an extra burst of heat.
4. Can I make the pie filling ahead of time? You can prepare the apple filling a few hours in advance, but refrigerate it. Add the lemon juice just before using to prevent browning.
5. My pie filling is too runny. What did I do wrong? This usually happens if you didn’t use enough thickener (flour or cornstarch) or didn’t allow the pie to cool completely. Cooling is crucial for the filling to set.