The Secret to the Perfect Apple Pie: Is it in the Filling or the Crust?
Few desserts evoke the warmth and comfort of home quite like a freshly baked Apple Pie. The aroma alone can transport you back to childhood, and mastering this classic is a culinary achievement worth celebrating. While store-bought options exist, nothing compares to the satisfaction and superior taste of creating one from scratch. Today, we’re diving deep into crafting an extraordinary Apple Pie, exploring the nuances of both its luscious filling and that all-important Apple Pie Crust. We’ll equip you with the knowledge and techniques to bake a pie that’s not just good, but truly unforgettable – a testament to the value of homemade goodness.
Ingredients & Kitchen Tools
To embark on your apple pie adventure, gather the following:
For the Filling:
- 6-8 medium baking apples: (e.g., Honeycrisp, Granny Smith, Fuji) – A mix offers complex flavors and textures.
- ½ cup granulated sugar: (Adjust to apple sweetness) – Provides sweetness.
- ¼ cup packed light brown sugar: (Adds depth and molasses notes) – Enhances flavor.
- 2 tablespoons all-purpose flour: (Thickens the filling) – Crucial for consistency.
- 1 teaspoon ground cinnamon: (Classic spice pairing) – Adds warmth.
- ¼ teaspoon ground nutmeg: (Subtle spice complement) – Balances the cinnamon.
- ⅛ teaspoon ground cloves: (Optional, for a deeper spice kick) – Adds complexity.
- 1 tablespoon lemon juice: (Prevents browning, brightens flavor) – Essential for freshness.
- 2 tablespoons unsalted butter: (Adds richness and gloss) – Melts into the filling beautifully.
For the Apple Pie Crust (makes double crust):
- 2 ½ cups all-purpose flour: (Foundation for a flaky crust) – The base.
- 1 teaspoon salt: (Enhances flavor, balances sweetness) – Crucial.
- 1 cup (2 sticks) unsalted butter: (Chilled and cut into ½-inch cubes) – Creates flakiness.
- ½ cup ice water: (Adjust as needed, keeps butter cold) – Binds the dough without overworking.
- 1 large egg, beaten: (For egg wash) – Creates a golden-brown crust.
- 1 tablespoon granulated sugar: (For sprinkling on top) – Adds sparkle and crunch.
Kitchen Tools & Utensils:
- 9-inch pie plate: (Standard size) – Holds your pie.
- Large mixing bowls: (For apples and dough) – Essential.
- Pastry blender or food processor: (For cutting in butter) – Speeds up crust making.
- Rolling pin: (For rolling out dough) – Key for even thickness.
- Paring knife and apple peeler: (For preparing apples) – Makes prep easier.
- Measuring cups and spoons: (For precise measurements) – Accuracy is key.
- Whisk: (For egg wash) – Simple mixing.
- Pastry brush: (For egg wash) – Even application.
- Wire cooling rack: (For cooling pie) – Prevents soggy bottom.
Prep Time & Cooking Schedule
- Prep Time: 45 minutes (approx.) – This includes preparing apples and the dough.
- Chill Time (Crust): 30-60 minutes – Crucial for flaky crust, allows gluten to relax.
- Cook Time: 50-60 minutes – Baking until golden and bubbly.
- Resting Time: 2-3 hours – Absolutely vital for the filling to set properly and prevent a soupy pie when sliced. Don’t rush this!
Plan to start your apple pie preparations earlier in the day if you want to enjoy it warm for dessert, or even the day before to allow for full cooling and setting overnight.
Step-by-Step Instructions
1. Prepare the Apple Pie Crust:
* In a large bowl, whisk together flour and salt. Cut in the cold butter using a pastry blender or your fingertips until the mixture resembles coarse meal with some pea-sized pieces of butter remaining.
* Gradually add ice water, one tablespoon at a time, mixing until just combined. Do not overmix! The dough should just hold together.
* Divide the dough in half, flatten each into a disk, wrap tightly in plastic, and refrigerate for at least 30 minutes (or up to 2 days). Chilling is key for a tender, flaky crust.
2. Prepare the Apple Filling:
* Peel, core, and slice your apples into ¼-inch thick pieces. Place them in a large bowl.
* Add granulated sugar, brown sugar, flour, cinnamon, nutmeg, cloves (if using), and lemon juice to the apples. Toss gently to coat evenly. Set aside to let the flavors meld and juices release while you roll out the crust.
3. Assemble the Pie:
* On a lightly floured surface, roll out one disk of dough into a 12-inch circle. Carefully transfer it to your 9-inch pie plate. Trim the edges, leaving about a ½-inch overhang.
* Pour the apple filling into the crust-lined pie plate. Dot the top of the filling with the 2 tablespoons of butter.
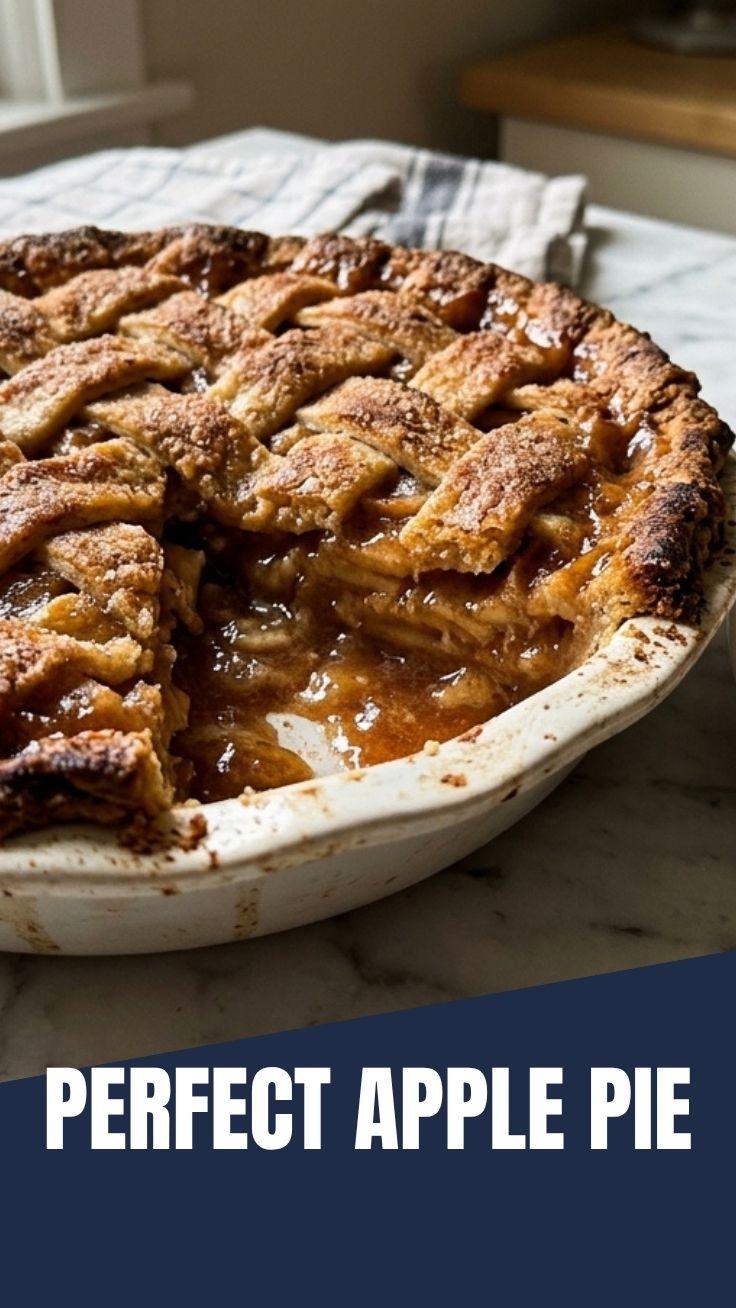
* Roll out the second disk of dough. You can either place it directly over the filling, cut it into strips for a lattice top, or create decorative shapes.
* Trim the top crust, leaving about a ½-inch overhang. Press the top and bottom crusts together, then crimp the edges decoratively.
* Cut several slits in the top crust (or lattice) to allow steam to escape during baking.
4. Bake the Apple Pie:
* Preheat your oven to 400°F (200°C).
* In a small bowl, whisk the egg with a tablespoon of water to make an egg wash. Brush the top crust with the egg wash and sprinkle with the remaining tablespoon of granulated sugar.
* Bake for 15 minutes, then reduce the oven temperature to 375°F (190°C) and continue baking for 35-45 minutes, or until the crust is golden brown and the filling is bubbly. If the crust browns too quickly, tent loosely with foil.
* Allow the pie to cool completely on a wire rack for at least 2-3 hours before slicing and serving. This allows the filling to set properly.
Nutritional Benefits & Advantages
Apples, the star of this pie, are packed with dietary fiber, which aids digestion and promotes satiety. They also contain essential vitamins like Vitamin C and various antioxidants, contributing to overall well-being. Using fresh, natural ingredients means you control the amount of sugar and fat, making this a more wholesome dessert than many store-bought alternatives. The complex carbohydrates from the crust and apples provide sustained energy, satisfying your sweet tooth without a sudden sugar crash.
Tips, Variations & Cooking Advice
- Flavor Variations: Add a splash of bourbon or brandy to the apple filling for a sophisticated twist. Incorporate a pinch of ground ginger or cardamom for added warmth.
- Ingredient Swaps: For a gluten-free pie, use a high-quality gluten-free all-purpose flour blend for the crust. Plant-based butter alternatives can be used for a dairy-free version, though the texture might vary slightly.
- Alternative Cooking Methods: While baking is traditional, some prefer to pre-cook the apples slightly on the stovetop to reduce baking time and ensure a tender filling, especially with harder apple varieties.
- Portion Changes: For individual servings, consider making mini apple pies in ramekins or muffin tins (adjust baking time accordingly).
Common Mistakes to Avoid
- Overworking the Dough: This develops gluten, leading to a tough, bready crust instead of a tender, flaky one. Mix just until combined.
- Warm Butter: If your butter isn’t very cold for the Apple Pie Crust, it will melt into the flour, resulting in a less flaky texture.
- Not Chilling the Dough: Chilling is essential for the butter to firm up and for the gluten to relax, making the dough easier to roll and ensuring a flaky final product.
- Not Slitting the Top Crust: Without vents, steam builds up, potentially rupturing the crust or making the pie soggy.
- Slicing Too Soon: This is perhaps the most common mistake! Slicing a hot pie leads to a liquidy, unformed filling. Patience is truly a virtue here. The starches in the apples need time to set as the pie cools.
- Uneven Apple Slices: This can lead to some apple pieces being overcooked and mushy while others are still firm. Consistent slicing promotes even cooking.
Storage & Meal Prep Tips
Leftover Apple Pie can be stored at room temperature, covered loosely with foil or plastic wrap for up to 2 days. For longer storage, refrigerate for up to 5 days. Though it’s best enjoyed fresh, it can be frozen for up to 3 months. To freeze, wrap the cooled pie tightly in several layers of plastic wrap and then foil. Thaw overnight in the refrigerator and reheat in a 350°F (175°C) oven for about 20-30 minutes, or until warmed through, to re-crisp the crust. Individual slices can also be gently reheated in the microwave for a quicker option, though the crust won’t be as crisp.
Conclusion
Crafting a homemade Apple Pie is a rewarding experience, transforming simple ingredients into a masterpiece of flavor and texture. By paying close attention to the details, from perfectly preparing the apples to mastering that flaky Apple Pie Crust, you’ll achieve a dessert that’s not only delicious but also a true expression of culinary care. Don’t be afraid to experiment with different apple varieties or spices to make it your own. We encourage you to try this recipe, savor the process, and share your delightful results with friends and family. Happy baking!
FAQs
Q1: What are the best apples for apple pie?
A1: A mix of apples is ideal! Honeycrisp, Granny Smith, Fuji, Golden Delicious, and Gala are all excellent choices. Using a combination provides a balance of sweetness, tartness, and texture.
Q2: Can I make the pie dough in advance?
A2: Absolutely! You can prepare the pie dough up to 2-3 days in advance and store it in the refrigerator, or freeze it for up to a month. Thaw in the refrigerator overnight before use.
Q3: How do I prevent a soggy bottom crust?
A3: Several tips: ensure your oven is preheated to the correct temperature, bake on a lower rack initially, use an egg wash on the bottom crust before adding filling (blind baking partway can also help), and crucially, allow the pie to cool completely before slicing.
Q4: My pie crust is too tough, what went wrong?
A4: Most likely, the dough was overmixed, developing too much gluten. Remember, mix just until the ingredients are combined and the dough barely holds together. Using very cold butter and ice water also helps prevent gluten development.
Q5: Can I reduce the sugar in the filling?
A5: Yes, you can adjust the sugar to your preference and the sweetness of your apples. Taste a sliced apple before mixing and decrease the sugar by ¼ cup if your apples are very sweet.