Unlock Flavor: Your Guide to Amazing Homemade Rotisserie Chicken
Ever wondered if you could replicate that succulent, perfectly seasoned rotisserie chicken you adore from the grocery store right in your own kitchen? The answer is a resounding yes! Preparing homemade Rotisserie Chicken Recipes isn’t just about saving money; it’s about control over ingredients, an explosion of fresh flavor, and the incredible satisfaction of a meal made with love. Forget those endless trips to the store; mastering a homemade version of this classic is easier than you think and opens up a world of culinary possibilities. Plus, learning how to make Slow Cooker Rotisserie Chicken offers unparalleled convenience for busy weeknights.
Ingredients & Kitchen Tools
Gathering your culinary arsenal is the first step to a perfect roast.
- Whole Chicken (3-4 pounds): Opt for organic or free-range for best flavor and texture. Pat it very dry before seasoning to ensure crispy skin.
- Olive Oil (2 tablespoons): Helps seasoning adhere and promotes even browning.
- Salt (1-2 tablespoons): Kosher or sea salt works best. Adjust to your preference. Essential for flavor and moisture retention.
- Black Pepper (1 teaspoon): Freshly ground is always superior. Adds a subtle bite.
- Garlic Powder (1 teaspoon): Provides a mellow, aromatic garlic flavor without burning.
- Onion Powder (1 teaspoon): Adds depth and a savory sweetness that complements chicken beautifully.
- Paprika (1 teaspoon): Smoked paprika adds a lovely smoky note; sweet paprika offers a milder flavor and vibrant color.
- Dried Thyme (1 teaspoon): Earthy and aromatic, a classic pairing with poultry.
- Lemon (1, optional): Halved and placed in the cavity for bright, zesty aroma.
- Onion (1, optional): Quartered and placed in the cavity for moisture and subtle flavor infusion.
- Fresh Rosemary/Thyme Sprigs (optional): For aromatic stuffing in the cavity.
- Roasting Pan with Rack: Essential for even cooking and allowing fat to drip away, promoting crisp skin.
- Kitchen Twine: To truss the chicken, ensuring even cooking.
- Instant-Read Meat Thermometer: Your most important tool for ensuring doneness and food safety.
- Basting Brush (optional): For applying pan juices or melted butter during cooking.
Prep Time & Cooking Schedule
- Prep Time: 15 minutes (includes seasoning and trussing)
- Cook Time: 60-90 minutes (depending on chicken size and oven)
- Resting Time: 10-15 minutes
Plan to start your culinary adventure about 1.5 to 2 hours before you intend to serve dinner, allowing ample time for both cooking and resting. The resting phase is crucial for juicy results!
Step-by-Step Instructions
1. Preheat Oven & Prep Chicken: Preheat your oven to 400°F (200°C). Remove the chicken from its packaging, discard the giblets and neck from the cavity, and thoroughly pat the chicken dry with paper towels – this is key for crispy skin!
2. Season the Bird: In a small bowl, combine salt, pepper, garlic powder, onion powder, paprika, and dried thyme. Drizzle the chicken all over with olive oil, then generously rub the seasoning mixture over the entire surface, including under the skin of the breast and thighs, if desired.
3. Stuff & Truss (Optional): If using, place lemon halves, onion quarters, and herb sprigs into the chicken cavity. Using kitchen twine, truss the chicken by tying the wings close to the body and securing the legs together. This helps the chicken cook more evenly and retain its shape.
4. Roast: Place the chicken breast-side up on a rack in a roasting pan. Roast for 60-90 minutes, or until an instant-read thermometer inserted into the thickest part of the thigh (without touching bone) registers 165°F (74°C). For the most delectable Rotisserie Chicken Recipes, consider basting with pan juices every 20-30 minutes during the last half-hour of cooking, or if aiming for an effortless Slow Cooker Rotisserie Chicken, ensure even coloring by rotating the chicken.
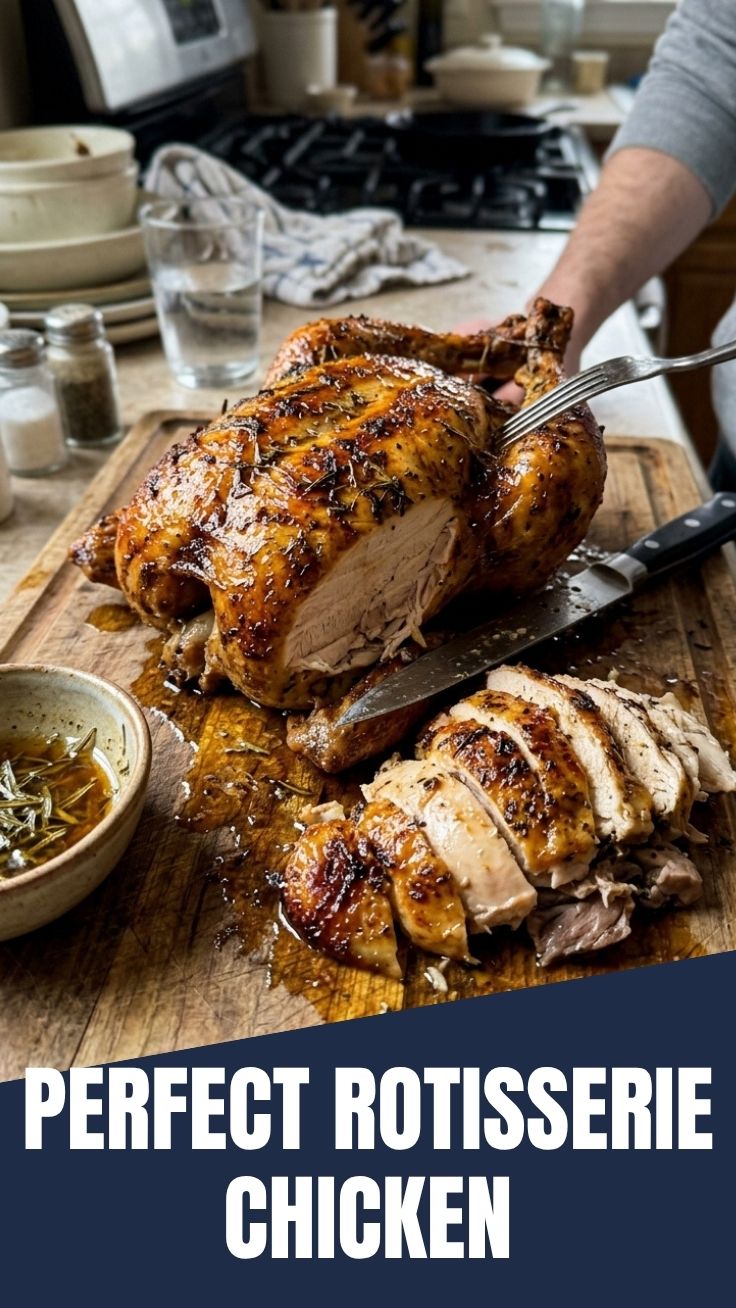
5. Rest & Carve: Once cooked, remove the chicken from the oven, transfer it to a cutting board, tent loosely with foil, and let it rest for 10-15 minutes. This allows the juices to redistribute, resulting in a more tender and flavorful bird. Carve and serve immediately.
Nutritional Benefits & Advantages
Homemade rotisserie chicken is a fantastic source of lean protein, essential for muscle repair and growth. It’s also rich in B vitamins, particularly niacin and B6, which are vital for energy production. By making it at home, you control the amount of sodium and unhealthy fats, avoiding the often excessive additives found in store-bought versions. The spices used offer various health benefits, from paprika’s antioxidants to thyme’s immune-boosting properties. Plus, a whole chicken provides nutrient-dense bone broth potential!
Tips, Variations & Cooking Advice
- Spicy Kick: Add a pinch of cayenne pepper or chili powder to your seasoning blend.
- Herbaceous Delight: Experiment with different fresh herbs like marjoram, sage, or oregano.
- Citrus Burst: Rub orange zest into the skin along with the seasoned oil for a brighter flavor profile.
- Crispy Skin Secret: For extra crispy skin, lightly dust the chicken with baking powder mixed with your salt in the seasoning blend. This helps draw out moisture.
- Brining: For an exceptionally juicy chicken, consider dry-brining it overnight with salt and seasonings.
- Air Fryer Method: For smaller chickens (under 3 lbs), an air fryer can mimic rotisserie results in less time.
- Portion Control: Easy to carve and portion according to dietary needs.
Common Mistakes to Avoid
- Not Patting Dry: Leads to soggy skin instead of crispy perfection.
- Overcrowding the Pan: Hinders air circulation, leading to uneven cooking and less crispy skin.
- Skipping the Rest: The biggest mistake! Cutting too soon results in dry chicken as all the juices run out.
- Underseasoning: Chicken needs a generous hand with salt and spices to truly shine. Don’t be shy!
- Guessing Doneness: Always use a meat thermometer. Visual cues can be misleading.
Storage & Meal Prep Tips
Leftover rotisserie chicken is a meal prep warrior!
- Refrigeration: Store carved chicken in an airtight container in the refrigerator for up to 3-4 days.
- Freezing: For longer storage, shred or dice the cooked chicken and freeze in an airtight container or freezer bag for up to 3-4 months.
- Reheating: Gently reheat in the oven (covered with foil to prevent drying), microwave, or a skillet with a splash of broth.
- Meal Ideas: Use leftovers for sandwiches, salads, quesadillas, tacos, soups, pasta dishes, or chicken pot pie.
Conclusion
Mastering homemade rotisserie chicken is a culinary triumph that offers endless versatility and delicious meals. From the incredible flavor and aroma to the satisfaction of cooking from scratch, embarking on making your own Rotisserie Chicken Recipes is incredibly rewarding. Whether you’re planning a weekend feast or aiming for the convenience of Slow Cooker Rotisserie Chicken, the juicy, tender results will speak for themselves. Give this recipe a try, experiment with your favorite seasonings, and share your delightful creations with us!
FAQs
1. Can I use a frozen chicken?
Yes, but ensure it is fully thawed in the refrigerator before seasoning and cooking. This can take 24-48 hours depending on size.
2. How do I make the skin extra crispy?
Thoroughly pat the chicken dry, consider air-drying it in the fridge for a few hours before cooking, and dust lightly with baking powder mixed with salt.
3. What vegetables can I roast with the chicken?
Root vegetables like potatoes, carrots, and onions are excellent choices. Toss them with a little oil and season with salt and pepper, and roast alongside the chicken in the pan.
4. My chicken is browning too quickly on top. What should I do?
If the skin is browning too much before the chicken is cooked through, tent it loosely with aluminum foil for the remainder of the cooking time to prevent burning.
5. How can I tell if my chicken is done without a thermometer?
While a thermometer is highly recommended, if you don’t have one, pierce the thickest part of the thigh; the juices should run clear. However, a thermometer is the only truly reliable method for food safety.