Unlock the Secret to Perfect Chocolate Chip Cookies: Your Ultimate Guide!
Have you ever craved that warm, gooey, perfectly golden Chocolate Chip Cookie, fresh from the oven, only to be disappointed by store-bought versions? There’s an undeniable magic in a homemade batch, a comfort that transcends mere sweetness. Today, we’re diving deep into crafting the ultimate Chocolate Chip Cookie Recipe, a blueprint for those delightfully chewy centers and crisp edges that will make you a legend in your own kitchen. Preparing these at home isn’t just about saving money; it’s about controlling the quality of ingredients, personalizing flavors, and enjoying the immense satisfaction of creating something truly special. Get ready to transform your baking game with our comprehensive guide to the perfect Chocolate Chip Cookies.
Ingredients & Kitchen Tools
Gather your culinary arsenal for this delicious endeavor!
- All-Purpose Flour (2 ¼ cups): The backbone of our cookies. Sifting isn’t strictly necessary but can help ensure a lighter texture.
- Baking Soda (1 teaspoon): Our leavening agent, crucial for that characteristic rise and chewiness.
- Salt (1 teaspoon): Balances the sweetness and enhances the overall flavor profile. Don’t skip it!
- Unsalted Butter (1 cup / 2 sticks, softened): Provides richness and tenderness. Softened butter creams better with sugar.
- Granulated Sugar (¾ cup): For sweetness and contributes to spreading and crispness.
- Packed Light Brown Sugar (¾ cup): Adds moisture, chewiness, and a lovely molasses flavor.
- Large Eggs (2, at room temperature): Binds ingredients together and adds structure and richness. Room temperature eggs emulsify better.
- Vanilla Extract (2 teaspoons): Essential for that classic, comforting aroma and flavor. Use good quality!
- Chocolate Chips (2 cups, semi-sweet or your preference): The star of the show! Semi-sweet offers a balanced sweetness. Consider milk chocolate for a sweeter cookie or dark chocolate for a less sweet, more intense flavor.
- Large Mixing Bowls (2): For separating wet and dry ingredients.
- Electric Mixer (stand or hand-held): For efficient creaming of butter and sugar.
- Rubber Spatula: For scraping down bowls and folding in ingredients.
- Baking Sheets: For baking your cookies.
- Parchment Paper or Silicone Baking Mats: Prevents sticking and ensures even baking.
- Cookie Scoop (optional, but recommended): For uniform cookie size and even baking.
Prep Time & Cooking Schedule
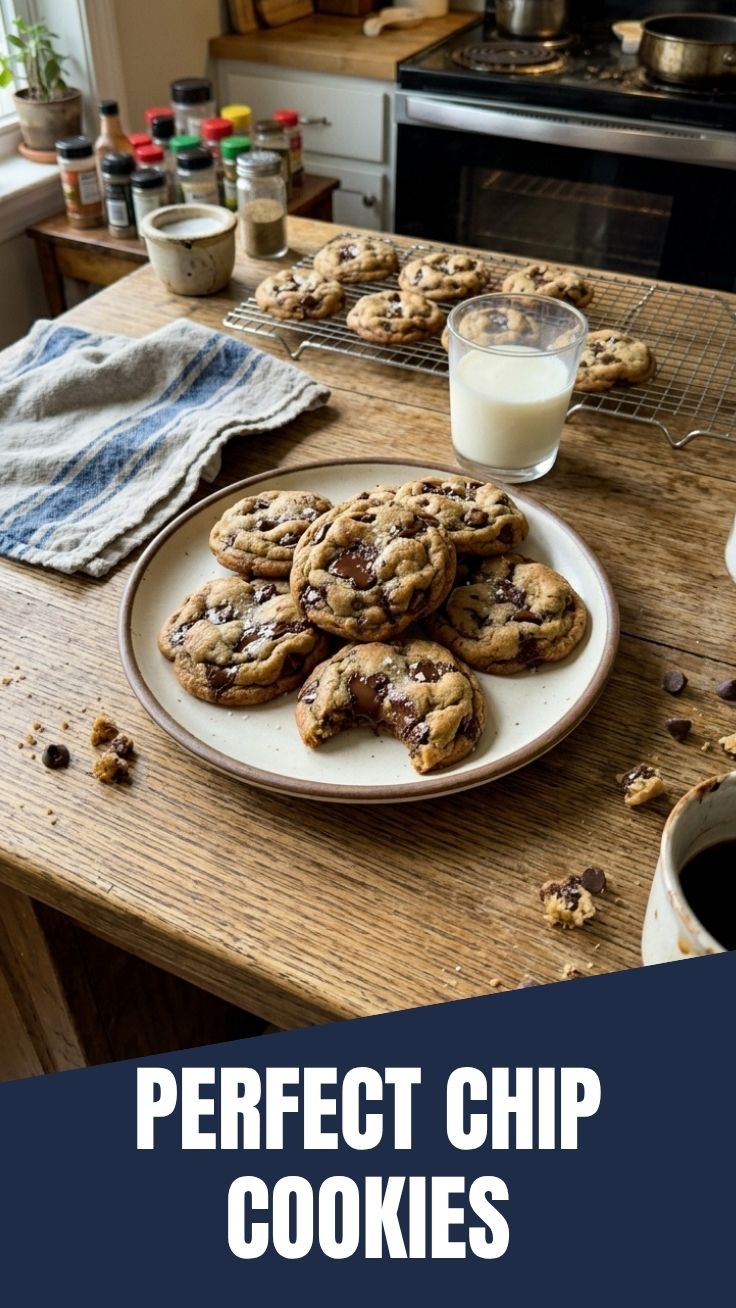
- Prep Time: 15-20 minutes (includes gathering ingredients and mixing)
- Chill Time: 30 minutes to 2 hours (optional, but highly recommended for richer flavor and better texture control)
- Cook Time: 9-12 minutes per batch
- Resting Time (after baking): 5-10 minutes on the baking sheet, then transfer to a wire rack.
This schedule allows you to fit baking into your day. The chill time is crucial; it helps the flavors meld and prevents the cookies from spreading too much, resulting in that ideal thick, gooey center.
Step-by-Step Instructions
1. Prep Your Oven & Pan: Preheat your oven to 375°F (190°C). Line baking sheets with parchment paper or silicone mats. This ensures easy removal and prevents sticking.
2. Combine Dry Ingredients: In a medium bowl, whisk together the all-purpose flour, baking soda, and salt. Set aside.
3. Cream Wet Ingredients: In a large mixing bowl, using an electric mixer, cream together the softened butter, granulated sugar, and packed light brown sugar on medium speed until light and fluffy (about 2-3 minutes). This aeration is key for tender cookies.
4. Add Eggs & Vanilla: Beat in the eggs one at a time, mixing well after each addition. Stir in the vanilla extract until just combined. Don’t overmix.
5. Gradually Add Dry to Wet: With the mixer on low speed, gradually add the dry ingredients to the wet ingredients, mixing until just combined. Be careful not to overmix the dough, as this can lead to tough cookies. Less mixing means more tender Chocolate Chip Cookies.
6. Fold in Chocolate Chips: Gently fold in the chocolate chips with a rubber spatula until evenly distributed throughout the dough.
7. Chill the Dough (Optional but Recommended): Cover the bowl with plastic wrap and refrigerate for at least 30 minutes, or up to 2 hours. This step deeply enhances the flavor and results in thicker cookies.
8. Scoop & Bake: Drop rounded tablespoons of dough (or use a cookie scoop for uniformity) onto the prepared baking sheets, leaving about 2 inches between each cookie.
9. Bake to Perfection: Bake for 9-12 minutes, or until the edges are golden brown and the centers are still slightly soft. For the perfect chewy Chocolate Chip Cookie Recipe, a slightly underbaked center is ideal.
10. Cool & Enjoy: Let the cookies cool on the baking sheets for 5-10 minutes before transferring them to a wire rack to cool completely.
Nutritional Benefits & Advantages
While these cookies are undeniably a treat, they offer some surprising advantages. Dark chocolate chips, for instance, are rich in antioxidants and flavonoids, which can contribute to heart health. Furthermore, baking at home allows you to control sugar levels and ingredient quality, potentially opting for organic butter or eggs. The fiber from the flour, though modest, also contributes to a balanced diet when consumed in moderation. Plus, the sheer joy and stress-relief derived from baking can be considered a significant mental health benefit!
Tips, Variations & Cooking Advice
- Brown Butter: For deep, nutty flavor, try browning your butter before adding it to the sugar. Just melt it slowly in a saucepan until golden brown and fragrant, then chill slightly before using.
- Salt Sprinkle: A pinch of flaky sea salt on top of the cookies right after they come out of the oven enhances the sweetness and adds a gourmet touch.
- Mixed Chocolates: Don’t limit yourself to just one type of chocolate! Combine semi-sweet, milk, and dark chocolate chips, or even throw in some chopped chocolate bars for varying textures and intensities.
- Nutty Additions: Fold in toasted chopped walnuts or pecans for an earthy crunch.
- Spice It Up: A tiny pinch of cinnamon, nutmeg, or even a dash of cayenne pepper can add an unexpected depth of flavor.
- Gluten-Free Option: Substitute the all-purpose flour with a 1:1 gluten-free baking blend that contains xanthan gum.
- Dairy-Free Option: Use plant-based butter alternatives and dairy-free chocolate chips.
Common Mistakes to Avoid
- Overmixing the Dough: This develops gluten, leading to tough, cake-like cookies instead of soft and chewy. Mix until just combined.
- Using Cold Eggs/Butter: Room temperature ingredients emulsify better, leading to a smoother, more uniform dough.
- Not Chilling the Dough: Warm dough spreads more, resulting in thinner, crispier cookies. Chilling helps control spread and deepen flavor.
- Overbaking: This is the most common sin! Cookies will continue to cook slightly after being removed from the oven. Aim for golden edges and a slightly underbaked center for optimal chewiness.
- Crowding the Baking Sheet: Give your cookies space! Overcrowding leads to uneven baking.
Storage & Meal Prep Tips
Once your Chocolate Chip Cookies have cooled completely, store them in an airtight container at room temperature for up to 3-5 days. To maintain freshness, you can place a slice of bread in the container; the cookies will absorb moisture from the bread, keeping them softer longer.
For longer storage, the dough can be frozen! Scoop individual cookie dough balls onto a parchment-lined baking sheet and freeze until solid. Then transfer the frozen dough balls to a freezer-safe bag or container and store for up to 3 months. When ready to bake, place frozen dough balls on a baking sheet and bake for a few extra minutes (12-15 minutes total), no need to thaw. Reheating leftover baked cookies briefly in the microwave or a warm oven can bring back that freshly baked warmth and gooeyness.
Conclusion
Mastering the perfect Chocolate Chip Cookies truly is a rewarding culinary journey. From the careful creaming of butter and sugar to the anticipation of that golden-brown finish, each step contributes to a symphony of flavors and textures. This comprehensive guide, embodying the essence of a truly great Chocolate Chip Cookie Recipe, equips you with the knowledge and techniques to bake with confidence and joy. Now it’s your turn – roll up your sleeves, gather your ingredients, and embark on your own cookie adventure. Share your beautiful batches with us and spread the deliciousness!
FAQs
Q1: Can I use unsalted butter instead of salted?
A: Yes, you can. If using unsalted butter, increase the added salt in the recipe by about ¼ teaspoon to compensate for the lack of salt in the butter.
Q2: My cookies are spreading too much. What went wrong?
A: This is usually due to butter being too warm, not chilling the dough, or an incorrect flour to fat ratio. Ensure your butter is just softened (not melted), chill your dough, and measure your flour accurately.
Q3: How do I get chewy centers and crispy edges?
A: The key is a good ratio of brown sugar to white sugar (brown sugar adds chewiness), chilling the dough, and slightly underbaking. Remove the cookies when the edges are golden but the centers still look a bit soft.
Q4: Can I make this dough ahead of time?
A: Absolutely! The dough can be stored in the refrigerator for up to 3 days or frozen for up to 3 months. In fact, resting the dough often deepens the flavor.
Q5: What’s the best type of chocolate to use?
A: Semi-sweet chocolate chips are a classic choice, offering balanced sweetness. For a gourmet touch, consider using chopped chocolate bars (instead of chips) for irregular, melty pockets of chocolate. You can also mix in milk or dark chocolate to suit your preference.