The Ultimate Homemade Chicken Sandwich: A Culinary Journey Beyond Fast Food
Are you tired of bland, mass-produced fast-food chicken sandwiches that leave you wanting more? Imagine sinking your teeth into a perfectly crispy, juicy, and flavor-packed Chicken Sandwich crafted right in your own kitchen. This isn’t just about preparing a meal; it’s about elevating an American classic into a gourmet experience. And with a nod to the vibrant, spicy kick of a Nashville Hot Chicken Sandwich, we’re about to explore a recipe that allows for both traditional comfort and adventurous heat. Making it at home offers unparalleled control over ingredients, freshness, and, most importantly, flavor. Forget the drive-thru; your culinary adventure starts now!
Ingredients & Kitchen Tools
Boneless, Skinless Chicken Thighs (4 large or 6 medium): Thighs offer more flavor and moisture than breast meat. Substitution: Chicken breast can be used, but adjust cooking time to prevent drying.*
- Buttermilk (2 cups): Tenderizes the chicken and forms the base of the breading.
All-Purpose Flour (2 cups): For a crispy coating. Substitution: Gluten-free flour blend for dietary needs.*
- Cornstarch (1/2 cup): Adds extra crispiness to the breading.
- Smoked Paprika (1 tbsp): For color and a smoky depth of flavor.
- Garlic Powder (1 tbsp): Essential aromatic.
- Onion Powder (1 tbsp): Complements the garlic.
- Cayenne Pepper (1-2 tsp, adjust to taste): For a subtle kick, or more for a Nashville Hot Chicken Sandwich style.
- Salt (2 tsp, or to taste): Enhances all flavors.
- Black Pepper (1 tsp, freshly ground): Adds pungency.
- Hot Sauce (1/4 cup, e.g., Frank’s RedHot): For the optional hot oil variation.
- Butter (1/2 cup, unsalted): Base for the hot oil.
- Brown Sugar (1 tbsp): Balances the heat in the hot oil.
- Hamburger Buns (4-6, brioche recommended): Soft and slightly sweet, perfect for soaking up juices.
- Dill Pickle Slices: A mandatory tangy counterpoint.
- Mayonnaise (1/2 cup): For spreading.
- Oil for Frying (4-6 cups, e.g., peanut, canola, vegetable): High smoke point oil.
- Large, Deep Pot or Dutch Oven: For safe deep frying.
- Wire Rack with Baking Sheet: For draining excess oil.
- Tongs: For handling chicken.
- Meat Thermometer: For ensuring safe internal temperature.
- Shallow Dishes (3): For breading station.
Prep Time & Cooking Schedule
- Prep Time: 20 minutes
- Marinating Time: 2-4 hours (or overnight for best results)
- Cook Time: 20-25 minutes
- Resting Time (Chicken): 5 minutes
Plan to marinate your chicken earlier in the day or even the night before. This crucial step contributes significantly to the tenderness and flavor, especially if you’re aiming for a juicy internal texture reminiscent of a premier chicken establishment.
Step-by-Step Instructions
1. Marinate the Chicken: Pat chicken thighs dry. In a bowl, combine chicken and buttermilk. Ensure chicken is fully submerged. Cover and refrigerate for at least 2 hours, preferably overnight. This tenderizes the meat and prepares it for optimal breading adherence, a crucial step for the best Chicken Sandwich.
2. Prepare Breading Mixture: In a shallow dish, whisk together flour, cornstarch, smoked paprika, garlic powder, onion powder, cayenne pepper, salt, and black pepper.
3. Breading the Chicken: Remove chicken from buttermilk, allowing excess to drip off. Dredge each thigh in the seasoned flour mixture, pressing firmly to ensure a thick, even coating. Place breaded chicken on a wire rack while you heat the oil.
4. Heat Frying Oil: Pour frying oil into a deep pot or Dutch oven, ensuring it’s at least 3-4 inches deep. Heat oil to 350°F (175°C). Use a thermometer for accuracy.
5. Fry the Chicken: Carefully lower 1-2 chicken thighs into the hot oil, ensuring not to overcrowd the pot. Fry for 6-8 minutes per side, or until golden brown and internal temperature reaches 165°F (74°C).
6. Drain Chicken: Transfer cooked chicken to a clean wire rack set over a baking sheet to drain excess oil. Season lightly with extra salt immediately.
7. Optional Hot Oil (for Nashville Hot Chicken Sandwich style): While chicken is resting, melt butter in a small saucepan. Stir in hot sauce, brown sugar, and a pinch of cayenne (if desired). Brush or drizzle this hot oil generously over the still-warm fried chicken.
8. Toast Buns: Lightly butter and toast hamburger buns in a pan or broiler until golden.
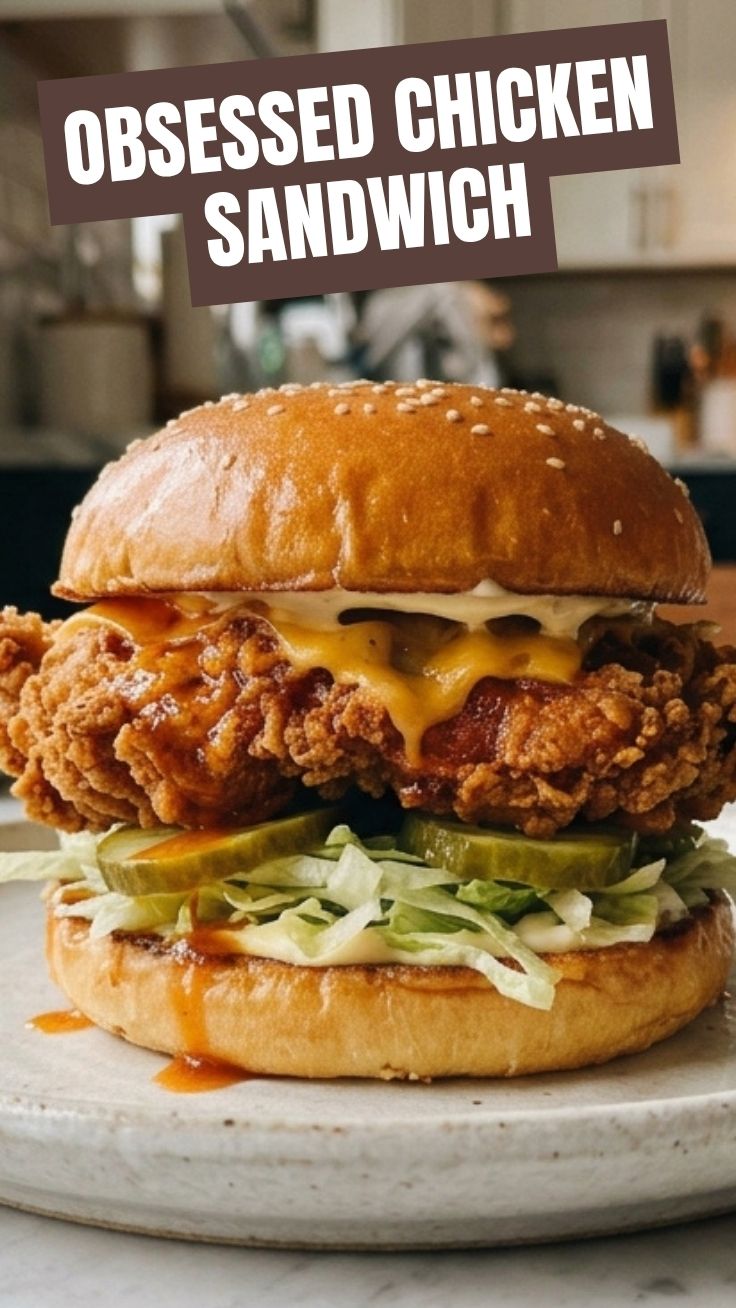
9. Assemble Sandwiches: Spread mayonnaise on both halves of the toasted bun. Place a crispy chicken thigh on the bottom bun, top with plenty of dill pickle slices, and then the top bun. Serve immediately!
Nutritional Benefits & Advantages
Chicken thighs are a good source of protein, essential for muscle repair and growth. While frying adds calories, preparing it at home allows for control over the type of oil used and portion sizes. This recipe also provides healthy fats, and if you opt for whole wheat buns, you’ll increase your fiber intake. The spices used, like cayenne, have metabolic benefits.
Tips, Variations & Cooking Advice
- Spicy Kick: For an authentic NASHVILLE HOT CHICKEN SANDWICH, increase cayenne in the breading and especially in the hot oil. Add a pinch of ghost pepper powder for extreme heat!
- Flavor Boost: Add a teaspoon of smoked paprika or old bay seasoning to your buttermilk marinade.
- Alternative Cooking: You can air fry or bake the chicken for a lighter version, though the crispiness won’t be quite the same. Air fry at 375°F (190°C) for 18-20 minutes, flipping halfway.
- Gluten-Free: Use a good quality gluten-free flour blend for breading.
- Sauces: Experiment with different sauces like honey mustard, sriracha mayo, or a homemade special sauce.
- Toppings: Add coleslaw, cheese, or sliced tomatoes for extra crunch and flavor.
Common Mistakes to Avoid
- Overcrowding the Pot: This lowers oil temperature, resulting in soggy chicken. Fry in batches.
- Not Marinating Long Enough: Leads to less tender, less flavorful chicken. Don’t skip or shorten this step significantly.
- Underseasoning: Don’t be shy with salt and pepper in both the marinade and breading mixture.
- Incorrect Oil Temperature: Too low, and chicken is greasy; too high, and the outside burns before the inside cooks. Use a thermometer.
- Skimping on Pickles: Pickles are essential to cut through the richness of the fried chicken.
Storage & Meal Prep Tips
Cooked chicken can be stored in an airtight container in the refrigerator for up to 3-4 days. To maintain crispiness, it’s best to reheat in an air fryer or oven at 350°F (175°C) for 10-15 minutes, rather than a microwave, which can make it soggy. For meal prepping, fry the chicken, store it separately, and assemble sandwiches just before eating to prevent buns from getting soggy.
Conclusion
Crafting your own Chicken Sandwich at home is a rewarding experience that blows any fast-food option out of the water. With its perfectly seasoned, crispy exterior and juicy, tender interior, this recipe is a game-changer. Whether you stick to the classic preparation or dial up the heat for a fiery Nashville Hot Chicken Sandwich, you’re guaranteed a meal that’s both satisfying and impressive. So, gather your ingredients, follow these steps, and prepare to delight your taste buds. We encourage you to try this recipe and share your creations – your homemade masterpiece awaits!
FAQs
- Q: Can I use chicken breast instead of thighs?
A: Yes, but chicken breast is leaner, so be careful not to overcook it. Reduce frying time slightly.
- Q: How do I know when the oil is hot enough without a thermometer?
A: You can drop a tiny pinch of flour into the oil. If it immediately sizzles and floats, the oil is ready. However, a thermometer is highly recommended for best results.
- Q: What type of hot sauce is best for the Nashville-style oil?
A: Frank’s RedHot is a popular choice for its classic flavor, but any vinegar-based hot sauce will work well.
- Q: Can I prepare the chicken ahead of time for frying later?
A: You can marinate the chicken overnight. Breading it right before frying is best to ensure maximum crispiness.
- Q: How can I make the breading stick better?
A: Ensure your chicken is removed from the buttermilk with excess dripping off, then press the flour mixture firmly onto the chicken to create a good adhesion layer.