Ultimate Smoked Brisket: Master the Art of Low and Slow Perfection at Home
Ever dreamed of replicating that melt-in-your-mouth, smoky perfection of authentic Smoked Brisket right in your own backyard? Home-cooked brisket isn’t just a meal; it’s an experience, a triumph of culinary patience. Moving beyond the restaurant scene, mastering this classic at home means complete control over flavor, tenderness, and that irresistible bark. This guide will demystify the process, transforming what many consider a daunting task into a rewarding journey, bringing the true essence of Texas BBQ right to your table.
Ingredients & Kitchen Tools
Crafting the perfect Smoked Brisket requires quality ingredients and the right gear.
Ingredients:
- 10-14 lb Full Packer Brisket: Untrimmed, USDA Prime or Choice grade for optimal fat and marbling.
- 1/2 cup Coarse Black Pepper: Freshly cracked for robust flavor.
- 1/2 cup Coarse Kosher Salt: Essential for a flavorful bark.
- 1/4 cup Granulated Garlic: Adds a pungent, savory depth.
- 1/4 cup Paprika (optional): For color and a hint of sweetness.
- Apple Cider Vinegar (in a spray bottle): For spritzing and moisture.
- Wood Chunks/Pellets: Oak, hickory, or pecan are classic for Texas BBQ.
Kitchen Tools:
- Smoker (Pellet, Offset, or Electric): Essential for maintaining consistent low temperatures.
- Meat Thermometer (Leave-in probe & Instant-read): Crucial for monitoring internal temperature accurately.
- Butcher Paper (Pink unwaxed): For wrapping the brisket during the stall. Aluminum foil can be used as an alternative, but butcher paper allows for better bark development.
- Sharp Brisket Knife: For precise trimming and slicing.
- Large Cutting Board: To handle the full packer brisket.
- Gloves (Heat-resistant & Nitrile): For safe handling and seasoning.
- Aluminum Foil Pan: For resting the brisket.
Prep Time & Cooking Schedule
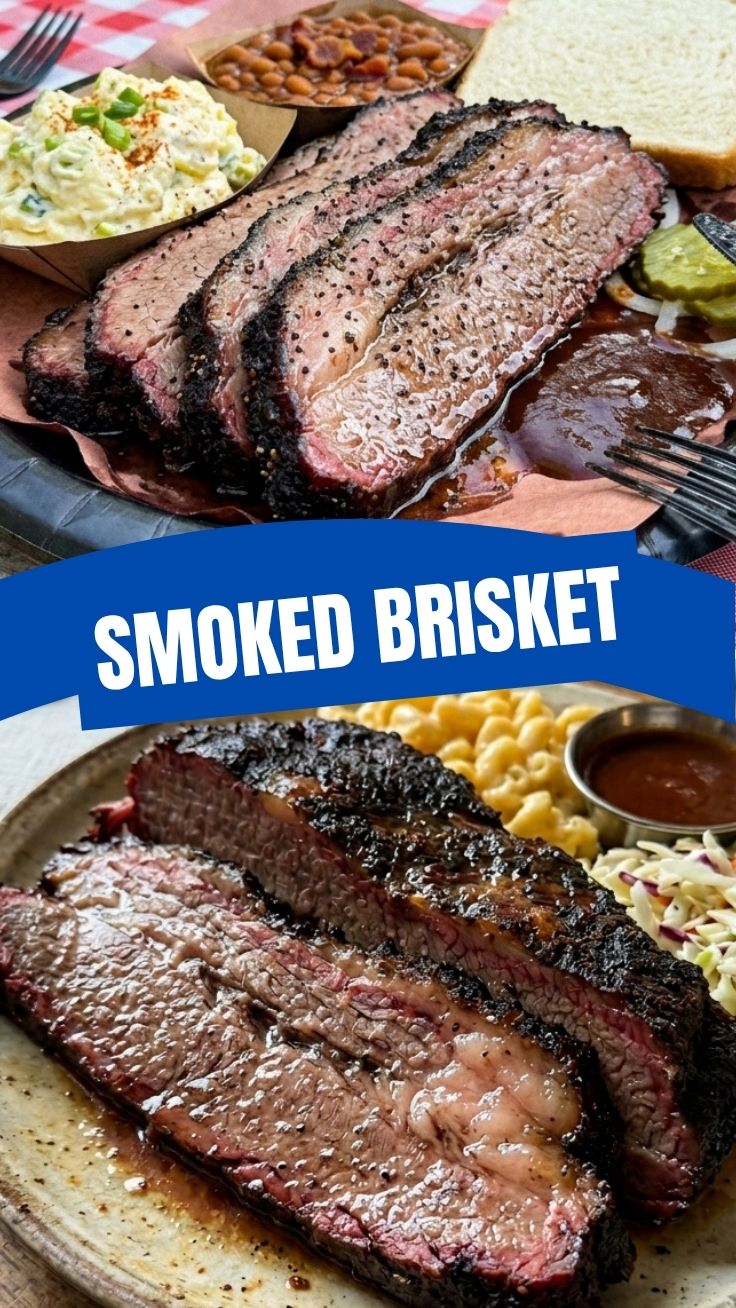
Planning is key for this culinary marathon.
- Prep Time: 30-45 minutes (trimming, seasoning)
- Cook Time: 1 to 1.5 hours per pound (approximately 10-18 hours for a 10-14 lb brisket)
- Resting Time: 2-4 hours (absolutely critical for tenderness)
- Total Time: Plan for a full day, or an overnight cook, to allow for the extensive cooking and resting periods. Starting early in the morning or the evening before ensures you’re not rushing the crucial resting phase.
Step-by-Step Instructions
Follow these steps for a truly exceptional Smoked Brisket experience.
1. Trim the Brisket: Trim the hard, excess fat from the fat cap to about 1/4 inch thickness. Remove any silver skin and hard fat pockets between the flat and the point. This ensures even cooking and allows smoke to penetrate.
2. Apply the Rub: Evenly coat the entire brisket with your salt, pepper, garlic, and optional paprika rub. Press it firmly into the meat to create a good bark foundation. Allow it to sit at room temperature for an hour, or refrigerate overnight for deeper flavor penetration.
3. Preheat Your Smoker: Set your smoker to a consistent temperature between 225°F and 275°F (250°F is often ideal). Add your preferred wood chunks/pellets and ensure a clean, blue smoke.
4. Smoke the Brisket: Place the brisket fat-side up (or towards the primary heat source) in the smoker. Insert your probe thermometer into the thickest part of the flat, avoiding large pockets of fat. Maintain consistent temperature.
5. The Spritz (Optional but Recommended): After 3-4 hours, or when the bark has set, begin spritzing the brisket with apple cider vinegar every hour or so. This helps keep the surface moist and promotes bark development.
6. The Stall & The Wrap: When the internal temperature reaches 150-165°F, the “stall” will likely occur. The temperature will plateau or even drop due to evaporative cooling. This is the time to wrap. Lay out two long sheets of butcher paper (or foil), place the brisket fat-side up on it, and wrap it tightly. Return it to the smoker. This push through the stall and tenderizes the meat, creating an amazing outcome for your Texas BBQ.
7. Finish Cooking: Continue cooking until the internal temperature reaches 200-205°F, or until the brisket is “probe tender” – meaning the thermometer slides in with very little resistance, like butter. This is a more reliable indicator than temperature alone.
8. The Rest: This is arguably the most crucial step. Once tender, remove the wrapped brisket from the smoker and place it in an aluminum foil pan. Loosely cover it with foil (if not already foil-wrapped), and let it rest at room temperature or in a faux Cambro (cooler) for at least 2 hours, preferably 3-4 hours. This allows the juices to redistribute, resulting in incredibly moist and tender meat.
9. Slice and Serve: Against the grain, slice the flat into pencil-thin slices. For the point, you can cube it for burnt ends or slice it thicker.
Nutritional Benefits & Advantages
Brisket, while rich, offers significant nutritional benefits. It’s a high-quality source of protein, essential for muscle repair and growth. It’s also packed with iron and B vitamins, vital for energy production and overall health. When smoked, the fat renders out, and if trimmed properly, it can be enjoyed as part of a balanced diet. The slow cooking process also makes the meat incredibly digestible.
Tips, Variations & Cooking Advice
- Wood Selection: Experiment with different wood types. Oak is classic for Texas BBQ, but pecan offers a nutty sweetness, and hickory provides a stronger, bolder smoke flavor.
- Rub Variations: While salt and pepper are traditional, feel free to add a touch of brown sugar for sweetness, chili powder for a kick, or onion powder for extra depth.
- Injecting: For very dry briskets or for an extra moisture boost, some pitmasters inject their brisket with beef broth or a mixture of broth and apple juice.
- Burnt Ends: The fatty, flavorful point can be separated after the initial cook, cubed, tossed in BBQ sauce, and returned to the smoker for another 2-3 hours to create delicious burnt ends.
Common Mistakes to Avoid
- Under-trimming or Over-trimming: Too much fat prevents bark formation; too little leads to dry meat. Aim for 1/4 inch fat cap.
- Cooking at Too High a Temperature: Low and slow is key. High temps will cause the fat to render too quickly, resulting in tough, dry meat.
- Skipping the Stall: Don’t panic when the temperature stops rising. This is normal. Wrap it and power through.
- Not Resting Long Enough: The biggest mistake! Rest time is non-negotiable for tender, juicy brisket.
- Slicing with the Grain: Always slice against the grain to maximize tenderness.
Storage & Meal Prep Tips
Leftover Smoked Brisket stores beautifully.
- Refrigeration: Store sliced or unsliced brisket in an airtight container for up to 3-4 days. For best results, keep it in its own rendered juices.
- Freezing: For longer storage, tightly wrap individual portions in plastic wrap and then foil, or vacuum seal. Freeze for up to 3 months.
- Reheating: The best way to reheat is low and slow. Place sliced brisket, perhaps with a splash of beef broth or its own juices, in a foil-covered pan in an oven at 250-275°F until warmed through. Alternatively, microwave on low power, checking frequently.
Conclusion
Mastering Smoked Brisket at home is a journey of patience, precision, and passion. By following this comprehensive guide, you’ll unlock the secrets to a tender, juicy, and flavor-packed brisket that will impress even the most discerning palate. The rich, smoky essence of true Texas BBQ is now within your reach. Don’t be afraid to experiment, trust your instincts, and most importantly, enjoy the process. Share your triumphant brisket creations in the comments below – we’d love to hear about your experience!
FAQs
Q1: How do I know when my brisket is “probe tender”?
A1: Probe tenderness means your instant-read thermometer or skewer slides into the meat with very little resistance, like pushing it through butter or peanut butter. This is a better indicator than a specific temperature after 200°F.
Q2: Can I use aluminum foil instead of butcher paper for wrapping?
A2: Yes, you can. Aluminum foil creates a tighter seal, steaming the brisket more, which can make it exceptionally tender but might soften the bark slightly. Butcher paper allows for some breathability, preserving a crispier bark while still helping to push through the stall.
Q3: My brisket came out dry. What went wrong?
A3: This is often due to overcooking (cooking beyond probe tender), insufficient resting time, or not wrapping during the stall. Ensure you let it rest for at least 2-4 hours, as this is crucial for moisture redistribution.
Q4: What’s the best wood for a classic smoked brisket?
A4: For traditional Texas BBQ, oak wood is supreme, offering a robust, clean smoke. Hickory or pecan are also excellent choices, providing slightly different flavor profiles.
Q5: How can I make burnt ends from the point?
A5: After the brisket finishes cooking and rests, separate the point and trim off any excess fat. Cube the point into 1-inch pieces, toss with your favorite BBQ sauce, and return to the smoker or oven at 250°F for another 1-2 hours until caramelized and tender.