Bake the Best Peanut Butter Cookies: A Comprehensive Guide
Isn’t there something incredibly comforting and nostalgic about a freshly baked batch of Peanut Butter Cookies? That perfect balance of sweet and salty, the unmistakable aroma filling your kitchen – it’s pure bliss. While store-bought options exist, there’s an undeniable satisfaction and superior flavor that comes from preparing this classic treat yourself. Mastering a truly delicious peanut butter cookie recipe at home not only guarantees freshness and quality but also allows you to customize it to your exact preferences. Dive into this guide for the ultimate homemade experience.
Ingredients & Kitchen Tools
Crafting the perfect batch of these delightful cookies requires a few simple ingredients and basic kitchen tools. This particular peanut butter cookie recipe prioritizes accessibility and delicious results.
Ingredients:
- 1 cup (2 sticks) unsalted butter, softened: Provides richness and tender texture. Unsalted butter allows for better control over the overall saltiness.
- 1 cup granulated sugar: For sweetness and crisp edges.
- 1 cup packed light brown sugar: Adds moisture, depth of flavor, and chewiness.
- 1 cup creamy peanut butter: The star ingredient! Opt for a classic processed peanut butter (like Jif or Skippy) for consistent texture and flavor. Natural peanut butter can be used but may result in a slightly drier, more crumbly cookie due to oil separation.
- 2 large eggs: Binds the ingredients and adds structure.
- 1 teaspoon vanilla extract: Enhances all the flavors. Pure vanilla extract is always recommended.
- 2 ½ cups all-purpose flour: The primary dry ingredient, providing structure.
- 1 teaspoon baking soda: Helps the cookies rise and spread slightly.
- ½ teaspoon salt: Balances the sweetness and enhances the peanut butter flavor.
- (Optional) ½ cup peanut butter chips or chocolate chips: For an extra burst of flavor and texture.
Kitchen Tools:
- Large mixing bowls (2): For wet and dry ingredients.
- Electric mixer (stand or hand-held): Essential for creaming butter and sugars, ensuring a smooth batter.
- Measuring cups and spoons: For accurate ingredient quantities.
- Rubber spatula: For scraping down bowls and mixing.
- Baking sheets: Preferably light-colored ones to prevent over-browning.
- Parchment paper or silicone baking mats: Prevents sticking and ensures even baking.
- Fork: For creating the classic crisscross pattern.
- Wire cooling rack: For cooling the cookies completely.
Prep Time & Cooking Schedule
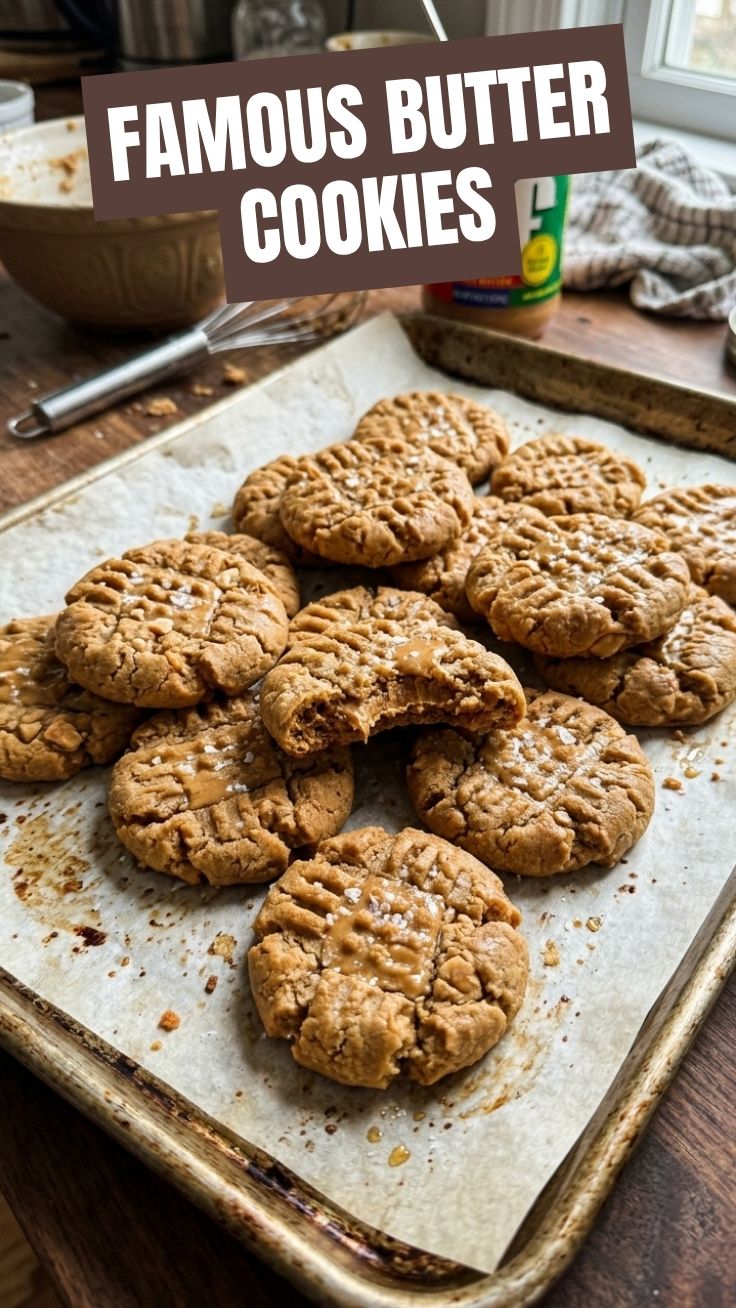
Planning your baking session is key to a stress-free experience. This Peanut Butter Cookies recipe is relatively quick and straightforward.
- Prep Time: 15-20 minutes (includes gathering ingredients, mixing the dough).
- Chilling Time: 30 minutes (minimum, but up to 2 hours is ideal for flavor development and less spreading). This step is crucial for the best texture!
- Cook Time: 8-12 minutes per batch.
- Resting Time (after baking): 5 minutes on the baking sheet, then transfer to a wire rack to cool completely.
Allow approximately 1 hour and 30 minutes from start to finish, including chilling time.
Step-by-Step Instructions
Follow these detailed steps to achieve perfect Peanut Butter Cookies every time. This comprehensive peanut butter cookie recipe will guide you through each stage.
1. Preheat Oven & Prepare Baking Sheets: Preheat your oven to 375°F (190°C). Line two baking sheets with parchment paper or silicone baking mats.
2. Combine Dry Ingredients: In a medium bowl, whisk together the all-purpose flour, baking soda, and salt. Set aside.
3. Cream Wet Ingredients: In a large mixing bowl, using an electric mixer on medium speed, cream together the softened butter, granulated sugar, and brown sugar until light and fluffy (about 2-3 minutes).
4. Add Peanut Butter & Eggs: Beat in the creamy peanut butter until well combined. Then, add the eggs one at a time, beating well after each addition, followed by the vanilla extract. Scrape down the sides of the bowl as needed to ensure everything is fully incorporated.
5. Gradually Add Dry to Wet: With the mixer on low speed, gradually add the dry ingredients to the wet ingredients, mixing until just combined. Be careful not to overmix, as this can lead to tough cookies. If using, fold in the peanut butter chips or chocolate chips now.
6. Chill Dough: Cover the dough with plastic wrap and chill in the refrigerator for at least 30 minutes. This helps prevent spreading and enhances flavor.
7. Scoop & Shape: Once chilled, scoop heaping tablespoons of dough and roll them into 1-inch balls. Place them about 2 inches apart on the prepared baking sheets.
8. Create Crisscross Pattern: Using the tines of a fork, gently press down on each cookie dough ball to create a crisscross pattern. This helps them bake evenly and gives them their classic look.
9. Bake: Bake for 8-12 minutes, or until the edges are lightly golden, and the centers are just set. Do not overbake, or they will be dry.
10. Cool: Remove the baking sheets from the oven and let the cookies cool on the sheets for 5 minutes before transferring them to a wire cooling rack to cool completely.
Nutritional Benefits & Advantages
Beyond their irresistible taste, these cookies offer some surprising benefits. Peanut butter is a good source of protein and healthy fats, contributing to satiety and providing sustained energy. They also contain fiber, vitamins (like E and B3), and minerals (magnesium, phosphorus, zinc). While still a treat, homemade versions like this specific Peanut Butter Cookies recipe allow for control over sugar and fat content compared to many store-bought options, making them a more wholesome indulgence.
Tips, Variations & Cooking Advice
- For Crispier Cookies: Slightly increase the baking time by 1-2 minutes, but watch carefully to prevent burning.
- Chewy Perfection: Ensure you don’t overbake. The cookies should still look slightly soft in the center when removed from the oven, as they will continue to set as they cool.
- Dietary Adaptations:
* Gluten-Free: Substitute the all-purpose flour with a 1:1 gluten-free baking flour blend containing xanthan gum.
* Dairy-Free: Use a dairy-free butter substitute in equal measure.
- Flavor Variations:
* Chocolate Peanut Butter: Add a cup of chocolate chips to the dough.
* Spiced: A pinch of cinnamon or nutmeg can add a warm, cozy note.
* Peanut Butter & Jelly: Create a thumbprint cookie by pressing an indentation in the center of each dough ball before baking, then filling with a small spoonful of your favorite jam after baking.
Common Mistakes to Avoid
- Overmixing the Dough: This develops gluten, leading to tough, cakey cookies. Mix just until combined.
- Not Chilling the Dough: Warm dough spreads too much, resulting in thin, flat, and greasy cookies. Chilling is essential!
- Overbaking: The most common mistake! Cookies will become dry and crumbly. They should still look slightly underdone in the center when you pull them out.
- Using Natural Peanut Butter (without adjusting): While healthier, natural peanut butter can make cookies crumbly. If using, you might need to add a tablespoon or two of extra flour or reduce the peanut butter slightly.
Storage & Meal Prep Tips
- Storage: Store cooled Peanut Butter Cookies in an airtight container at room temperature for up to 5-7 days.
- Freshness: To maintain optimal freshness, you can place a slice of bread in the container with the cookies; the bread will absorb moisture, keeping the cookies soft.
- Freezing Baked Cookies: Arrange cooled cookies in a single layer on a baking sheet and freeze until solid (1-2 hours). Transfer to a freezer-safe bag or container, separating layers with parchment paper. They will last for up to 3 months. Thaw at room temperature.
- Freezing Dough: Form the dough into balls, flatten with a fork, and freeze on a baking sheet until solid. Transfer to a freezer-safe bag. Bake directly from frozen, adding an extra 2-4 minutes to the baking time. This is excellent for meal prep and having fresh cookies on demand!
Conclusion
There you have it – the ultimate guide to baking the most delicious Peanut Butter Cookies. This detailed peanut butter cookie recipe, packed with tips and tricks, guarantees a batch of tender, chewy, and perfectly balanced cookies every time. Don’t hesitate to whisk up a batch today; your taste buds will thank you! We’d love to hear about your baking adventures. Share your results and any creative twists you added in the comments below!
FAQs
Q1: Can I use crunchy peanut butter instead of creamy?
A1: Yes, you can! Crunchy peanut butter will add a pleasant textural crunch to your cookies. The recipe ratios should remain the same.
Q2: My cookies are spreading too much. What went wrong?
A2: This usually happens if your butter was too soft, the dough wasn’t chilled enough, or you used natural peanut butter with excess oil. Ensure your butter is just softened (not melted) and always chill your dough for at least 30 minutes.
Q3: How do I know when the cookies are done baking?
A3: The edges should be lightly golden, and the centers should appear just set, perhaps still a little soft. They will firm up as they cool. Err on the side of underbaking rather than overbaking for a chewier cookie.
Q4: Can I make these cookies without an electric mixer?
A4: Absolutely! You can use a sturdy whisk and a good amount of arm power to cream the butter and sugars, and then mix in the remaining ingredients. It will just take a bit longer.
Q5: What’s the best way to get uniform cookie sizes?
A5: Using a cookie scoop of consistent size (e.g., a 1.5-tablespoon scoop) is the best way to ensure all your cookies are the same size, which helps them bake evenly.