The Irresistible Warmth of Homemade Molasses Cookies: A Culinary Journey
Ever wonder what fills a home with that comforting, nostalgic aroma, embodying warmth and tradition in every bite? The answer often lies in the enchanting scent of freshly baked Molasses Cookies. There’s something truly magical about these soft, chewy, and spiced delights that transports you back to simpler times. Preparing this Molasses cookie recipe at home isn’t just about baking; it’s about crafting an experience, filling your kitchen with an intoxicating fragrance, and creating memories with every batch. Beyond the sensory delight, the satisfaction of producing these warmly spiced treats from scratch, knowing every ingredient that goes into them, is incredibly rewarding.
Ingredients & Kitchen Tools
Crafting the perfect Molasses Cookies requires a few essential ingredients and basic kitchen tools. This carefully selected list ensures you achieve that ideal balance of chewiness and spice.
- 2 ¾ cups All-Purpose Flour: The foundational structure for our cookies.
- 1 ½ teaspoons Baking Soda: Helps the cookies rise and achieve their characteristic chew.
- 1 teaspoon Ground Cinnamon: Adds a warm, sweet, and woody spice.
- ½ teaspoon Ground Ginger: Provides a pungent, zesty kick that complements the molasses.
- ¼ teaspoon Ground Cloves: A strong, sweet, and aromatic spice that adds depth.
- ¼ teaspoon Salt: Balances the sweetness and enhances all the flavors.
- 1 cup Unsalted Butter (2 sticks), softened: For richness and a tender crumb.
- 1 cup Granulated Sugar: Sweetens the dough and provides structure.
- ¼ cup Packed Light Brown Sugar: Contributes moisture, chewiness, and a caramel-like flavor.
- 1 Large Egg: Binds the ingredients and adds richness.
- ½ cup Unsulfured Molasses: The star ingredient, offering a deep, earthy, bittersweet flavor and essential moisture. Avoid blackstrap for this recipe as it can be too strong.
- ¼ cup Granulated Sugar (for rolling): Creates a sparkling, slightly crisp exterior.
Kitchen Tools & Utensils:
- Large Mixing Bowl: For combining dry ingredients.
- Electric Mixer (stand or hand-held): Essential for creaming butter and sugars.
- Spatula: For scraping down bowls and folding ingredients.
- Measuring Cups and Spoons: For accurate ingredient portions.
- Baking Sheets: Non-stick or lined with parchment paper.
- Parchment Paper or Silicone Baking Mats: Prevents sticking and ensures even baking.
- Wire Cooling Rack: For cooling the cookies completely.
- Small Bowl: For the rolling sugar.
Prep Time & Cooking Schedule
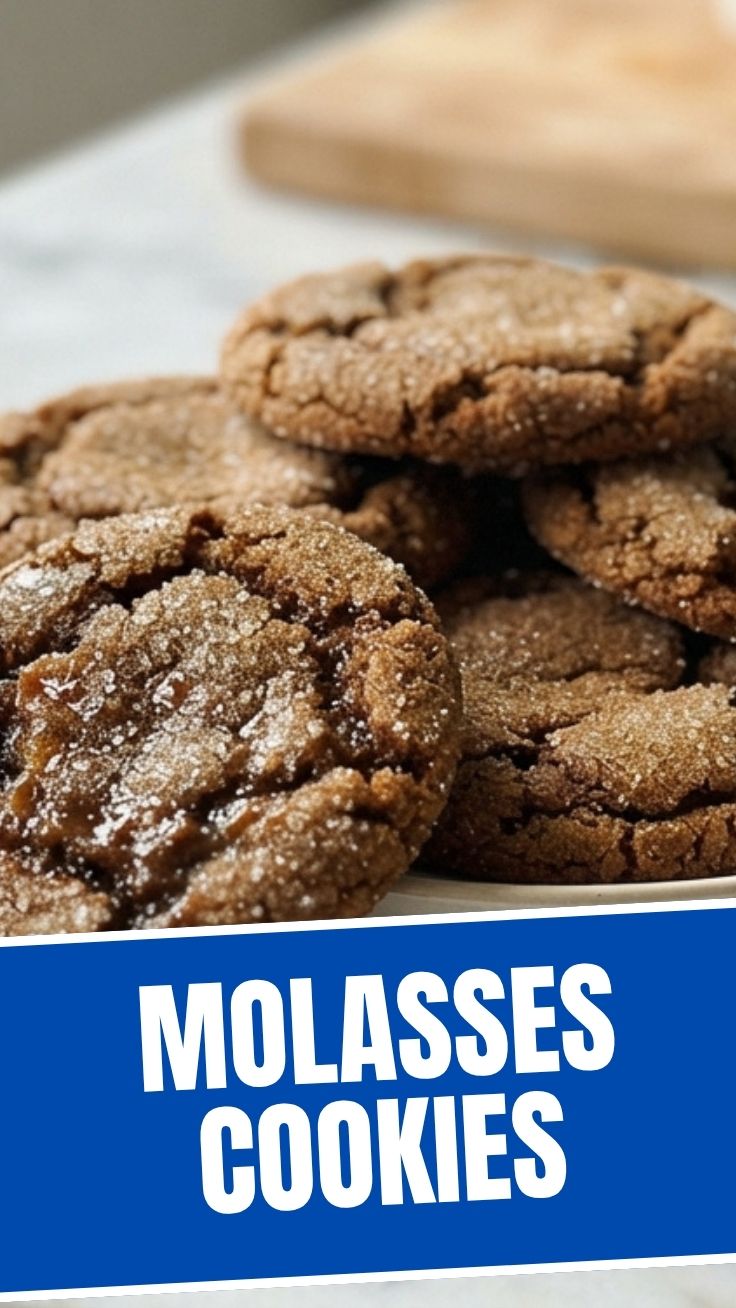
Planning is key to baking success! Here’s a breakdown to help you manage your time effectively:
- Prep Time: 20 minutes (includes measuring and mixing wet/dry ingredients)
- Chill Time: 30 minutes (crucial for firming up the dough, preventing spread, and deepening flavors)
- Cook Time: 8-10 minutes per batch
- Resting Time: 5 minutes (on the baking sheet after baking)
- Total Time: Approximately 1 hour 15 minutes (plus cooling time)
The chilling time is non-negotiable for achieving the perfect texture. During this period, the flour fully hydrates, the fats solidify, and the spices meld beautifully. You can even prepare the dough a day ahead and chill it overnight, allowing the flavors to develop even further.
Step-by-Step Instructions
Follow these clear directions to bake your own batch of delightful Molasses Cookies. Precision in each step ensures consistent results and that quintessential chewy texture.
1. Whisk Dry Ingredients: In a large bowl, whisk together the flour, baking soda, ground cinnamon, ground ginger, ground cloves, and salt. Set aside.
2. Cream Wet Ingredients: In a separate large bowl, using an electric mixer, cream together the softened butter, granulated sugar, and packed light brown sugar until light and fluffy (about 2-3 minutes).
3. Add Egg and Molasses: Beat in the large egg until fully incorporated, then add the unsulfured molasses. Mix until just combined, ensuring not to overmix.
4. Combine Wet and Dry: Gradually add the dry ingredients to the wet ingredients, mixing on low speed until just combined. Be careful not to overmix the dough; overworking the gluten can lead to tough cookies.
5. Chill Dough: Cover the bowl with plastic wrap and chill the dough in the refrigerator for at least 30 minutes. This step is vital for the structure and texture of our Molasses cookie recipe.
6. Preheat Oven & Prepare Baking Sheets: While the dough chills, preheat your oven to 375°F (190°C) and line baking sheets with parchment paper or silicone mats. Pour the ¼ cup of granulated sugar into a small bowl for rolling.
7. Roll Cookies: Scoop rounded tablespoons of dough and roll them into balls, then roll each ball generously in the granulated sugar until fully coated. Place them about 2 inches apart on the prepared baking sheets.
8. Bake: Bake for 8-10 minutes, or until the edges are set and slightly golden, but the centers still look soft. They will continue to set as they cool. Do not overbake!
9. Cool: Let the cookies cool on the baking sheets for 5 minutes before transferring them to a wire rack to cool completely. This prevents them from breaking.
Nutritional Benefits & Advantages
Beyond their delicious taste, Molasses Cookies offer some notable nutritional benefits, primarily from their star ingredient. Molasses, particularly unsulfured varieties, is a good source of several essential minerals, including iron, calcium, magnesium, and potassium. These minerals play vital roles in bone health, energy production, muscle function, and maintaining blood pressure. While these are treats, enjoying them in moderation allows you to savor the flavor while benefiting from the unique nutrient profile molasses provides.
Tips, Variations & Cooking Advice
- Spice it Up: For an extra kick, add a pinch of black pepper or a dash of cardamom to the spice mix.
- Citrus Zest: A teaspoon of orange or lemon zest can brighten the flavor profile beautifully.
- Gluten-Free Option: Substitute the all-purpose flour with a 1:1 gluten-free baking blend that contains xanthan gum.
- Dairy-Free Option: Use plant-based butter alternatives. Ensure they have a similar fat content to regular butter for best results.
- Chewier Cookies: For an even chewier cookie, slightly underbake them so they have a very soft center when removed from the oven.
- Crispier Edges: Bake for an additional 1-2 minutes if you prefer a slightly crispier edge.
Common Mistakes to Avoid
- Overmixing the Dough: This develops gluten, leading to tough, cake-like cookies. Mix until just combined.
- Not Chilling the Dough: Skipping this step will result in flatter, less chewy cookies that spread too much.
- Overbaking: This is the most common mistake. Overbaked Molasses Cookies become dry and hard. Look for set edges and soft centers.
- Using Blackstrap Molasses: While a type of molasses, blackstrap is very strong and can make your cookies taste bitter. Stick to unsulfured (light or dark) molasses.
- Crowding the Baking Sheet: Give your cookies enough space to spread (about 2 inches apart) to ensure even baking.
Storage & Meal Prep Tips
Once baked, properly store your Molasses Cookies to maintain their freshness and chewiness.
- Room Temperature: Store cooled cookies in an airtight container at room temperature for up to 5 days. Placing a slice of bread in the container can help keep them soft.
- Freezing Baked Cookies: Flash freeze cooled cookies on a baking sheet until solid (about 1 hour), then transfer them to a freezer-safe bag or container. They can be frozen for up to 3 months. Thaw at room temperature.
- Freezing Dough: Roll cookie dough balls, coat in sugar, then flash freeze them on a baking sheet. Once solid, transfer to a freezer-safe bag. Bake from frozen, adding an extra 2-3 minutes to the baking time.
Conclusion
Baking homemade Molasses Cookies is a truly rewarding experience, filling your home with an aroma that speaks of comfort and care. This detailed Molasses cookie recipe, with its balance of warm spices and tender chewiness, is designed to be approachable and delicious. Whether you’re a seasoned baker or just starting your culinary journey, these cookies are a perfect project. Don’t hesitate to embark on this delightful baking adventure, and share your results! We’d love to hear how your homemade batches turn out.
FAQs
Q1: Can I make the cookie dough ahead of time?
A1: Absolutely! The dough can be prepared up to 2-3 days in advance and stored in the refrigerator, tightly covered. In fact, chilling the dough longer can deepen the flavors.
Q2: My cookies came out hard. What went wrong?
A2: Most likely, they were overbaked. Molasses cookies should be removed from the oven when the edges are set but the centers still look soft. They firm up as they cool.
Q3: Can I substitute honey for molasses?
A3: While both are sweeteners, molasses has a distinct flavor and contributes significantly to the unique texture of these cookies. Substituting molasses with honey will result in a very different cookie in terms of both taste and consistency. It is not recommended for this specific recipe.
Q4: How do I ensure my spices are fresh?
A4: Spices can lose potency over time. To ensure optimal flavor, purchase whole spices and grind them yourself, or buy smaller quantities of ground spices and replace them every 6-12 months.
Q5: Why are my cookies spreading too much?
A5: Several factors could contribute to this: the butter might have been too soft (verging on melted), the dough wasn’t chilled long enough, or your oven temperature might be too low. Ensure your butter is softened but still cool to the touch, and always chill your dough.