Mastering Irresistible Pancakes: A Comprehensive Guide to Homemade Perfection
Ever wonder how some conjure up pancakes that are consistently light, airy, and bursting with flavor? The secret often lies in understanding the nuances of ingredients and techniques. Forget those dense, rubbery attempts! Today, we’re diving deep into the art of creating the perfect homemade fluffy pancakes recipe, a culinary endeavor that promises not just a delightful breakfast but also a rewarding experience in your own kitchen. Preparing spectacular Fluffy Pancakes and delightful Buttermilk Pancakes at home empowers you to control the quality of your ingredients, tailor toppings to your heart’s content, and ultimately, craft a breakfast masterpiece that will impress everyone.
Ingredients & Kitchen Tools
Here’s everything you’ll need to achieve pancake perfection:
Dry Ingredients:
- All-Purpose Flour (1 ½ cups): The backbone of your pancakes, providing structure.
- Granulated Sugar (2 tablespoons): Adds a touch of sweetness and aids in browning.
- Baking Powder (2 teaspoons): The primary leavening agent for lift and fluffiness.
- Baking Soda (1 teaspoon): Reacts with the buttermilk for extra rise and tender crumb.
- Salt (½ teaspoon): Balances flavors and enhances sweetness.
Wet Ingredients:
- Buttermilk (1 ½ cups): Crucial for tenderizing the pancakes and reacting with baking soda. If you don’t have buttermilk, combine 1 ½ cups of milk with 1 ½ tablespoons of lemon juice or white vinegar and let it sit for 5-10 minutes.
- Large Eggs (2): Bind the ingredients and add richness.
- Unsalted Butter, melted (¼ cup): Adds moisture, flavor, and helps achieve a golden crust.
- Vanilla Extract (1 teaspoon): Enhances the overall aroma and taste.
Kitchen Tools:
- Large Mixing Bowl: For combining dry ingredients.
- Medium Mixing Bowl: For whisking wet ingredients.
- Whisk: For thoroughly blending ingredients.
- Rubber Spatula or Wooden Spoon: For gently folding the batter.
- Ladle or ¼-cup Measuring Cup: For portioning batter onto the griddle.
- Non-stick Skillet or Electric Griddle: Essential for even cooking and preventing sticking.
- Spatula: For flipping pancakes.
Prep Time & Cooking Schedule
- Prep Time: 10 minutes
- Resting Time (Optional but Recommended): 10-15 minutes (allows gluten to relax and baking powder to activate, leading to a more tender pancake)
- Cook Time: 15-20 minutes (depending on your griddle size and heat)
- Total Time: Approximately 35-45 minutes
It’s helpful to gather all your ingredients and tools before you begin. This recipe is perfect for a weekend breakfast where you have a little extra time to enjoy the cooking process. The resting time for the batter can be used to set up your toppings or brew coffee.
Step-by-Step Instructions
1. Whisk Dry Ingredients: In a large bowl, combine the all-purpose flour, granulated sugar, baking powder, baking soda, and salt. Whisk well to ensure all leavening agents are evenly distributed. This step is crucial for achieving an even rise in your Fluffy Pancakes.
2. Combine Wet Ingredients: In a separate medium bowl, whisk together the buttermilk, large eggs, melted unsalted butter, and vanilla extract until thoroughly combined.
3. Combine Wet and Dry: Pour the wet ingredients into the dry ingredients. Stir gently with a rubber spatula or wooden spoon until just combined. A few lumps are perfectly fine and even desired; overmixing develops gluten and leads to tough pancakes. This gentle approach is key for tender Buttermilk Pancakes.
4. Rest the Batter (Optional but Recommended): Cover the bowl and let the batter rest at room temperature for 10-15 minutes. This allows the baking powder and soda to activate, creating more air bubbles for a lighter texture.
5. Heat Your Griddle: Preheat a non-stick skillet or electric griddle over medium heat. Lightly grease with butter or cooking spray. Test the heat by sprinkling a few drops of water; if they sizzle and evaporate, it’s ready.
6. Cook the Pancakes: Pour ¼ cup of batter per pancake onto the heated griddle. Cook for 2-3 minutes per side, or until golden brown and bubbles form on the surface, and the edges look set.
7. Flip and Finish: Gently flip the pancakes with a spatula and cook for another 1-2 minutes until the second side is golden brown.
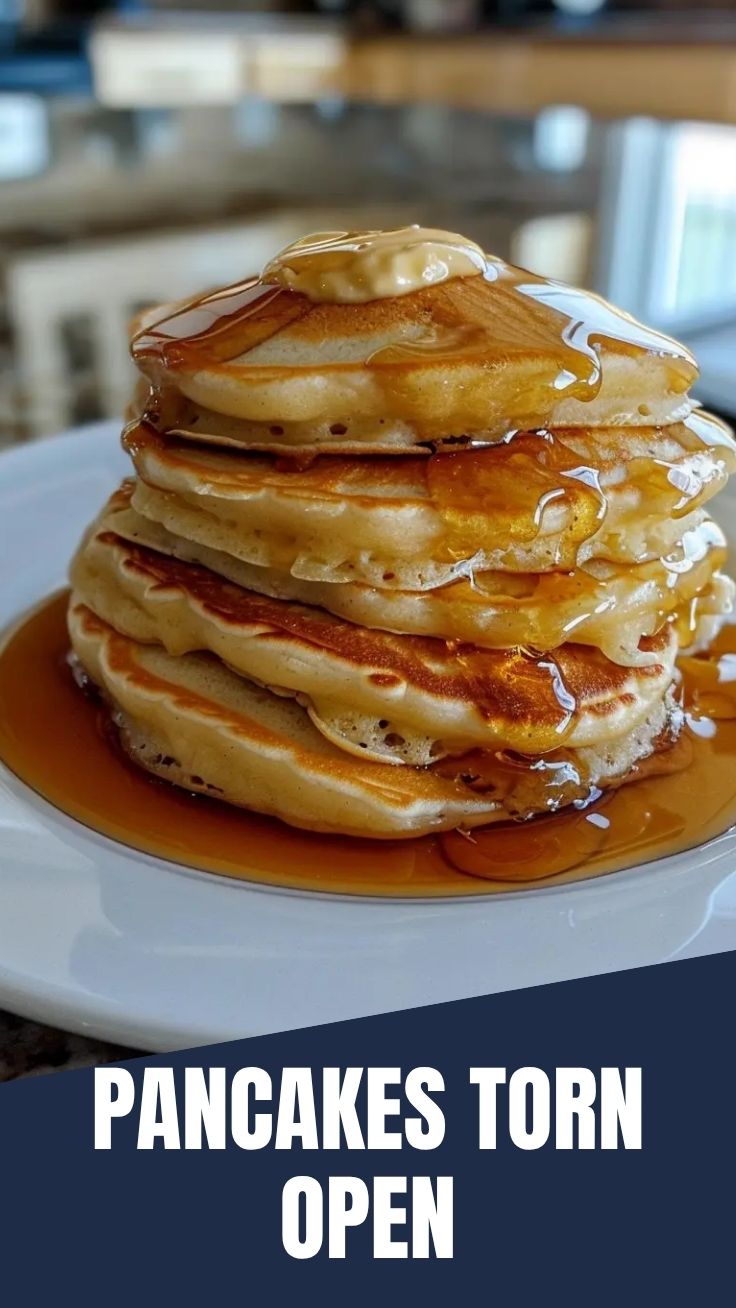
8. Serve Immediately: Transfer cooked pancakes to a plate and serve warm with your favorite toppings.
Nutritional Benefits & Advantages
These homemade pancakes offer more than just deliciousness. Using fresh ingredients means you avoid the preservatives often found in store-bought mixes. Buttermilk provides probiotics beneficial for gut health. Eggs contribute protein and essential vitamins, while flour offers complex carbohydrates for sustained energy. You can also boost the nutritional profile by adding whole wheat flour, fresh fruits, or nuts to the batter.
Tips, Variations & Cooking Advice
- Flavor Variations: Add a pinch of cinnamon or nutmeg to the dry ingredients, or stir in a tablespoon of lemon zest for a bright, citrusy note.
- Ingredient Swaps: For a slightly healthier option, substitute up to half of the all-purpose flour with whole wheat pastry flour. You can also use vegan buttermilk (plant-based milk with apple cider vinegar) for a dairy-free version.
- Alternative Cooking Methods: While a griddle is ideal, a well-seasoned cast iron skillet also works wonderfully, providing a lovely crust.
- Dietary Adaptations: For gluten-free pancakes, use a 1:1 gluten-free flour blend. Ensure your baking powder and soda are gluten-free too.
- Don’t Overmix! This is the golden rule for tender pancakes. Lumps are your friends.
- Don’t Cook on Too High Heat: Medium heat ensures the pancakes cook through without burning the exterior.
Common Mistakes to Avoid
- Overmixing the Batter: Leads to tough, chewy pancakes. Mix until just combined.
- Cooking on Too High Heat: Results in burnt exteriors and raw interiors.
- Not Greasing the Griddle Properly: Causes sticking and uneven browning.
- Flipping Too Early: The pancake will break apart. Wait for bubbles to form and edges to set.
- Not Letting the Batter Rest (Optional): Skipping this step can lead to slightly less fluffy pancakes.
Storage & Meal Prep Tips
Leftover pancakes can be stored in an airtight container in the refrigerator for up to 3-4 days. For longer storage, freeze them in a single layer on a baking sheet until solid, then transfer to a freezer-safe bag for up to 2-3 months. Reheat in a toaster, microwave, or in a warm oven for a quick breakfast. They toast beautifully, regaining some of their original crispness.
Conclusion
Creating the perfect stack of homemade pancakes is an incredibly rewarding experience. By following this comprehensive guide, you’re not just making breakfast; you’re crafting a culinary moment that’s both delicious and deeply satisfying. From achieving that signature rise of a Fluffy Pancakes to savoring the delicate tang of a Buttermilk Pancakes, you now have all the tools and knowledge to elevate your morning meal. We encourage you to try this recipe, experiment with your favorite toppings, and share your delicious results with us! Happy flipping!
FAQs
Q1: Can I make the batter ahead of time?
A1: You can prepare the dry ingredients and wet ingredients separately and combine them right before cooking. Alternatively, the mixed batter can be refrigerated overnight, but it might be slightly less fluffy due to the diminished efficacy of the leavening agents. Add
a tiny pinch more baking soda just before cooking for a boost.
Q2: What are the best toppings for these pancakes?
A2: The possibilities are endless! Classic maple syrup and butter are always a hit. Fresh berries, sliced bananas, chocolate chips, whipped cream, a dusting of powdered sugar, or even a dollop of fruit compote are excellent choices.
Q3: My pancakes aren’t fluffy. What went wrong?
A3: The most common culprits are overmixing the batter (which develops gluten and makes them tough) or inactive leavening agents (check expiration dates on baking powder and soda). Ensure your griddle isn’t too hot, as this can prevent proper rise.
Q4: Can I use regular milk instead of buttermilk?
A4: Yes, but you’ll need to “sour” it first. For 1 ½ cups of milk, stir in 1 ½ tablespoons of lemon juice or white vinegar and let it sit for 5-10 minutes until it slightly curdles. This mimics buttermilk and is essential for the baking soda to react properly.
Q5: How do I know when to flip the pancakes?
A5: Look for bubbles forming on the surface of the pancake and the edges to appear set and slightly dry. The underside should be golden brown. This usually takes 2-3 minutes on medium heat.