Master the Grill: Flavorful Chicken Kabobs for Every Occasion
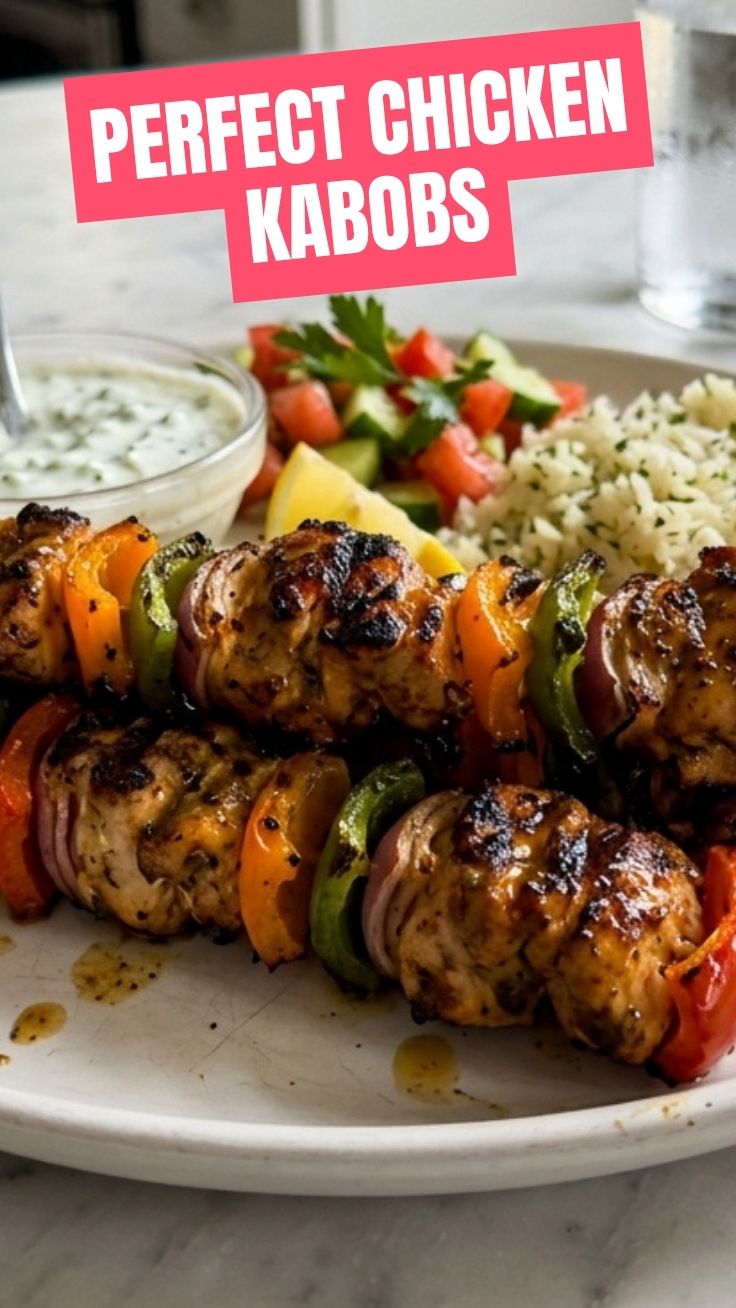
Ever wondered how to transform a simple weeknight meal into a vibrant, healthy, and incredibly satisfying culinary experience? Look no further than the humble yet spectacular Chicken Kabobs. This blog post isn’t just about a recipe; it’s about unlocking a world of fresh flavors and the joy of creating something delicious from scratch. Preparing these Grilled chicken kabobs at home offers unparalleled control over ingredients, allowing you to tailor them to your health goals and taste preferences, all while avoiding the hidden sugars and preservatives often found in store-bought alternatives. Get ready to impress your family and friends with a dish that’s as visually appealing as it is scrumptious.
Ingredients & Kitchen Tools
Crafting the perfect kabobs requires a thoughtful selection of fresh ingredients and a few essential kitchen tools.
- For the Marinade:
* 2 lbs boneless, skinless chicken breasts: Cut into 1-inch cubes. The star of our show!
* 1/4 cup olive oil: Extra virgin for flavor, or light for a milder taste.
* 3 cloves garlic, minced: Fresh is always best for pungent aroma.
* 2 tbsp lemon juice: Freshly squeezed brightens the flavors.
* 1 tbsp dried oregano: A classic Mediterranean herb.
* 1 tsp dried thyme: Earthy and aromatic.
* 1/2 tsp smoked paprika: Adds depth and a hint of smoky flavor.
* Salt and freshly ground black pepper: To taste, enhances all other flavors.
- For the Skewers:
* 1 large red onion: Cut into 1-inch pieces, adds sweetness when grilled.
* 2 bell peppers (any color), cut into 1-inch pieces: Adds a vibrant crunch and vitamins.
* 1 zucchini, cut into 1/2-inch thick rounds: Becomes tender and slightly charred.
* 1 pint cherry tomatoes: Pop with juicy goodness after grilling.
- Kitchen Tools:
* Large mixing bowl: For marinating the chicken.
* Whisk: To combine marinade ingredients.
* Sharp knife and cutting board: For precise vegetable and chicken preparation.
* Measuring spoons and cups: For accurate ingredient quantities.
* Grill (gas or charcoal): The heart of the operation.
* Long metal skewers or wooden skewers (soaked for at least 30 minutes): Essential for holding the kabobs together. Metal skewers are reusable and conduct heat evenly.
* Tongs: For turning kabobs on the grill.
* Basting brush (optional): For applying extra marinade or sauce.
Prep Time & Cooking Schedule
- Prep Time: 20 minutes
- Marinade Time: Minimum 30 minutes, ideally 2 hours, or up to 4 hours for maximum flavor absorption. Do not marinate longer than 4 hours as the lemon juice can start to “cook” the chicken.
- Cook Time: 10-15 minutes
- Resting Time: 5 minutes
For the best results, start marinating the chicken in the morning or early afternoon. This allows the flavors to truly meld. About 30 minutes before grilling, soak your wooden skewers (if using) and prepare your vegetables. This way, everything is ready to go when it’s time to fire up the grill.
Step-by-Step Instructions
Transforming simple ingredients into sensational Chicken Kabobs is easier than you think with these clear steps.
1. Prepare the Marinade: In the large mixing bowl, whisk together the olive oil, minced garlic, lemon juice, oregano, thyme, smoked paprika, salt, and pepper.
2. Marinate the Chicken: Add the cubed chicken breast to the marinade, ensuring all pieces are well coated. Cover the bowl and refrigerate for at least 30 minutes, or up to 4 hours.
3. Prepare Vegetables & Skewers: While the chicken marinates, chop your red onion, bell peppers, and zucchini. If using wooden skewers, immerse them in water for at least 30 minutes to prevent burning.
4. Assemble the Kabobs: Thread the marinated chicken and vegetables alternately onto the skewers. Try to distribute the ingredients evenly so they cook uniformly.
5. Preheat Grill: Preheat your grill (gas or charcoal) to medium-high heat (around 400°F or 200°C). Lightly oil the grill grates to prevent sticking.
6. Grill the Kabobs: Place the Grilled chicken kabobs on the preheated grill. Cook for 10-15 minutes, turning occasionally, until the chicken is cooked through (internal temperature reaches 165°F or 74°C) and the vegetables are tender with nice char marks.
7. Rest and Serve: Once cooked, remove the skewers from the grill and let them rest for 5 minutes before serving. This allows the juices to redistribute, ensuring tender and flavorful chicken.
Nutritional Benefits & Advantages
These kabobs are a powerhouse of nutrition! Chicken breast is an excellent source of lean protein, essential for muscle repair and growth. The colorful array of vegetables provides a rich supply of vitamins, minerals, and antioxidants, boosting your immune system and promoting overall health. Cooked on the grill, the dish remains light, avoiding heavy oils and fats often associated with other cooking methods. It’s naturally gluten-free and can be easily adapted to be dairy-free, making it suitable for a variety of dietary needs.
Tips, Variations & Cooking Advice
- Flavor Boost: Add a pinch of red pepper flakes to the marinade for a spicy kick.
- Herb Twist: Experiment with fresh herbs like rosemary or parsley in the marinade.
- Vegetable Swap: Feel free to use mushrooms, cherry tomatoes, or even pineapple chunks for a sweet and savory contrast.
- Alternative Cooking: No grill? No problem! These kabobs can be baked in the oven at 400°F (200°C) for 20-25 minutes, or pan-fried in a large skillet.
- Serving Suggestions: Serve with a side of quinoa, brown rice, a fresh green salad, or a dollop of tzatziki sauce.
Common Mistakes to Avoid
1. Over-Marinating: Marinating chicken for too long (over 4 hours) with acidic ingredients like lemon juice can begin to “cook” the chicken, making it tough.
2. Overcrowding the Grill: Placing too many kabobs on the grill at once lowers the grill temperature and leads to steaming instead of charring, resulting in less flavorful chicken and vegetables.
3. Uneven Pieces: Cutting chicken and vegetables into uneven sizes can lead to uneven cooking. Ensure pieces are roughly the same size for consistent results.
4. Not Oiling the Grill: Skipping this step can lead to your kabobs sticking, making them difficult to flip and resulting in torn chicken and vegetables.
5. Not Soaking Wooden Skewers: Unsoaked wooden skewers will burn and char on the grill, potentially breaking and leaving a burnt taste.
Storage & Meal Prep Tips
Leftover Chicken Kabobs can be stored in an airtight container in the refrigerator for up to 3-4 days. To reheat, you can use a microwave for quick warming, but for best texture, try reheating them in a skillet over medium heat or in a toaster oven until warmed through. They can also be frozen for up to 2-3 months, though the vegetables might become slightly softer upon thawing. For meal prep, you can marinate the chicken a day in advance and chop your vegetables, keeping them separate until assembly day.
Conclusion
There you have it – a foolproof guide to creating delicious and healthy Chicken Kabobs that will delight your taste buds and nourish your body. These Grilled chicken kabobs are more than just a meal; they’re an experience, a celebration of fresh ingredients, and the simple joy of home cooking. We encourage you to try this recipe, experiment with your favorite variations, and share your culinary successes with us! What are your go-to kabob combinations? Let us know in the comments below!
FAQs
Q1: Can I use chicken thighs instead of breasts?
A1: Absolutely! Chicken thighs are a great alternative, offering more flavor and moisture. They may require a few extra minutes of cooking time.
Q2: How do I prevent the chicken from drying out?
A2: The key is not to overcook it. Use a meat thermometer to ensure the chicken reaches 165°F (74°C) and remove it immediately. Marinating also helps keep the chicken juicy.
Q3: What are some good alternative marinades?
A3: You could try a teriyaki marinade, a spicy lime-cilantro marinade, or a yogurt-based tandoori marinade for different flavor profiles.
Q4: Can I prepare the kabobs ahead of time?
A4: You can marinate the chicken and chop the vegetables a day in advance. Assemble the skewers right before grilling for optimal freshness and texture.
Q5: What if I don’t have a grill?
A5: You can bake them in the oven at 400°F (200°C) for 20-25 minutes, or pan-fry them in a heavy-bottomed skillet until cooked through and nicely browned.