Taste the Sunshine: Why a Homemade Heirloom Tomato Tart is Your Summer Must-Have
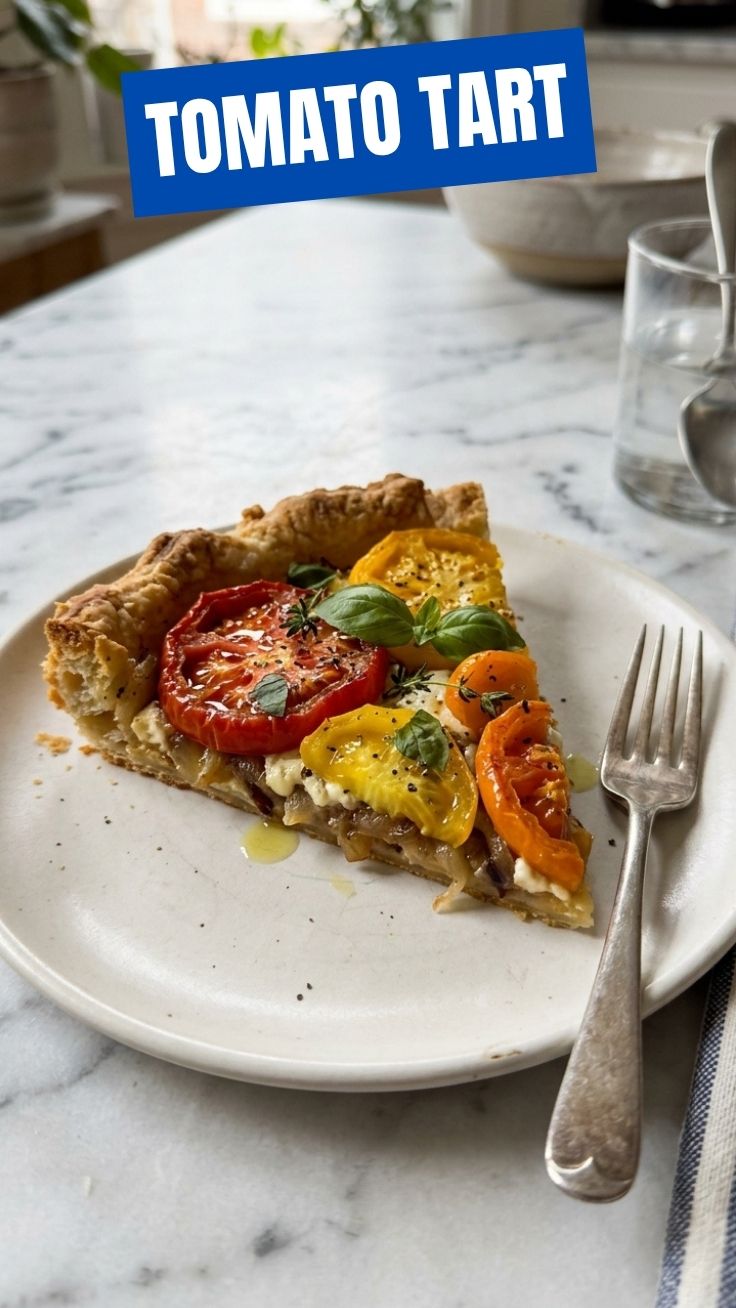
Ever savored a dish so vibrant it tastes like sunshine on a plate? That’s precisely the experience you’ll unlock with a homemade Tomato Tart (Heirloom). Beyond its undeniable beauty, preparing this culinary masterpiece at home offers an unparalleled sense of satisfaction and allows you to control every delicious detail, from the flaky crust to the peak-season tomatoes. If you’ve been searching for the quintessential summer recipe, one that celebrates freshness and simplicity, look no further. This elegant yet approachable tart is a showstopper that showcases the rich, nuanced flavors of diverse Heirloom Tomato Recipes, proving that simple ingredients, when handled with care, can create extraordinary meals.
Ingredients & Kitchen Tools
Crafting the perfect Tomato Tart (Heirloom) requires a blend of fresh, high-quality ingredients and a few standard kitchen essentials.
- For the Crust:
* 1 ½ cups all-purpose flour: The base for a flaky, tender crust. Use unbleached for best results.
* ½ teaspoon salt: Enhances flavor and balances sweetness.
* ½ cup (1 stick) unsalted butter, very cold and cubed: Essential for creating a flaky texture; the colder, the better.
* ¼ cup ice water: Binds the dough without overworking it. Add gradually.
- For the Filling:
* 2-3 large heirloom tomatoes (various colors and types), thinly sliced: The star of the show. Choose ripe, firm tomatoes for best flavor and texture.
* ¼ cup fresh basil leaves, chopped: Adds a fragrant, peppery bite.
* ½ cup grated Gruyère or Parmesan cheese: Provides a savory, nutty depth.
* 2 tablespoons olive oil, extra virgin: For drizzling and brushing.
* 1 clove garlic, minced (optional): Adds a subtle aromatic layer.
* Salt and freshly ground black pepper to taste: Seasoning is key to highlighting the tomatoes.
* 1 tablespoon Dijon mustard (optional): Spreads on the crust to prevent sogginess and add a tang.
- Kitchen Tools:
* 9-inch tart pan with removable bottom: Ideal for easy serving and presentation.
* Mixing bowls: For dough and filling preparation.
* Rolling pin: For rolling out the dough.
* Sharp knife and cutting board: For slicing tomatoes and chopping basil.
* Pastry brush: For olive oil.
* Baking sheet: To place the tart pan on for support.
Prep Time & Cooking Schedule
- Prep Time: 30 minutes (includes making the dough)
- Chill Time (Dough): 30 minutes
- Cook Time: 35-45 minutes
- Resting Time (after baking): 10-15 minutes
This schedule allows ample time for the dough to chill, which is crucial for a tender crust, and ensures the tart sets beautifully after baking. Start by preparing the dough, then chill it while you slice the tomatoes and prepare the filling.
Step-by-Step Instructions
1. Prepare the Pie Dough: In a large bowl, whisk together flour and salt. Cut in the very cold butter using a pastry blender or your fingertips until the mixture resembles coarse crumbs with some pea-sized butter pieces. Gradually add ice water, one tablespoon at a time, mixing until the dough just comes together. Do not overmix. Form into a disc, wrap in plastic, and refrigerate for at least 30 minutes. This chilling step is vital for a flaky crust, especially for a delicate Tomato Tart (Heirloom).
2. Preheat Oven & Roll Dough: Preheat your oven to 400°F (200°C). On a lightly floured surface, roll out the chilled dough into a 12-inch circle. Carefully transfer the dough to a 9-inch tart pan with a removable bottom, pressing it gently into the sides. Trim any excess dough. Prick the bottom of the crust with a fork several times to prevent puffing.
3. Blind Bake (Optional but Recommended): For a crispier crust, line the dough with parchment paper and fill with pie weights or dried beans. Bake for 10-12 minutes, then remove weights and parchment and bake for another 5 minutes, or until lightly golden. This helps prevent a soggy bottom.
4. Prepare the Filling: While the crust bakes (or after rolling), very thinly slice your heirloom tomatoes. For best results with Heirloom Tomato Recipes, gently pat the tomato slices dry with a paper towel to remove excess moisture. If using, spread Dijon mustard thinly over the bottom of the pre-baked crust. Sprinkle half of the grated cheese over the mustard.
5. Assemble the Tart: Arrange the tomato slices decoratively over the cheese, slightly overlapping them. Sprinkle with minced garlic (if using), the remaining cheese, and the chopped fresh basil. Drizzle generously with olive oil, then season with salt and freshly ground black pepper.
6. Bake: Place the tart pan on a baking sheet and bake for 35-45 minutes, or until the crust is golden brown and the tomatoes are slightly softened and caramelized. The edges of the tomatoes might get a little crispy, adding to the texture.
7. Cool and Serve: Let the tart cool on a wire rack for at least 10-15 minutes before unmolding and slicing. This allows the filling to set and prevents the slices from falling apart.
Nutritional Benefits & Advantages
This Tomato Tart (Heirloom) isn’t just delicious; it’s also packed with nutritional goodness. Heirloom tomatoes are a fantastic source of vitamins C and K, potassium, and lycopene—a powerful antioxidant known for its potential health benefits, including supporting heart health and reducing the risk of certain cancers. Fresh basil adds additional antioxidants and vitamins. Using olive oil provides healthy monounsaturated fats. This tart offers a relatively light yet satisfying meal, making it an excellent choice for a vibrant, health-conscious diet.
Tips, Variations & Cooking Advice
- Herb Variations: Experiment with other fresh herbs like thyme, oregano, or chives for different flavor profiles.
- Cheese Swap: Feta, goat cheese, or provolone can be used in place of Gruyère for distinct tastes.
- Gluten-Free: Use a high-quality gluten-free pie crust mix or your favorite gluten-free pastry recipe.
- Dairy-Free: Substitute the cheese with a dairy-free Parmesan alternative or nutritional yeast for a cheesy umami flavor.
- Additions: Consider adding a layer of caramelized onions or a thin spread of pesto under the tomatoes for extra depth.
Common Mistakes to Avoid
- Overworking the Dough: Leads to a tough, inelastic crust. Mix just until combined.
- Not Chilling the Dough: Results in a less flaky crust and makes it harder to roll out.
- Skipping the Blind Bake (or pricking the crust): Can lead to a soggy bottom, especially with juicy Heirloom Tomato Recipes.
- Not Drying Tomatoes: Excess moisture will make the tart watery and compromise the crust’s crispness.
- Cutting into Tart Too Soon: Allow it to rest; this helps the filling set and prevents a messy collapse.
Storage & Meal Prep Tips
Leftovers of this Tomato Tart (Heirloom) can be stored in an airtight container in the refrigerator for up to 2-3 days. While delicious cold, it’s best reheated gently in a preheated oven at 300°F (150°C) for about 10-15 minutes until warmed through, which helps re-crisp the crust. Freezing is not recommended for this particular tart as the tomatoes can become watery upon thawing, affecting the texture. For meal prep, you can make and blind bake the crust a day ahead, keeping it covered at room temperature, then assemble and bake closer to serving.
Conclusion
Embrace the peak of summer flavors with this exquisite homemade Tomato Tart (Heirloom). It’s a testament to how simple, quality ingredients, particularly vibrant Heirloom Tomato Recipes, can elevate a meal from ordinary to extraordinary. Whether served as a light lunch, an elegant appetizer, or a stunning side dish, this tart is sure to impress with its fresh taste and beautiful presentation. Don’t let summer pass you by without creating this show-stopping dish. Share your culinary creations with us and let us know how your tart turned out!
FAQs
Q1: Can I use store-bought pie crust for this tart?
A1: Yes, you can use a store-bought pie crust for convenience. Opt for a good quality one for the best flavor and texture.
Q2: My tart crust is getting too dark before the filling is cooked. What should I do?
A2: You can loosely cover the edges of the crust with aluminum foil to prevent them from burning while the rest of the tart bakes.
Q3: Can I add other vegetables to the tart?
A3: Absolutely! Thinly sliced zucchini, bell peppers, or even a layer of spinach can be added. Just be mindful of excess moisture; pre-sautéing watery vegetables can help.
Q4: How important is it to dry the tomato slices?
A4: Very important! Excess moisture from the tomatoes is the leading cause of a soggy tart bottom. Patting them dry thoroughly helps maintain a crisp crust.