Decadent Delights: How to Bake the Perfect Homemade Fudgy Brownies
Ever wondered how to achieve that elusive, melt-in-your-mouth perfection in a homemade treat? Forget store-bought imitations; mastering a batch of exquisite Brownies from scratch is a culinary triumph that’s surprisingly achievable. Imagine the aroma filling your kitchen, the rich, deep scent of cocoa mingling with sweet vanilla – a truly irresistible experience. Preparing these delightful Chocolate brownies at home not only guarantees superior flavor and freshness but also allows you to control the quality of ingredients, ensuring a wholesome and utterly satisfying indulgence. Get ready to impress your taste buds and loved ones with a treat that speaks volumes of homemade goodness.
Ingredients & Kitchen Tools
To embark on your brownie-baking adventure, gather these essential items:
- Unsalted Butter (1 cup / 226g): Essential for that rich, tender crumb. Using unsalted butter allows you to control the exact amount of salt in your recipe.
- Granulated Sugar (2 cups / 400g): Provides sweetness and contributes to the fudgy texture.
- Light Brown Sugar (1/2 cup / 100g): Adds moisture and a subtle caramel note, enhancing the depth of flavor.
- Large Eggs (4): Binds the ingredients, provides structure, and creates that signature chewy texture.
- Vanilla Extract (2 teaspoons): A flavor enhancer that complements the chocolate beautifully.
- All-Purpose Flour (1 cup / 125g): The structural base; measure accurately to avoid dense or cake-like brownies.
- Unsweetened Cocoa Powder (3/4 cup / 75g): The star of the show. Use high-quality Dutch-processed cocoa for a darker color and mellower chocolate flavor.
- Salt (1/2 teaspoon): Balances sweetness and enhances all other flavors.
- Chocolate Chips or Chunks (1 cup / 180g): For extra pockets of melted chocolate goodness. Dark chocolate, milk chocolate, or a mix – your choice!
- 9×13 Inch Baking Pan: The ideal size for a standard batch.
- Parchment Paper: Prevents sticking and makes for easy removal and cleanup.
- Mixing Bowls (2-3): For separating wet and dry ingredients.
- Whisk: For combining dry ingredients and light mixing.
- Rubber Spatula: Essential for folding and scraping down the sides of bowls.
- Saucepan (medium): For melting butter and sugar.
- Oven Mitts: For safety when handling hot pans.
- Wire Rack: For cooling the brownies evenly.
Prep Time & Cooking Schedule
- Prep Time: 15 minutes
- Cook Time: 25-30 minutes
- Resting Time: 30-60 minutes (crucial for setting the fudgy texture!)
Always preheat your oven while preparing the batter to ensure it reaches the correct temperature. The resting time after baking is vital for the brownies to set properly, ensuring a clean cut and that coveted fudgy consistency. Resist the urge to cut into them too early!
Step-by-Step Instructions
1. Preheat & Prepare: Preheat your oven to 350°F (175°C). Line a 9×13 inch baking pan with parchment paper, leaving an overhang on the sides for easy lifting. Lightly grease the parchment paper for extra non-stick insurance.
2. Melt Butter & Sugar: In a medium saucepan over low heat, melt the unsalted butter. Once melted, remove from heat and stir in the granulated sugar and light brown sugar until combined. The gentle heat helps dissolve the sugar, contributing to a chewier texture.
3. Incorporate Wet Ingredients: Allow the butter-sugar mixture to cool slightly (about 5 minutes) to prevent scrambling the eggs. Whisk in the eggs one at a time, ensuring each is fully incorporated before adding the next. Stir in the vanilla extract. The mixture should be smooth and glossy.
4. Combine Dry Ingredients: In a separate large bowl, whisk together the all-purpose flour, unsweetened cocoa powder, and salt. This ensures even distribution of dry ingredients, preventing lumps.
5. Fold Wet into Dry: Gradually add the wet ingredients to the dry ingredients, mixing with a rubber spatula until just combined. Be careful not to overmix, as this can develop the gluten in the flour and lead to tougher Brownies. Gently fold in the chocolate chips or chunks.
6. Bake: Pour the batter evenly into the prepared baking pan. Bake for 25-30 minutes, or until a toothpick inserted into the center comes out with moist crumbs, but not wet batter. Overbaking will result in dry, cake-like results rather than perfectly fudgy Chocolate brownies.
7. Cool Completely: Remove the pan from the oven and let cool completely on a wire rack for at least 30-60 minutes before cutting and serving. This allows the brownies to set and intensifies their fudgy texture.
Nutritional Benefits & Advantages
While we often associate baked goods with indulgence, these brownies offer some surprising nutritional perks. Unsweetened cocoa powder is rich in antioxidants, particularly flavonoids, which are known for their potential to improve heart health and act as anti-inflammatory agents. Dark chocolate chips further enhance this antioxidant boost. Eggs provide a good source of protein and essential vitamins, contributing to satiety. While sugar content should be enjoyed in moderation, homemade brownies allow for control over ingredient quality, avoiding artificial additives often found in commercially prepared versions.
Tips, Variations & Cooking Advice
- Salted Caramel Swirl: Before baking, gently swirl in a few tablespoons of homemade or store-bought salted caramel sauce for an elevated flavor profile.
- Nutty Brownies: Add 1/2 cup of chopped walnuts or pecans to the batter along with the chocolate chips for added crunch and flavor.
- Espresso Powder Boost: A teaspoon of instant espresso powder (not brewed coffee) will intensify the chocolate flavor without making the brownies taste like coffee.
- Brown Butter: For a deeper, nutty flavor, brown the butter before adding the sugars. This adds a layer of sophistication.
- Gluten-Free Option: Substitute regular all-purpose flour with a 1:1 gluten-free baking flour blend.
- Dairy-Free Option: Use plant-based butter and dairy-free chocolate chips.
- Even Chewier Edges: For those who love crispy, chewy edges, bake in an 8×8 inch pan for slightly longer, adjusting baking time as needed.
Common Mistakes to Avoid
- Overmixing the Batter: Leads to tough, cake-like brownies. Mix only until just combined.
- Overbaking: The most common mistake! Pull the brownies out when a toothpick still has moist crumbs attached. They will continue to cook slightly as they cool.
- Cutting While Warm: This results in messy, crumbly brownies. Patience is key for clean, fudgy squares.
- Using Too Much Flour: Leads to dry, crumbly brownies. Measure flour by weight if possible for accuracy.
- Not Using Parchment Paper: Makes removal difficult and cleanup messy. Don’t skip this step!
Storage & Meal Prep Tips
Once completely cooled, store your Brownies in an airtight container at room temperature for up to 3-4 days. For longer storage, individual squares can be wrapped in plastic wrap and then placed in an airtight freezer-safe container or bag. They will keep in the freezer for up to 3 months. Thaw at room temperature or gently warm in a microwave for a few seconds for a freshly baked taste. These make excellent prepared treats for school lunches, unexpected guests, or a delightful after-dinner dessert throughout the week.
Conclusion
Crafting the perfect batch of homemade Brownies is a rewarding experience, yielding a rich, fudgy, and utterly satisfying dessert that truly stands out. By following these detailed steps and embracing the subtle nuances of timing and technique, you’ll consistently bake heavenly squares that vanish almost as quickly as they appear. The joy of creating these delectable treats, especially when they are the epitome of indulgent Chocolate brownies, is immense. We encourage you to try this recipe, experiment with the variations, and share your delightful results with friends and family. Happy baking!
FAQs
Q1: Why are my brownies dry and cakey?
A1: This usually indicates overmixing the batter or overbaking. Mix until just combined and pull them out of the oven when a toothpick comes out with moist crumbs, not liquid batter.
Q2: Can I use oil instead of butter?
A2: While you can substitute oil, butter provides a richer flavor and contributes significantly to the fudgy texture. If you must use oil, opt for a neutral-flavored oil like vegetable or canola.
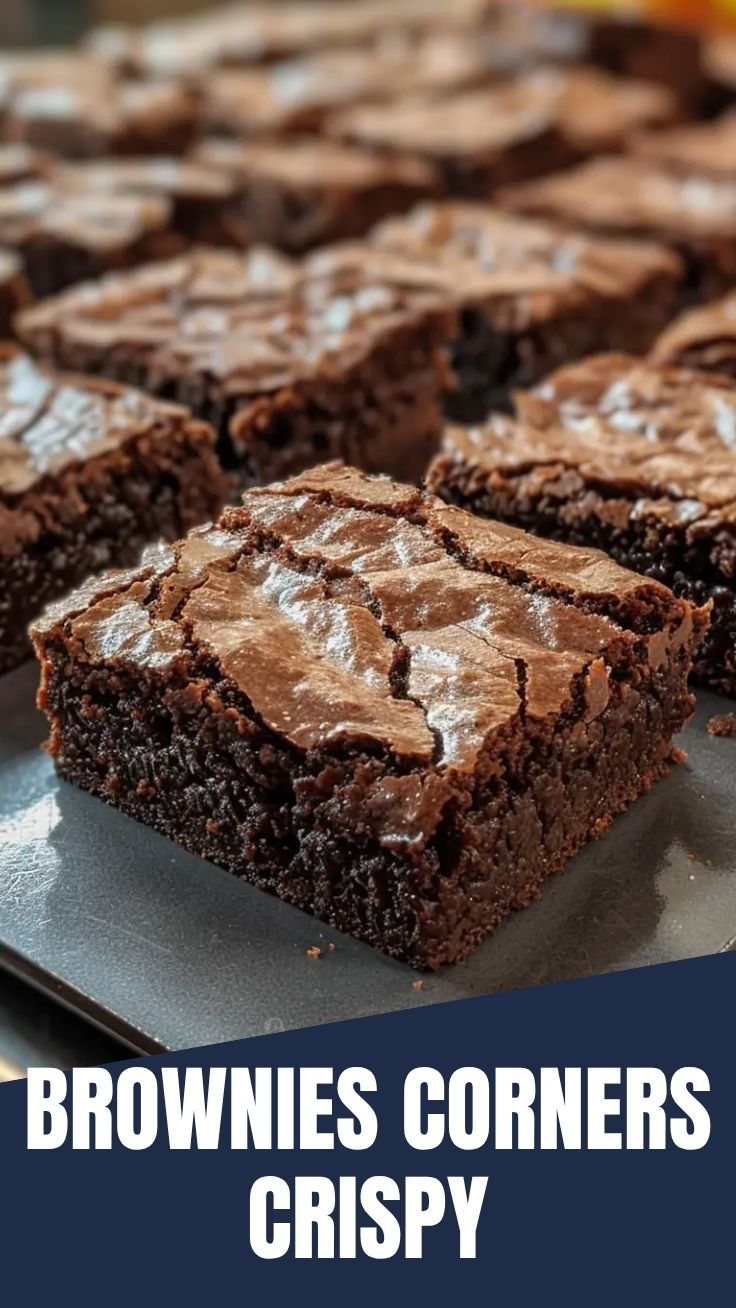
Q3: How do I get those shiny, crackly tops on my brownies?
A3: This often comes from fully dissolving the sugar in the melted butter and eggs, creating a glossy batter. Ensure your butter-sugar mixture is warm enough to dissolve the sugar without scrambling the eggs.
Q4: Can I add nuts or other mix-ins to the brownies?
A4: Absolutely! Chopped walnuts, pecans, white chocolate chips, or even a sprinkle of sea salt before baking are excellent additions. Add them in step 5 with the chocolate chips.
Q5: My brownies are still gooey in the middle. What went wrong?
A5: They likely need more baking time. Ovens can vary, so extend the baking time by 2-5 minute increments, checking for doneness with a toothpick each time.