Master the Art of Savory Rice Pilaf: A Journey to Culinary Perfection
Ever wondered how some home cooks effortlessly achieve that perfectly fluffy, flavorful rice that elevates any meal? Unlocking the secrets to a truly delicious Rice Pilaf can transform your everyday cooking, turning simple ingredients into a gourmet experience. This dish, often overlooked, is a versatile staple that can complement a myriad of cuisines, from Mediterranean delights to hearty roasts. Forget bland, sticky grains; we’re diving into the techniques that guarantee a fragrant, tender pilaf every single time, especially when crafted with aromatic Basmati rice. Beyond its incredible taste, preparing this culinary gem at home offers the undeniable advantage of controlling ingredient quality and tailoring it to your family’s preferences. Let’s embark on this flavorful journey together!
Ingredients & Kitchen Tools
To embark on our journey to perfect Rice Pilaf, gather these essential items:
- 1 ½ cups Basmati rice: Long-grain, aromatic rice known for its fluffy texture when cooked properly.
- 3 tablespoons unsalted butter or olive oil: For sautéing and adding richness.
- ½ cup finely diced yellow onion: Aromatic base, adds depth of flavor.
- 2 cloves garlic, minced: Essential for a pungent, savory kick.
- 3 cups low-sodium chicken or vegetable broth: Provides liquid and flavor; adjust salt content based on your broth.
- ½ teaspoon salt: Enhances overall flavor; adjust to taste.
- ¼ teaspoon black pepper: Adds a subtle spice.
- Optional garnishes: Fresh parsley, toasted slivered almonds, or a squeeze of lemon.
Kitchen Tools:
- Heavy-bottomed pot with a tight-fitting lid: Essential for even cooking and steaming.
- Fine-mesh sieve: For thoroughly rinsing the rice.
- Measuring cups and spoons: For accurate ingredient proportions.
- Wooden spoon or spatula: For stirring and prevents scratching the pot.
Prep Time & Cooking Schedule
- Prep Time: 15 minutes (includes rinsing rice and chopping vegetables)
- Cook Time: 20-25 minutes
- Resting Time: 10 minutes (crucial for perfect texture!)
Plan your cooking schedule by starting the pilaf about 40 minutes before you plan to serve your main course. The resting time allows the flavors to truly meld and the grains to become perfectly separated and fluffy, making it an ideal side dish that can practically cook itself while you attend to other components of your meal.
Step-by-Step Instructions
1. Rinse the Rice: Place the Basmati rice in a fine-mesh sieve and rinse under cold running water for 2-3 minutes, until the water runs clear. This step is vital to remove excess starch, preventing sticky rice. Drain well.
2. Sauté Aromatics: In your heavy-bottomed pot, melt butter or heat olive oil over medium heat. Add the diced onion and cook, stirring occasionally, until softened and translucent, about 5-7 minutes. Add the minced garlic and cook for another minute until fragrant, being careful not to burn it.
3. Toast the Rice: Add the rinsed and drained rice to the pot with the aromatics. Sauté for 2-3 minutes, stirring constantly, until the grains become slightly translucent around the edges and develop a nutty aroma. This toasting step is a secret to achieving distinct, individual grains in your Rice Pilaf.
4. Add Liquid and Seasoning: Pour in the chicken or vegetable broth, then add salt and pepper. Stir once to combine all ingredients evenly.
5. Bring to a Boil, Then Simmer: Increase heat to high and bring the mixture to a rolling boil. Once boiling, immediately reduce the heat to the lowest setting, cover the pot tightly with the lid, and cook for exactly 15 minutes without lifting the lid.
6. Rest and Fluff: After 15 minutes, remove the pot from the heat but do not lift the lid. Let the pilaf rest, covered, for at least 10 minutes. This allows the steam to finish cooking the rice and ensures a perfectly fluffy texture.
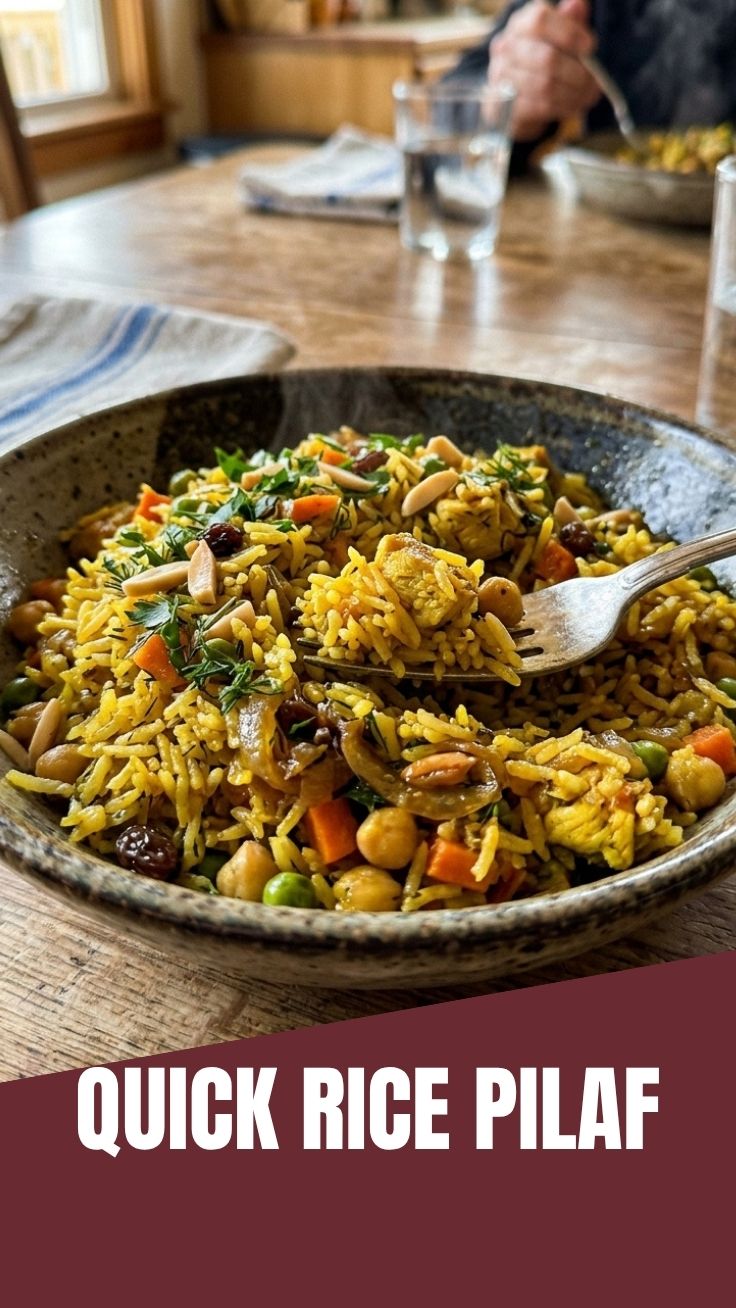
7. Serve: Gently fluff the finished rice with a fork. Serve immediately, garnished with fresh parsley or toasted almonds if desired.
Nutritional Benefits & Advantages
Our savory Rice Pilaf, especially when made with Basmati rice, offers more than just deliciousness. Basmati rice is known for its lower glycemic index compared to other white rice varieties, meaning it can cause a slower, more sustained rise in blood sugar. It’s also a good source of complex carbohydrates, providing sustained energy. By cooking at home, you control the amount of fat and sodium, ensuring a healthier side dish. Adding vegetables like onions and garlic further boosts nutrient intake with antioxidants and beneficial compounds.
Tips, Variations & Cooking Advice
- Vegetable Boost: Feel free to add diced carrots, peas, or corn (fresh or frozen) along with the broth for added color, flavor, and nutrients.
- Herbaceous Notes: Incorporate dried herbs like thyme or bay leaf with the broth for an extra aromatic kick.
- Protein Power-Up: For a heartier meal, stir in cooked shredded chicken, chickpeas, or toasted nuts at the end.
- Vegan/Vegetarian: Use vegetable broth and olive oil instead of butter.
- Spice It Up: A pinch of turmeric or paprika can lend a beautiful color and subtle warmth.
- Perfectly Toasted Nuts: Toast slivered almonds or pine nuts in a dry pan over medium heat until fragrant and golden, then sprinkle over the finished pilaf.
Common Mistakes to Avoid
- Not Rinsing the Rice: This is the biggest culprit for gummy, sticky rice. Rinse until the water is completely clear.
- Lifting the Lid During Cooking: Every time you lift the lid, precious steam escapes, disrupting the cooking process and resulting in unevenly cooked rice. Resist the urge!
- Stirring Too Much After Adding Liquid: Stirring too much releases starch, making the pilaf sticky. A single gentle stir is all you need.
- Cooking on High Heat: Once boiling, reduce to the lowest setting to allow the rice to gently steam and absorb the liquid. High heat can burn the bottom and leave the top undercooked.
- Skipping the Resting Time: This crucial step allows the residual steam to finish cooking the grains and makes them perfectly fluffy and separated.
Storage & Meal Prep Tips
Leftover Rice Pilaf can be stored in an airtight container in the refrigerator for up to 3-4 days. For longer storage, it can be frozen for up to 1-2 months. To reheat, sprinkle a tablespoon of water per cup of pilaf, cover, and microwave until heated through, or reheat gently in a covered saucepan on the stovetop with a little added liquid. This helps maintain its moisture and prevents it from drying out. This pilaf is an excellent component for meal prep bowls, pairing beautifully with grilled chicken, roasted vegetables, or a simple lentil stew.
Conclusion
Mastering a perfectly fluffy and flavorful Rice Pilaf, especially with fragrant Basmati, is a fundamental skill that will elevate countless meals in your kitchen. From the critical step of rinsing the rice to the essential resting period, each stage plays a vital role in achieving that ideal texture and taste. We encourage you to try this recipe, experiment with your favorite variations, and share your culinary successes. Your journey to homemade perfection starts here!
FAQs
Q1: Can I use brown rice for this recipe?
A1: While brown rice can be used, it requires a longer cooking time (around 45-50 minutes) and more liquid (approximately 3 ½ cups) due to its outer bran layer.
Q2: My pilaf is a bit mushy. What went wrong?
A2: This usually indicates too much liquid, insufficient rinsing, or lifting the lid too often during cooking. Ensure you measure precisely and avoid peeking!
Q3: How do I add extra flavor to my pilaf?
A3: Sautéing a bay leaf or a pinch of dried thyme with the onions, or stirring in a tablespoon of fresh lemon juice at the end, can add wonderful depth. Toasted nuts or dried fruit also provide great flavor and texture.
Q4: Can I make this ahead of time for a party?
A4: Absolutely! Prepare the pilaf as directed, let it cool completely, then refrigerate. Reheat just before serving, adding a splash of broth or water to rehydrate.
Q5: What’s the best way to prevent the bottom of the rice from sticking or burning?
A5: A heavy-bottomed pot (like a Dutch oven) distributes heat more evenly, and ensuring you reduce the heat to the lowest setting immediately after boiling will prevent sticking and burning.