Mastering the Art of Savory Stuffing: Your Ultimate Guide to a Flavorful Feast
Has the thought of a perfectly golden, herb-infused Stuffing ever made your mouth water, promising a symphony of flavors with every bite? Crafting homemade Stuffing isn’t just about combining ingredients; it’s about weaving together traditions, infusing love, and creating a dish that elevates any meal, especially during festive gatherings. Moving beyond the pre-packaged boxes, this guide will empower you to create a culinary masterpiece that’s both deeply satisfying and incredibly personalized. Imagine a plush texture, rich with aromatic herbs and savory broths, a far cry from dry, uninspired versions. This comprehensive post will walk you through every step, ensuring your homemade Stuffing, with its delightfully plush texture, becomes the star of your table.
Ingredients & Kitchen Tools
To embark on this delightful culinary journey, gather the following:
– 1 large loaf (16-20 oz) day-old artisan bread: Such as sourdough, challah, or French bread. Day-old bread is crucial for absorbing moisture without becoming soggy.
– 1 cup (2 sticks) unsalted butter: Adds rich flavor and helps toast the bread.
– 2 large yellow onions, finely diced: Provides a sweet, aromatic base.
– 4 stalks celery, finely diced: Adds a subtle crunch and classic flavor.
– 3-4 cloves garlic, minced: Enhances the savory depth.
– 4 cups chicken or vegetable broth, warm: The liquid foundation for moisture and flavor. Use low-sodium to control seasoning.
– 1/2 cup fresh parsley, chopped: For a fresh, herbaceous note.
– 1/4 cup fresh sage, chopped: Essential for that classic Stuffing aroma.
– 2 tbsp fresh thyme, chopped: Another key aromatic herb.
– 2 large eggs, lightly beaten (optional): Helps bind the Stuffing and create a more cohesive texture.
– Salt and freshly ground black pepper: To taste. Season generously, remembering the bread will absorb a lot.
– Optional additions: 1 cup cooked sausage, 1 cup chopped apples, 1/2 cup dried cranberries, 1/2 cup pecans or walnuts.
Kitchen Tools:
– Large baking dish (9×13 inch): For baking your Stuffing.
– Large mixing bowls: For combining ingredients.
– Large skillet or Dutch oven: For sautéing vegetables.
– Sharp knife and cutting board: For prepping ingredients.
– Measuring cups and spoons: For accurate ingredient quantities.
Prep Time & Cooking Schedule
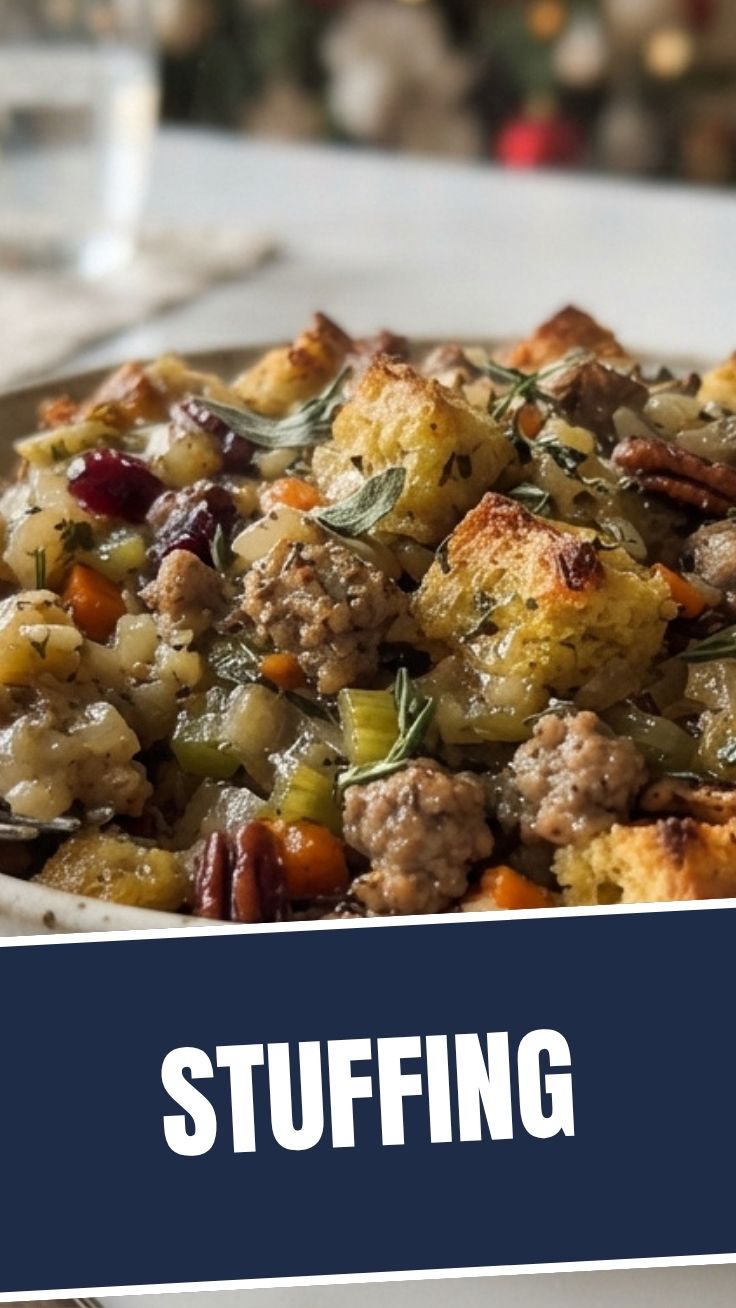
– Prep Time: 30 minutes (includes chopping vegetables and cubing bread).
– Cook Time: 40-50 minutes (total baking time).
– Resting Time: 10 minutes (after baking, before serving).
Plan to start your prep about 1.5 hours before you want to serve, allowing ample time for baking and a short rest. Getting the bread ready the day before will significantly cut down on your active prep time.
Step-by-Step Instructions
1. Prepare the Bread: Cut the day-old bread into 1-inch cubes. Spread them evenly on a large baking sheet and toast in a preheated oven at 300°F (150°C) for 15-20 minutes, or until lightly golden and dry. This step prevents soggy Stuffing and ensures a delightful plush texture. Let cool.
2. Sauté Aromatics: In a large skillet or Dutch oven, melt the butter over medium heat. Add the diced onions and celery, cooking until softened, about 8-10 minutes. Stir in the minced garlic and cook for another minute until fragrant.
3. Combine Wet and Dry: In a very large mixing bowl, combine the toasted bread cubes and the sautéed vegetable mixture. Add the fresh parsley, sage, and thyme. If using, stir in any optional additions like sausage or cranberries.
4. Moisten and Season: Gradually pour the warm chicken or vegetable broth over the bread mixture, tossing gently to distribute. The goal is to moisten all the bread without making it mushy. If using eggs, whisk them into the broth before adding. Season generously with salt and pepper, tasting a small piece to adjust. Remember, it’s easier to add salt than remove it.
5. Bake: Transfer the Stuffing mixture into the prepared 9×13 inch baking dish. For a crispier top, leave some bits exposed. For a softer, more plush interior, cover loosely with foil for the first 30 minutes of baking. Bake in a preheated oven at 375°F (190°C) for 30 minutes. Remove foil (if used) and bake for another 10-20 minutes, or until the top is golden brown and the internal temperature reaches 165°F (74°C).
6. Rest and Serve: Allow the Stuffing to rest for 10 minutes before serving. This allows the flavors to meld and the texture to set.
Nutritional Benefits & Advantages
Homemade Stuffing offers a wealth of nutritional advantages over store-bought versions. By selecting whole, fresh ingredients, you’re boosting your intake of dietary fiber from the bread and vegetables like celery and onions. The herbs—sage, thyme, and parsley—are not just flavor enhancers; they are packed with antioxidants and anti-inflammatory compounds. Using low-sodium broth allows for better sodium control, and incorporating lean proteins or extra vegetables can further enhance the nutritional profile, providing essential vitamins and minerals without excessive processed additives.
Tips Variations & Cooking Advice
– Crusty vs. Soft: For a crustier top, bake uncovered for the entire duration. For a softer, more uniform texture, cover with foil for the first 30 minutes.
– Flavor Variations:
– Fruity: Add chopped apples, dried cranberries, or apricots.
– Nutty: Incorporate toasted pecans, walnuts, or chestnuts.
– Earthy: Sauté wild mushrooms with the aromatics.
– Spicy: Add a pinch of red pepper flakes.
– Ingredient Swaps: Use corn bread for a sweeter, Southern-style Stuffing. Try chicken or turkey sausage for a heartier dish.
– Dietary Adaptations:
– Gluten-Free: Use high-quality gluten-free bread.
– Dairy-Free: Use olive oil or a plant-based butter alternative.
– Vegetarian/Vegan: Use vegetable broth and omit any meat products. You can boost savory notes with nutritional yeast.
Common Mistakes to Avoid
– Soggy Stuffing: This is often due to using fresh bread or adding too much moisture. Always use day-old or toasted bread cubes, and add broth gradually.
– Under-seasoning: Bread absorbs a lot of flavor, so be generous with salt, pepper, and herbs. Taste as you go!
– Overcooking: Baking too long can dry out the Stuffing. Keep an eye on it and aim for a golden-brown top and moist interior.
– Crowding the pan: Don’t overfill your baking dish; this can lead to uneven cooking and a less desirable texture.
Storage & Meal Prep Tips
Storage: Leftover Stuffing should be stored in an airtight container in the refrigerator for up to 3-4 days.
Freezing: For longer storage, freeze cooled Stuffing in an airtight, freezer-safe container or bag for up to 3 months. Thaw overnight in the refrigerator before reheating.
Reheating: Reheat in a preheated oven at 350°F (175°C) until warmed through, about 15-20 minutes. You can cover with foil to prevent drying out, or uncover for a crispier exterior. A splash of extra broth can help retain moisture.
Conclusion
Crafting your own savory Stuffing from scratch is a deeply rewarding experience, transforming simple ingredients into a dish that truly embodies comfort and celebration. With this guide, you’re well-equipped to create a perfectly seasoned, wonderfully plush Stuffing every time. Embrace the joy of homemade cooking and savor the rich, aromatic flavors. We encourage you to try this recipe, experiment with your favorite variations, and share your delicious results with your loved ones! The plush texture and robust flavor of this homemade Stuffing will undoubtedly make it a centerpiece at your next gathering.
FAQs
Q1: Can I prepare the Stuffing ahead of time?
A1: Yes, you can assemble the entire Stuffing mixture (excluding the eggs if using) up to 1-2 days in advance. Store it covered in the refrigerator and add the eggs just before baking.
Q2: What’s the best type of bread for Stuffing?
A2: Day-old artisan breads like sourdough, challah, or French bread work best. Their sturdy structure holds up well without turning mushy. Avoid very soft sandwich bread.
Q3: My Stuffing turned out too dry. What went wrong?
A3: This usually means not enough broth was added, or it was overbaked. Ensure all bread cubes are fully moistened, and consider covering with foil for part of the baking time to retain moisture.
Q4: Can I bake this Stuffing inside a turkey?
A4: While traditionally done, baking Stuffing inside a turkey carries food safety risks if not cooked to a safe internal temperature (165°F/74°C) simultaneously with the bird. For safety and a better texture, we recommend baking it separately.
Q5: How can I make my Stuffing extra flavorful?
A5: Don’t skimp on fresh herbs, use good quality broth, and consider adding a splash of dry white wine or apple cider to the broth for an extra layer of flavor. Sautéing the vegetables until deeply caramelized also adds a lot of depth.