Sizzle, Swirl, & Savor: Your Ultimate Guide to Unforgettable Garlic Butter Shrimp
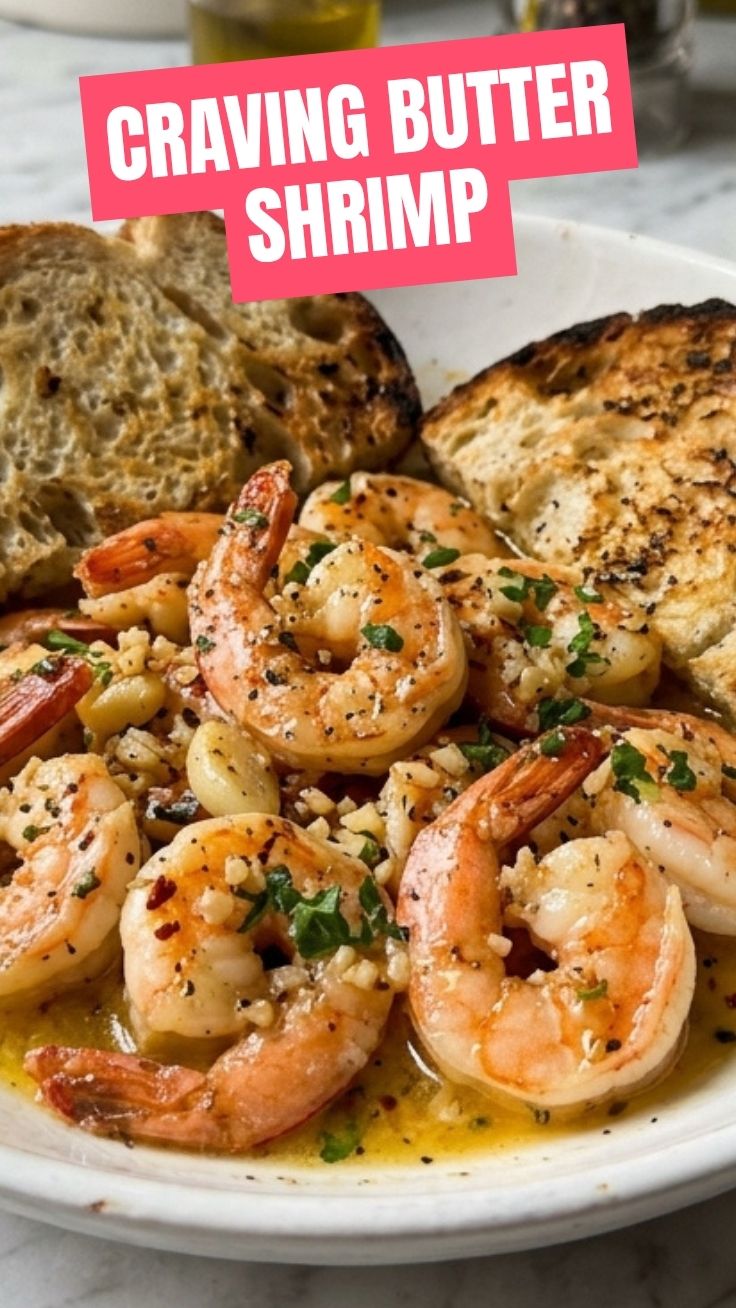
Ever craved a dish that’s both effortlessly elegant and ridiculously flavorful? Imagine succulent shrimp, bathed in a rich, aromatic garlic butter sauce, cooked to perfection in minutes. That’s the magic of homemade Garlic Butter Shrimp! Preparing this culinary gem at home isn’t just about saving money; it’s about controlling the quality of your ingredients, customizing flavors to your exact preference, and basking in the delightful aroma that fills your kitchen. This blog post will guide you through creating a restaurant-quality meal that will impress without demanding hours in the kitchen, proving that gourmet doesn’t have to mean complicated.
Ingredients & Kitchen Tools
- Shrimp (1 lb or 450g): Large or jumbo (16/20 count recommended), peeled and deveined, tails on or off (your preference). Fresh or frozen (thawed).
- Unsalted Butter (4 tbsp / 55g): The foundation of our luscious sauce. Unsalted allows you to control the seasoning precisely.
- Garlic (4-6 cloves): Freshly minced for maximum aromatic impact. Avoid pre-minced for the best flavor.
- Lemon (1 medium): Half for juice, half for wedges for serving. Adds a bright, zesty counterpoint.
- Fresh Parsley (2 tbsp): Finely chopped, for garnish and a touch of freshness.
- Red Pepper Flakes (1/2 tsp, optional): For a subtle kick of heat. Adjust to your spice preference.
- Salt (to taste): Kosher or sea salt recommended.
- Black Pepper (to taste): Freshly ground is always best.
- Olive Oil (1 tbsp): For searing the shrimp.
- Large Skillet/Frying Pan: Preferably non-stick or cast iron, large enough to hold all the shrimp in a single layer.
- Tongs: Essential for flipping and handling shrimp.
- Small Bowl: For prepping ingredients.
Prep Time & Cooking Schedule
- Prep Time: 10 minutes (Thawing shrimp, mincing garlic, chopping parsley, juicing lemon).
- Cook Time: 5-7 minutes (Shrimp cooks very quickly!).
- Resting Time: 0 minutes (Serve immediately for best results).
This recipe is incredibly fast, making it a perfect weeknight meal. Ensure all your ingredients are prepped and measured before you start cooking, as the actual cooking time is minimal.
Step-by-Step Instructions
1. Prepare the Shrimp: If using frozen shrimp, thaw them thoroughly under cold running water or in the refrigerator overnight. Pat the thawed shrimp completely dry with paper towels. This is crucial for a good sear. Season lightly with salt and pepper.
2. Heat the Skillet: Place your large skillet over medium-high heat. Add the olive oil and allow it to shimmer, indicating it’s hot enough.
3. Sear the Shrimp: Add the prepared shrimp to the hot skillet in a single layer. Avoid overcrowding the pan; cook in batches if necessary. Cook for about 60-90 seconds per side, until the shrimp turn pink and opaque. The shrimp should have a slight char. Remove the cooked shrimp from the skillet and set aside.
4. Create the Garlic Butter Sauce: Reduce the heat to medium. Add the butter to the same skillet. Once melted, add the minced garlic and red pepper flakes (if using). Sauté for about 30-60 seconds until the garlic is fragrant, being careful not to burn it. Burnt garlic tastes bitter.
5. Finish the Dish: Return the seared Garlic Butter Shrimp to the skillet. Pour in the fresh lemon juice and sprinkle with chopped fresh parsley. Toss everything gently to coat the shrimp evenly in the garlic butter. Cook for another 30 seconds, allowing the flavors to meld.
6. Serve Immediately: Transfer the shrimp and sauce to a serving platter. Garnish with additional fresh parsley and lemon wedges.
Nutritional Benefits & Advantages
Shrimp is a lean protein powerhouse, low in calories but rich in essential nutrients like selenium, vitamin B12, and phosphorus. It also provides beneficial omega-3 fatty acids. While butter adds richness, it’s a source of fat-soluble vitamins like A and E. Paired with fresh garlic, known for its immune-boosting and anti-inflammatory properties, this dish offers a delicious way to enjoy a nutrient-dense meal that supports overall well-being.
Tips, Variations & Cooking Advice
- Spice It Up: For a more pronounced kick, increase the red pepper flakes or add a dash of cayenne pepper.
- Herbaceous Twist: Experiment with other fresh herbs like dill, chives, or oregano for different flavor profiles.
- Wine Infusion: A splash of dry white wine (about 1/4 cup) can be added after the garlic for an extra layer of complexity in the sauce. Let it simmer and reduce briefly before adding the shrimp back.
- Creamy Version: For a richer, creamier sauce, whisk in 1/4 cup of heavy cream at the end, simmering until slightly thickened.
- Serving Suggestions: This shrimp is fantastic over pasta, rice, quinoa, or simply with crusty bread to soak up all that glorious sauce. It also pairs beautifully with a fresh garden salad or steamed vegetables.
- Gluten-Free/Dairy-Free: This recipe is naturally gluten-free. For a dairy-free version, substitute butter with your favorite plant-based butter alternative.
Common Mistakes to Avoid
- Overcooking Shrimp: This is the most common mistake! Overcooked shrimp become rubbery and tough. Watch them closely; they turn opaque and pink very quickly.
- Overcrowding the Pan: This lowers the pan’s temperature, steaming the shrimp instead of searing them, resulting in a less desirable texture. Cook in batches if necessary.
- Burning Garlic: Garlic cooks quickly. Keep an eye on it and lower the heat if needed to prevent it from turning bitter.
- Underseasoning: Don’t be afraid to season the shrimp itself before cooking, and then taste the sauce to adjust salt and pepper at the end.
Storage & Meal Prep Tips
Leftover Garlic Butter Shrimp can be stored in an airtight container in the refrigerator for up to 2-3 days. Reheat gently in a skillet over low heat or in the microwave to prevent overcooking. Freezing cooked shrimp is generally not recommended as it can compromise the texture, making it tough when reheated. For meal prep, you can prepare the sauce ingredients (mince garlic, chop parsley) ahead of time, then cook the shrimp fresh when ready to eat.
Conclusion
Embrace the simple sophistication of homemade Garlic Butter Shrimp! This recipe proves that extraordinary flavors aren’t reserved for fancy restaurants. With minimal effort, you can create a memorable meal, bursting with the savory richness of garlic butter sauce and perfectly cooked shrimp. Give it a try, share your delightful creations, and let this become a beloved staple in your culinary repertoire. Happy cooking!
FAQs
Q: Can I use frozen cooked shrimp for this recipe?
A: While possible, it’s best to use raw shrimp. Cooked frozen shrimp often become rubbery when reheated. If you must use them, add them to the sauce at the very end, just long enough to warm through.
Q: What’s the best way to thaw frozen shrimp quickly?
A: Place the frozen shrimp in a colander and rinse under cold running water for 5-10 minutes, or until fully thawed. Pat very dry before cooking.
Q: My garlic butter sauce seized up. What happened?
A: This usually happens if the heat is too high when adding lemon juice, which can cause the butter to separate. Ensure your heat is low to medium when finishing the sauce, and whisk gently to emulsify.
Q: How do I know when the shrimp is perfectly cooked?
A: Shrimp cooks quickly! It will turn from grayish-translucent to opaque pink and curl into a C-shape. If it curls into an O-shape, it’s likely overcooked.