Master the Flavor: Your Guide to Irresistible Homemade Orange Chicken
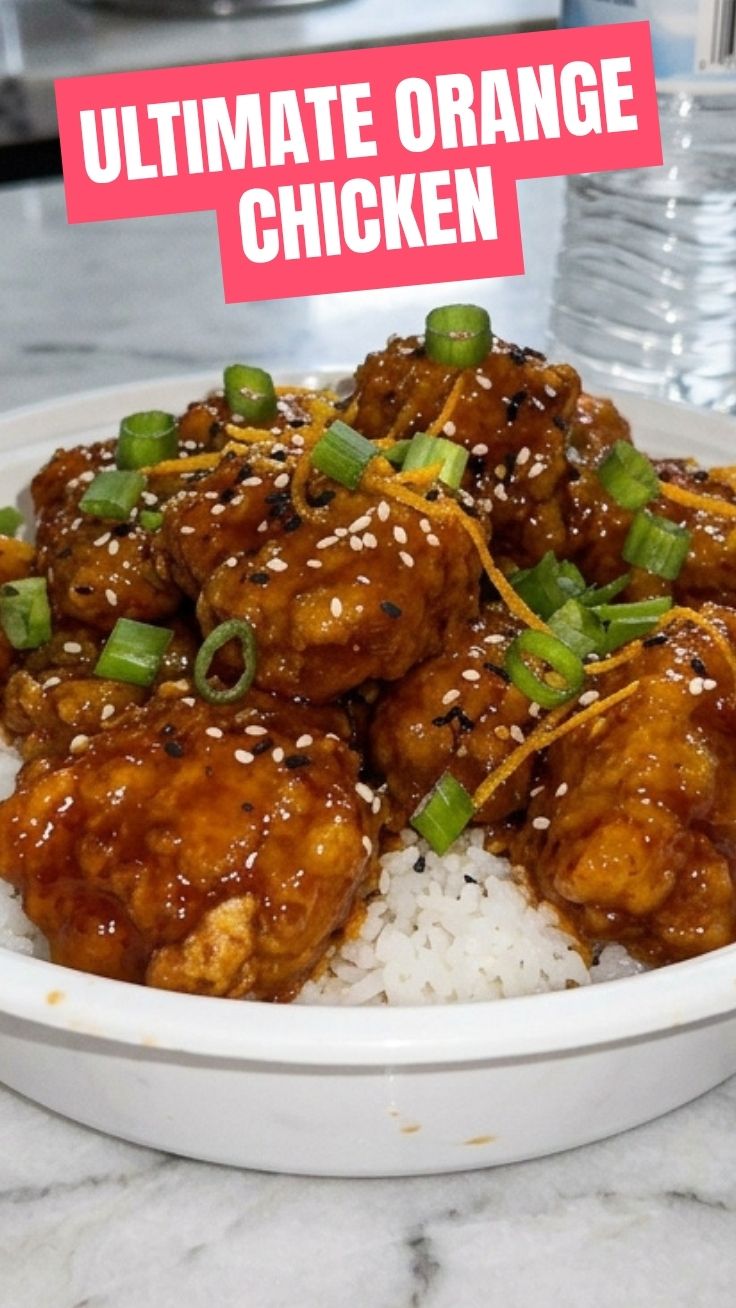
Are you tired of takeout, craving that perfect balance of sweet and tangy, with a hint of spice, all from the comfort of your own kitchen? Look no further! Today, we’re diving deep into the art of creating a truly sensational homemade Orange Chicken. Forget those mystery ingredients and over-processed sauces; making this beloved dish yourself allows for fresh, high-quality components and an incredible depth of flavor that simply can’t be replicated. We’ll guide you through every step to achieve that coveted crispy exterior and tender interior, all while delivering a vibrant citrus punch that rivals any restaurant favorite. And for those who enjoy a bit more heat and complexity, many of these techniques can be adapted to perfect a savory General Tso Chicken too. Get ready to transform your weeknight dinner into an extraordinary culinary experience!
Ingredients & Kitchen Tools
Gathering your mise en place is the first step to culinary success. Here’s what you’ll need:
- For the Chicken:
* 1 ½ lbs boneless, skinless chicken thighs or breasts: Thighs offer more flavor and tenderness; breasts are leaner.
* ¼ cup cornstarch: For that essential crispy coating.
* 1 large egg, beaten: Helps the cornstarch adhere.
* Salt and freshly ground black pepper: To season the chicken.
* 2 cups vegetable oil (or similar high smoke point oil): For frying.
- For the Orange Sauce:
* 1 cup fresh orange juice: The heart of our sauce, preferably freshly squeezed for best flavor.
* ¼ cup rice vinegar: Adds a tangy brightness.
* 2 tablespoons soy sauce (low sodium preferred): For umami and saltiness.
* 2 tablespoons brown sugar: Balances the tang with sweetness.
* 1 tablespoon fresh ginger, grated: Aromatic and adds a warm spice.
* 2 cloves garlic, minced: Essential aromatic base.
* 1 teaspoon orange zest: Intensifies the citrus flavor.
* ½ teaspoon red pepper flakes (optional): For a touch of heat.
* 1 tablespoon cornstarch + 2 tablespoons cold water (slurry): To thicken the sauce.
- For Garnish & Serving:
* Sesame seeds: For a nutty finish.
* Sliced green onions: Adds freshness and color.
* Cooked white or brown rice: The perfect accompaniment.
* Steamed broccoli or stir-fried vegetables: For a complete meal.
- Kitchen Tools:
* Large skillet or wok: For frying and saucing.
* Mixing bowls: For chicken and sauce prep.
* Whisk: To combine sauce ingredients.
* Tongs or slotted spoon: For handling chicken and draining.
* Paper towels: To drain excess oil.
* Grater/zester: For ginger and orange zest.
Prep Time & Cooking Schedule
- Prep time: 20 minutes (includes chopping, mincing, and sauce preparation)
- Cook time: 20-25 minutes (frying chicken, cooking sauce, combining)
- Total time: Approximately 40-45 minutes
This recipe is designed for a relatively quick turnaround. The most time-consuming part is frying the chicken in batches. We recommend preparing your sauce while the chicken fries to optimize your kitchen flow.
Step-by-Step Instructions
1. Prepare the Chicken: Cut the chicken into 1-inch bite-sized pieces. In a medium bowl, whisk the egg. In another shallow dish, combine the cornstarch, salt, and pepper. Dip each chicken piece into the egg, then dredge it thoroughly in the cornstarch mixture, ensuring it’s fully coated. Set aside on a wire rack.
2. Make the Orange Sauce: In a medium saucepan, whisk together the fresh orange juice, rice vinegar, soy sauce, brown sugar, grated ginger, minced garlic, orange zest, and red pepper flakes (if using). Bring the mixture to a simmer over medium heat, stirring occasionally.
3. Fry the Chicken: Heat the vegetable oil in a large skillet or wok over medium-high heat until it reaches about 350-375°F (175-190°C). Carefully add the coated chicken in batches, ensuring not to overcrowd the pan. Fry for 4-6 minutes per batch, or until golden brown and cooked through. Use tongs or a slotted spoon to remove the chicken and place it on a paper-towel-lined plate to drain excess oil. Cook all the chicken pieces.
4. Thicken the Sauce: While the chicken is draining, in a small bowl, whisk together the 1 tablespoon cornstarch and 2 tablespoons cold water until smooth (this is your slurry). Once the orange sauce is simmering, gradually whisk in the cornstarch slurry. Continue to whisk until the sauce thickens to your desired consistency, about 1-2 minutes. The vibrant flavors of this homemade Orange Chicken are truly unparalleled, and this sauce is the key differentiator. Simultaneously, when crafting a robust General Tso Chicken, a similar thickening step ensures a velvety, clingy coating that elevates the dish.
5. Combine and Serve: Add the fried chicken directly into the thickened orange sauce in the saucepan. Toss gently until all the chicken pieces are thoroughly coated.
6. Garnish and Enjoy: Transfer the orange chicken to a serving platter. Garnish generously with sesame seeds and sliced green onions. Serve immediately over fluffy white rice with a side of steamed vegetables.
Nutritional Benefits & Advantages
Homemade Orange Chicken offers significant advantages over its takeout counterpart. By controlling the ingredients, you reduce unhealthy fats, excess sodium, and artificial flavors. Fresh orange juice provides a good source of Vitamin C, an essential antioxidant. Using lean chicken (especially breasts) offers high-quality protein for muscle repair and satiety. Moreover, the inclusion of fresh ginger and garlic contributes to the dish’s flavor profile while offering anti-inflammatory properties. This recipe allows you to tailor the sweetness and spice levels to your dietary needs, making it a healthier and more satisfying option.
Tips, Variations & Cooking Advice
- Spice It Up: For extra heat, increase the red pepper flakes in the sauce or add a pinch of dried cayenne pepper.
- Gluten-Free: Use tamari instead of soy sauce and ensure your cornstarch is certified gluten-free.
- Vegetarian Option: Substitute crispy baked tofu or tempeh for the chicken.
- Healthier Frying: For less oil, you can pan-fry the chicken with less oil until golden, or even air fry it for a crispy, lower-fat alternative. Adjust cooking times accordingly.
- Citrus Boost: Add a squeeze of fresh lime juice to the finished sauce for an extra layer of brightness.
- Marinade: For even more flavor, consider marinating the chicken in a little soy sauce and ginger for 15-20 minutes before coating.
Common Mistakes to Avoid
- Overcrowding the Pan: Frying too much chicken at once will lower the oil temperature, leading to soggy, oily chicken rather than crispy. Fry in batches!
- Under-Seasoning the Chicken: Don’t rely solely on the sauce for flavor. A pinch of salt and pepper on the chicken makes a big difference.
- Over-Thickening the Sauce: Add the cornstarch slurry gradually. You can always add more, but it’s hard to thin out an overly thick sauce.
- Not Draining Excess Oil: Ensure your fried chicken drains well on paper towels to prevent greasiness.
- Using Bottled Orange Juice Concentrates: Freshly squeezed orange juice makes an immense difference in the sauce’s flavor.
Storage & Meal Prep Tips
Leftover Orange Chicken can be stored in an airtight container in the refrigerator for up to 3-4 days. While the crispy coating may soften slightly, the flavors will meld beautifully. To reheat, gently warm in a skillet over medium heat or in the microwave. For best results maintaining some crispness, place it on a baking sheet in a preheated oven at 300°F (150°C) for 10-15 minutes until heated through. This recipe is also great for meal prepping; simply store the chicken and sauce separately and combine just before serving for a fresher texture.
Conclusion
Crafting your own delightful Orange Chicken at home is a rewarding culinary journey, offering superior flavor and customizability compared to any takeout option. From the golden-crisp chicken to the perfectly balanced sweet and tangy sauce, every bite is a testament to fresh ingredients and thoughtful preparation. The techniques learned here also provide a fantastic foundation for exploring other Asian-inspired favorites, like a robust General Tso Chicken. We hope you feel empowered to recreate this irresistible dish in your own kitchen. Give it a try, share your delicious results with us, and let your taste buds embark on an unforgettable adventure!
FAQs
Q1: Can I bake the chicken instead of frying it?
A1: Yes, you can for a healthier option. Toss the coated chicken with a tablespoon of oil and bake at 400°F (200°C) for 20-25 minutes, flipping halfway, until golden and cooked through. It won’t be as crispy as fried but still delicious.
Q2: How can I make the sauce spicier?
A2: Increase the red pepper flakes to 1 teaspoon or more, or add a pinch of cayenne pepper to the sauce ingredients. You can also garnish with fresh chili slices.
Q3: My sauce isn’t thickening. What should I do?
A3: Ensure your cornstarch slurry is well mixed and add it gradually, whisking constantly while the sauce simmers. If it’s still too thin, mix another half tablespoon of cornstarch with a tablespoon of cold water and slowly add until desired consistency is reached.
Q4: Can I use bottled orange juice?
A4: While fresh is best for vibrant flavor, you can use high-quality, 100% pure orange juice (not from concentrate, if possible). Avoid juices with added sugars or artificial flavors.
Q5: What’s the best way to ensure the chicken stays crispy in the sauce?
A5: For maximum crispness, toss the fried chicken with the sauce just before serving. If you let it sit for too long, the sauce will soften the coating. Some people even prefer to serve the sauce on the side for dipping.