The Ultimate Homemade Mac and Cheese: Your Guide to Creamy, Cheesy Perfection
Tired of lackluster, boxed mac and cheese? Imagine a decadent, bubbling casserole, its golden crust hinting at the rich, velvety sauce beneath, each bite a symphony of cheesy goodness. Crafting your own homemade Mac and Cheese isn’t just about cooking; it’s about creating an experience, a moment of pure culinary bliss that store-bought versions simply can’t replicate. This classic comfort food, when made with love and fresh ingredients, transforms an ordinary meal into an extraordinary feast, a true testament to the power of home cooking. Join us as we unlock the secrets to a truly unforgettable mac and cheese, a dish that will become a staple in your culinary repertoire.
Ingredients & Kitchen Tools
- 1 lb Elbow Macaroni: The quintessential pasta for mac and cheese, its hollow shape perfectly cradles the creamy sauce. (Feel free to substitute with shells, cavatappi, or penne for a different textural experience.)
- 1/2 cup Unsalted Butter (1 stick): Forms the base of our roux, providing richness and flavor.
- 1/2 cup All-Purpose Flour: Thickens the béchamel sauce, creating that luscious consistency. (For a gluten-free option, use a 1:1 gluten-free flour blend.)
- 4 cups Whole Milk (warm): The liquid component of our béchamel, ensure it’s warm to prevent lumps. (Can substitute with half-and-half for extra creaminess, or dairy-free milk for a vegan alternative.)
- 1 tsp Dry Mustard: Don’t skip this! It doesn’t make the dish taste like mustard, but it enhances the cheese flavor beautifully.
- 1/2 tsp Smoked Paprika: Adds a subtle smoky depth and a hint of color.
- Salt and Freshly Ground Black Pepper to taste: Essential for balancing and amplifying all the flavors.
- 4 cups Shredded Sharp Cheddar Cheese: The star of the show. Sharp cheddar offers a robust, tangy flavor that is characteristic of classic mac and cheese. (Always shred your own cheese for a smoother melt; pre-shredded varieties contain anti-caking agents that can hinder melting.)
- 2 cups Shredded Monterey Jack or Gruyere Cheese: Adds a wonderful melt and creamy texture. Monterey Jack is mild and melts beautifully, while Gruyere offers a nutty, complex flavor.
- 1/2 cup Grated Parmesan Cheese (optional, for topping): Creates a delightful golden crust.
- Large Pot/Dutch Oven: For cooking pasta and making the sauce.
- Whisk: Essential for making a smooth roux and béchamel.
- 9×13 Inch Baking Dish: For baking the mac and cheese to golden perfection.
Prep Time & Cooking Schedule
- Prep Time: 20 minutes (includes shredding cheese and gathering ingredients)
- Cook Time: 30 minutes for the stovetop sauce, plus 25-30 minutes for baking
- Resting Time: 10 minutes (allows the sauce to set and prevents it from being too runny)
This recipe is perfect for a weeknight indulgence or a weekend gathering. The hands-on time is manageable, allowing you to seamlessly integrate it into your dinner plans.
Step-by-Step Instructions
1. Preheat & Prep: Preheat your oven to 375°F (190°C). Lightly grease a 9×13 inch baking dish. Shred all cheeses and set aside.
2. Cook the Pasta: Bring a large pot of salted water to a rolling boil. Add the elbow macaroni and cook according to package directions until al dente (slightly firm to the bite). Drain the pasta thoroughly and set aside. Do not rinse.
3. Make the Roux: In the same large pot (or a clean Dutch oven) over medium heat, melt the unsalted butter. Once melted, gradually whisk in the all-purpose flour. Cook, stirring constantly, for 1-2 minutes until a thick paste (roux) forms and smells slightly nutty. Do not let it brown too much.
4. Create the Béchamel: Slowly pour in the warm whole milk, whisking constantly to prevent lumps. Continue whisking until the sauce is smooth and begins to thicken, about 5-7 minutes.
5. Season & Melt the Cheese: Remove the pot from the heat. Stir in the dry mustard and smoked paprika. Gradually add the shredded sharp cheddar cheese and Monterey Jack (or Gruyere), a handful at a time, whisking until each addition is fully melted and incorporated before adding more. This ensures a silky smooth sauce for our homemade Mac and Cheese. Season generously with salt and freshly ground black pepper to taste. Remember, the sauce should be well-seasoned as it forms the base flavor for this ultimate comfort food.
6. Combine & Bake: Add the cooked macaroni to the cheese sauce and stir gently until every piece is evenly coated. Pour the macaroni and cheese mixture into your prepared baking dish. If using, sprinkle the grated Parmesan cheese evenly over the top.
7. Bake to Perfection: Bake for 25-30 minutes, or until the top is golden brown and bubbly.
8. Rest & Serve: Remove from the oven and let it rest for 10 minutes before serving. This allows the sauce to firm up slightly, preventing it from being too runny.
Nutritional Benefits & Advantages
While often seen as an indulgence, homemade mac and cheese offers several nutritional advantages when prepared with quality ingredients. Dairy products provide essential calcium and vitamin D for strong bones. Opting for whole wheat pasta can increase fiber intake, aiding digestion. Protein from the cheese contributes to muscle repair and satiety. Furthermore, preparing it at home gives you complete control over the types of cheese and fat content, allowing you to tailor it to your dietary needs.
Tips, Variations & Cooking Advice
- Cheese Blends: Experiment with other cheeses! A touch of smoked gouda, fontina, or even a spicy pepper jack can elevate the flavor profile.
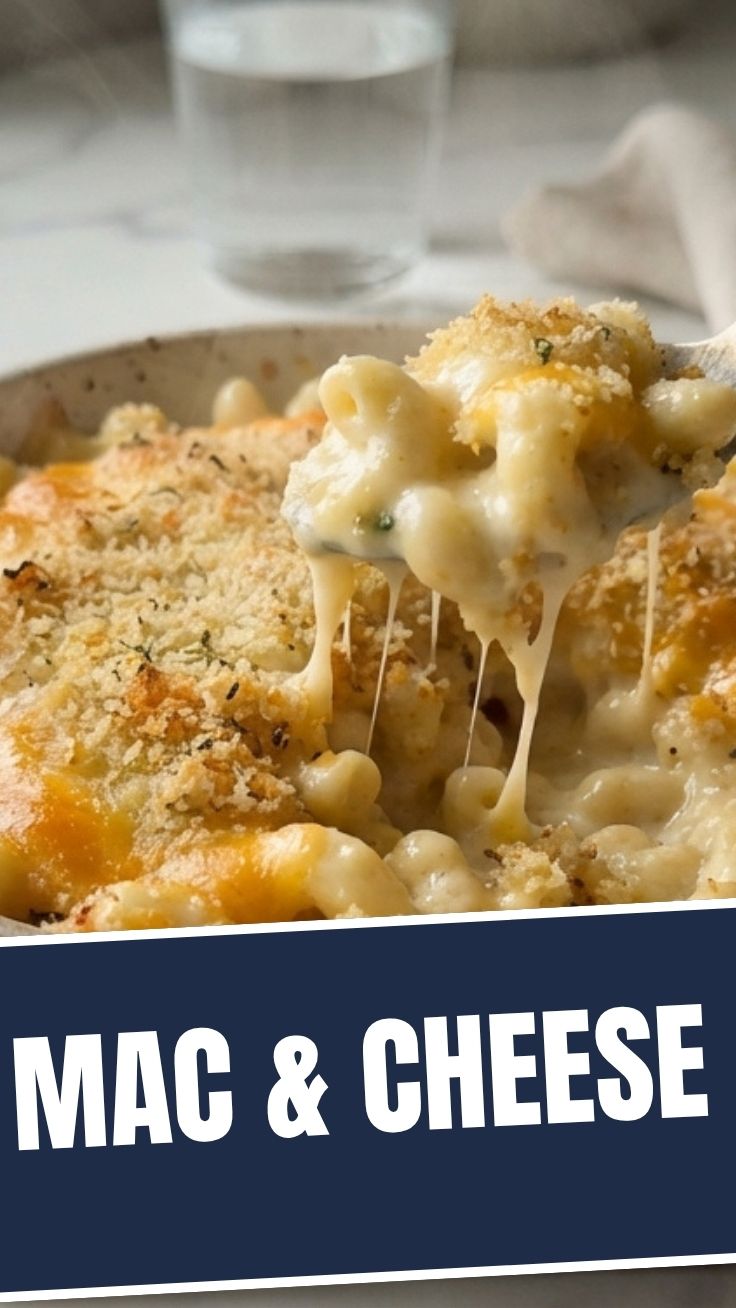
- Crust Topping: For an extra crunchy topping, mix 1 cup of panko breadcrumbs with 2 tablespoons of melted butter and sprinkle over the top before baking.
- Added Protein: Stir in cooked, shredded chicken, crumbled bacon, or sautéed sausage for a heartier meal.
- Vegetable Boost: Sneak in some finely chopped steamed broccoli, peas, or spinach for added nutrients.
- Spice It Up: Add a pinch of cayenne pepper or a dash of hot sauce to the cheese sauce for a little kick.
- Dairy-Free Version: Use unsweetened dairy-free milk (like almond or oat) and your favorite dairy-free shreds and cream cheese alternative.
- Gluten-Free: Ensure you use certified gluten-free pasta and a 1:1 gluten-free flour blend for the roux.
Common Mistakes to Avoid
- Overcooking the Pasta: Mushy pasta leads to a gummy mac and cheese. Cook it just to al dente, as it will continue to cook in the oven.
- Not Shredding Your Own Cheese: Pre-shredded cheese contains anti-caking agents that can leave your sauce grainy and prevent a smooth melt.
- Adding Cold Milk to the Roux: This can cause the roux to seize up and become lumpy. Ensure your milk is warm before adding it.
- Over-Thickening the Sauce: The sauce will thicken further as it bakes and cools. It should be creamy but pourable before combining with pasta.
- Not Seasoning Enough: Cheese sauces need plenty of salt and pepper to truly shine. Taste and adjust as you go.
Storage & Meal Prep Tips
Leftover mac and cheese can be stored in an airtight container in the refrigerator for up to 3-4 days. To reheat, add a splash of milk and microwave until warm, stirring occasionally, or warm gently on the stovetop. It can also be frozen for up to 3 months. Thaw overnight in the refrigerator and reheat as directed, adding extra milk if needed to restore creaminess. This makes it an excellent option for meal prepping!
Conclusion
There’s truly nothing quite like a homemade batch of Mac and Cheese. It’s more than just a dish; it’s an experience, a warm hug in a bowl that brings smiles to faces of all ages. By following these detailed steps and embracing the art of cheese sauce creation, you’ll master this ultimate comfort food and create a culinary masterpiece that will be requested again and again. Go ahead, give this recipe a try, and share your delicious results with us! We can’t wait to see your cheesy creations.
FAQs
Q: Can I make this mac and cheese ahead of time?
A: Yes, you can prepare the sauce and combine it with the pasta, then refrigerate in the baking dish for up to 24 hours. Let it come closer to room temperature before baking, and you might need to add a few extra minutes to the baking time.
Q: Why is my cheese sauce lumpy?
A: Lumps usually occur if the milk wasn’t warm when added to the roux, or if the milk was added too quickly. Ensure your milk is warm and whisk vigorously while slowly pouring it in.
Q: What’s the best cheese for mac and cheese?
A: A combination of cheeses is best for depth and melt. Sharp cheddar is classic for flavor, while Monterey Jack, Gruyere, or Fontina contribute to a super creamy texture. Always shred your own!
Q: Can I use different pasta shapes?
A: Absolutely! While elbow macaroni is traditional, shells, cavatappi, penne, or even rotini work wonderfully. Just ensure they are cooked al dente.
Q: How do I prevent my mac and cheese from drying out when reheating?
A: When reheating, always add a splash of milk or even a dollop of butter. Stir it in as it warms to restore the sauce’s creaminess and prevent dryness.