Unlock the Secrets to Perfect BBQ Ribs: Your Ultimate Guide for Flavorful Feasts
Ever wondered how to achieve that fall-off-the-bone tenderness and irresistible smoky flavor in your homemade ribs? Getting that quintessential barbecue experience right at home might seem daunting, but with the right guidance, it’s not only achievable but incredibly rewarding. Today, we’re diving deep into the art of creating mouth-watering Labor Day BBQ Ribs that will impress every guest and leave them clamoring for your secret recipe. Forget dry, tough ribs; we’re talking about succulent, flavorful perfection that rivals any pitmaster’s best. So, let’s fire up the grill (or oven!) and transform your cooking game with this ultimate guide to crafting the perfect BBQ Ribs and, for those seeking a more hands-off approach, even some fantastic ideas for Slow Cooker Ribs.
Ingredients & Kitchen Tools
Crafting stellar ribs begins with quality ingredients and the right culinary arsenal.
- Pork Ribs (2-3 racks, St. Louis style or baby back): These cuts are ideal for a balance of meat and fat, leading to juicy, flavorful results. St. Louis style offers a richer flavor due to more fat, while baby backs are leaner and cook faster.
- Dry Rub (homemade or store-bought): A crucial flavor layer. A good rub typically includes brown sugar, paprika, chili powder, garlic powder, onion powder, salt, and black pepper.
- BBQ Sauce (homemade or your favorite brand): The finishing glaze that adds tang, sweetness, and complexity.
- Apple Cider Vinegar (1/2 cup): Used in a spritz for moisture and tenderization during cooking.
- Apple Juice (1/2 cup): Another spritz component, adding sweetness and aiding the “bark.”
- Optional Smoker Wood Chunks (hickory or applewood): For authentic smoky flavor if using a smoker or grill with a smoke box.
- Aluminum Foil (heavy-duty): Essential for wrapping the ribs to create a moist cooking environment.
- Basting Brush: For applying BBQ sauce evenly.
- Meat Thermometer: For ensuring safe internal temperatures, though visual cues are often sufficient for ribs.
- Large Roasting Pan or Baking Sheet with Rack: For oven cooking or as a resting spot.
- Spray Bottle: For applying the apple cider vinegar/juice mixture.
Prep Time & Cooking Schedule
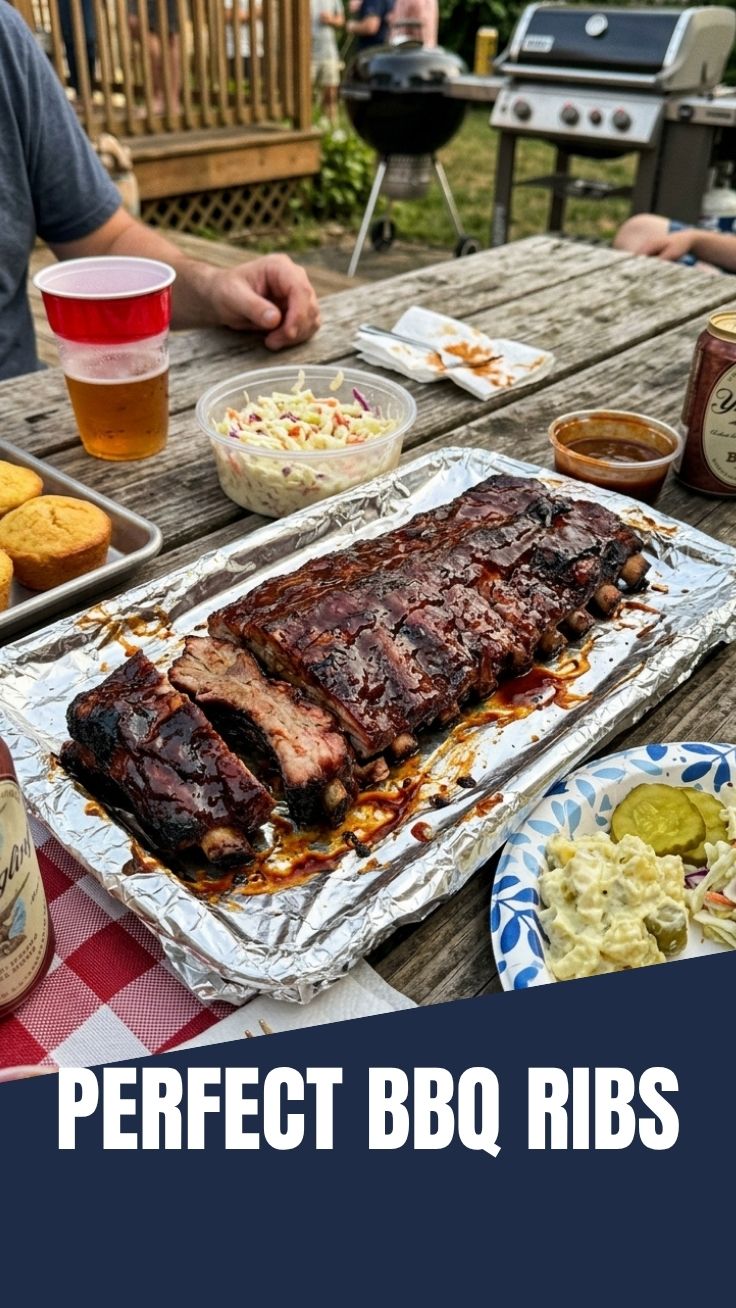
Planning is key to perfectly cooked ribs. This recipe typically involves several stages, ensuring maximum flavor and tenderness.
- Prep Time: 20-30 minutes (includes membrane removal and dry rub application).
- Marinating Time (Optional): 2-4 hours, or ideally overnight, in the refrigerator for deeper flavor penetration.
- Cook Time: 3-6 hours, depending on cooking method (grill, oven, or smoker) and rib type.
- Resting Time: 15-20 minutes after cooking to allow juices to redistribute.
Total active preparation is minimal, but the cooking process requires patience. For instance, if you’re aiming for a Sunday afternoon feast, begin your dry rub application on Saturday evening.
Step-by-Step Instructions
Let’s break down the journey to succulent Labor Day BBQ Ribs. This method focuses on a hybrid approach for maximum flavor and tenderness.
1. Prepare the Ribs: Start by removing the membrane from the back of each rack. This thin, silverskin layer can make ribs tough. Use a butter knife to lift it from a corner, then grip with a paper towel and pull it off. Pat the ribs dry with paper towels.
2. Apply the Dry Rub: Generously coat both sides of the ribs with your chosen dry rub, pressing it gently to adhere. For best results, allow them to marinate in the refrigerator for at least 2 hours, or preferably overnight.
3. Smoke/Oven Bake (Initial Cook): Preheat your smoker to 225-250°F (107-121°C) or oven to 275°F (135°C). If smoking, place the ribs directly on the grates and smoke for 2-3 hours, spritzing with the apple cider vinegar/juice mixture every 45-60 minutes to keep them moist. If using an oven, place ribs on a rack over a baking sheet, meaty side up, and bake for 2.5-3 hours. This initial stage builds the flavor and “bark.”
4. The “Wrap” or “2-2-1” Stage: This is where the magic of tenderizing happens. Lay out two large sheets of heavy-duty foil for each rack. Place a rack of ribs meaty side down on the first sheet, then top with a splash of apple juice or cider. Cover with the second foil sheet and crimp the edges tightly to create a sealed packet. Return the wrapped ribs to the smoker or oven and cook for another 2 hours at the same temperature. This steaming action ensures fall-off-the-bone tenderness. This stage is particularly crucial for perfect BBQ Ribs, helping to break down connective tissues.
5. Saucing and Finishing: Carefully unwrap the ribs (they’ll be very tender!). Discard any accumulated liquid. Slather both sides generously with your favorite BBQ sauce. Return the unwrapped, sauced ribs to the smoker, grill, or oven for another 30-60 minutes at 300°F (150°C), or until the sauce is caramelized and slightly tacky. This step sets the sauce and provides that final, delectable glaze. If you prefer a simpler approach, remember that Slow Cooker Ribs offer a fantastic alternative to achieve similar tenderness with less direct supervision during the cooking process.
6. Rest and Serve: Transfer the ribs to a cutting board, tent loosely with foil, and let them rest for 15-20 minutes before slicing. This allows the juices to redistribute, resulting in a more succulent final product.
Nutritional Benefits & Advantages
Pork ribs, in moderation, offer several nutritional benefits:
- High Protein: An excellent source of high-quality protein, essential for muscle repair and growth.
- Vitamins and Minerals: Rich in B vitamins (especially B12, niacin, and B6), which are vital for energy metabolism and nervous system function. They also contain essential minerals like phosphorus, selenium, and zinc.
- Satiety: The combination of protein and fat helps in feeling full and satisfied, potentially aiding in portion control.
- Convenience (especially Slow Cooker Ribs): While the grill method is delicious, opting for Slow Cooker Ribs significantly reduces active cooking time, making it a convenient option for busy individuals to enjoy a hearty, home-cooked meal.
Tips, Variations & Cooking Advice
- Flavor Variations: Experiment with different dry rubs (sweet, spicy, smoky) and BBQ sauces (vinegar-based, mustard-based, tomato-based).
- Alternative Cooking Methods: No smoker? No problem! Use your oven, or for ultra-tender results with minimal effort, try the Slow Cooker Ribs method. You can finish them under a broiler or on a hot grill for a quick char.
- Ingredient Swaps: For dietary restrictions, look for sugar-free BBQ sauces or create your own with alternative sweeteners.
- Gluten-Free/Dairy-Free: Most dry rubs are naturally gluten-free and dairy-free. Always check BBQ sauce labels for hidden ingredients.
- The 3-2-1 Method: A common pitmaster technique for spare ribs: 3 hours smoking unwrapped, 2 hours wrapped, 1 hour sauced and cooking directly. Adjust times for baby back ribs (typically 2-2-1).
Common Mistakes to Avoid
- Not Removing the Membrane: This is the most common oversight and leads to tough, chewy ribs.
- Overcooking/Undercooking: Ribs should be tender but not disintegrate when you pick them up. Look for the meat pulling back from the bone by about half an inch.
- Applying Sauce Too Early: If you apply BBQ sauce at the beginning, it will burn and become bitter. Wait until the last 30-60 minutes of cooking.
- Lack of Resting Time: Skipping the rest period can result in drier ribs as the juices escape when you cut into them too soon.
Storage & Meal Prep Tips
- Refrigeration: Leftover ribs can be stored in an airtight container in the refrigerator for 3-4 days.
- Freezing: For longer storage, wrap individual portions tightly in plastic wrap and then in foil, or place in freezer-safe bags. They can be frozen for up to 3 months.
- Reheating: To maintain moisture, reheat ribs gently in the oven at a low temperature (250-300°F / 120-150°C), covered with foil, until heated through. You can also re-sauce them before reheating for added flavor. Avoid microwaving, as it can make them rubbery.
- Meal Prep: Cook a large batch of ribs, then portion and store for quick and easy meals throughout the week. They’re excellent in sandwiches, salads, or with simple sides.
Conclusion
Mastering the art of Labor Day BBQ Ribs is a journey that rewards patience with unparalleled flavor and tenderness. By following these steps and understanding the nuances of temperature and time, you’re well on your way to becoming a backyard barbecue hero. Whether you choose the smoky allure of the grill or the effortless convenience of Slow Cooker Ribs, the principles of a good rub, proper cooking stages, and a delicious sauce remain paramount. Don’t be afraid to experiment and personalize your approach. Give this recipe a try, share your culinary triumphs with us, and savor the incredible satisfaction of creating truly exceptional ribs right in your own kitchen!
FAQs
Q1: How do I know when the ribs are done?
A1: The most reliable indicator is tenderness. The meat should pull back from the bones about a half-inch, and when gently twisted, a bone should easily detach.
Q2: Can I make this a spicier recipe?
A2: Absolutely! Increase the amount of cayenne pepper or chili flakes in your dry rub, or use a spicier BBQ sauce. You can also add a pinch of ghost pepper powder for extreme heat.
Q3: What if I don’t have a smoker?
A3: No problem! Follow the oven instructions, incorporating liquid smoke into your dry rub or spritz for a smoky essence, or opt for the easy Slow Cooker Ribs method.
Q4: What are the best woods for smoking ribs?
A4: Hickory, apple, and cherry wood are excellent choices for pork ribs, each imparting a distinct, delicious smoky flavor.
Q5: My ribs are tough, what went wrong?
A5: This usually means they weren’t cooked long enough, especially in the wrapped stage, or the membrane wasn’t removed. Ensure sufficient cooking time and temperature.