Sweet and Savory Perfection: Mastering the Art of Honey Garlic Shrimp at Home
Ever caught yourself scrolling through endless takeout menus, wishing you could recreate that irresistible sweet and savory magic of your favorite Asian-inspired dishes in your own kitchen? The good news is, you absolutely can! Today, we’re diving deep into the delectable world of Honey Garlic Shrimp – a dish so effortlessly elegant yet astonishingly simple to prepare. Forget complicated techniques and obscure ingredients; this honey garlic shrimp recipe offers a burst of flavor that will impress your family and friends, all while being remarkably beginner-friendly. Preparing this culinary delight at home not only ensures freshness and quality but also allows you to control the ingredients, catering to your taste preferences and dietary needs.
Ingredients & Kitchen Tools
Crafting the perfect honey garlic shrimp is as much about the quality of
your ingredients as it is about the right tools. Here’s what you’ll need:
- 1 lb Large Shrimp, peeled and deveined: Fresh or frozen (thawed
completely). Larger shrimp hold up better to cooking and absorb
flavor beautifully.
- 3-4 cloves Garlic, minced: The heart of our aromatic profile.
Freshly minced is always best for maximum flavor.
- ¼ cup Honey: Provides the essential sweetness and glaze. Use a
good quality, runny honey.
- 2 tablespoons Soy Sauce (low-sodium preferred): Adds umami and
saltiness without overpowering.
- 1 tablespoon Rice Vinegar: A touch of acidity to balance the
sweetness and richness.
- 1 tablespoon Olive Oil or Vegetable Oil: For sautéing the
shrimp.
- 1 teaspoon Sriracha or Red Pepper Flakes (optional): For a
touch of heat, if desired.
- 1 tablespoon Cornstarch (optional, for thicker sauce): Helps to
thicken the luscious glaze.
- Green Onions, chopped (for garnish): Adds a fresh, vibrant finish.
- Sesame Seeds (for garnish): Enhances flavor and visual appeal.
Kitchen Tools:
- Large Skillet or Wok: Essential for even cooking of the shrimp.
- Whisk: For combining the sauce ingredients smoothly.
- Small Bowl: For mixing the sauce.
- Tongs or Spatula: For turning the shrimp.
Prep Time & Cooking Schedule
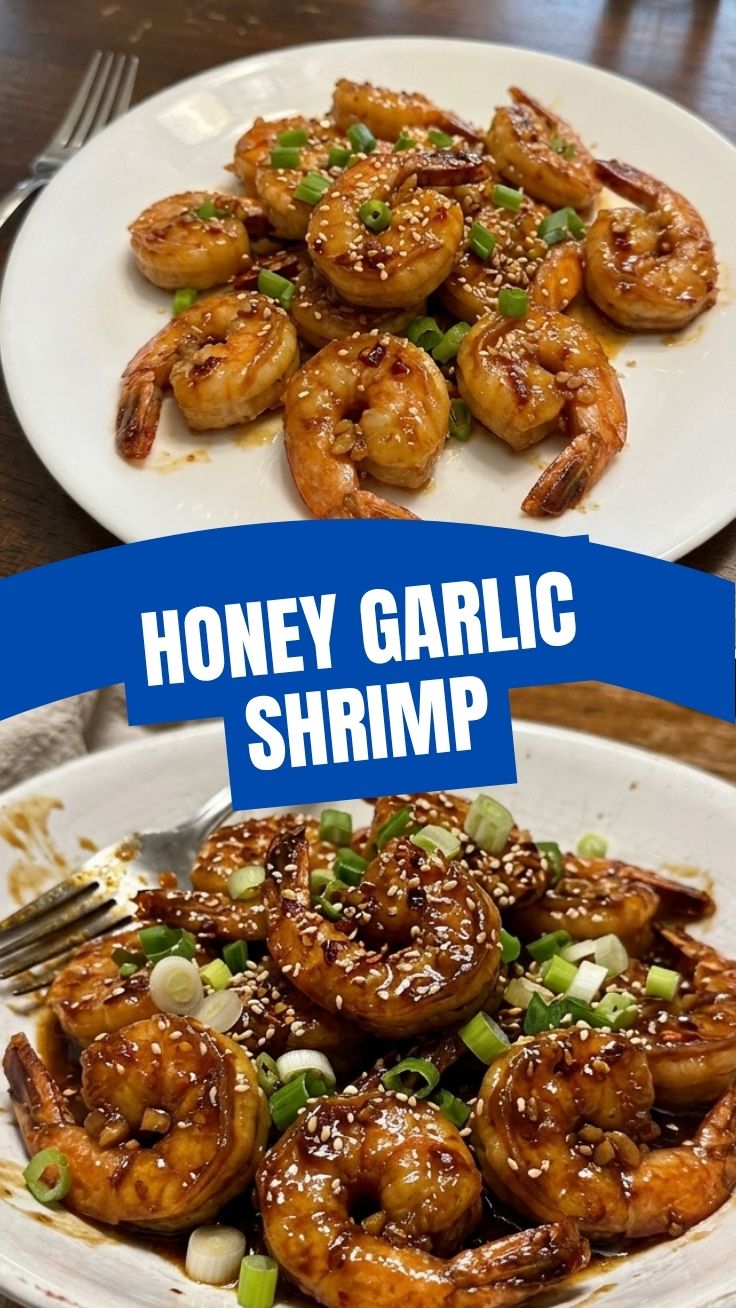
This recipe is a weeknight warrior, designed for speed and deliciousness.
- Prep Time: 10 minutes (This includes mincing garlic,
peeling/deveining shrimp if needed, and mixing the sauce.)
- Cook Time: 8-10 minutes (Shrimp cooks very quickly!)
- No Resting or Marinating Time needed: This recipe is ready to
cook immediately once prepped.
Plan to start cooking once your sides (rice, noodles, or vegetables) are
almost ready, as the shrimp is best served fresh off the pan.
Step-by-Step Instructions
Let’s get cooking! Follow these simple steps to culinary success, ensuring each piece of shrimp is perfectly coated in that irresistible glaze.
1. Prepare the Shrimp: If using frozen shrimp, thaw them completely
under cold running water and pat them thoroughly dry with paper
towels. This is crucial for getting a good sear.
2. Make the Honey Garlic Sauce: In a small bowl, whisk together the
minced garlic, honey, soy sauce, rice vinegar, and sriracha (if
using). If you want a thicker sauce for your Honey Garlic Shrimp, whisk in the cornstarch
now until no lumps remain.
3. Cook the Shrimp: Heat the olive oil in a large skillet or wok
over medium-high heat. Once hot, add the shrimp in a single layer.
Avoid overcrowding the pan; cook in batches if necessary. Cook for
1-2 minutes per side, until the shrimp turn pink and opaque. Don’t
overcook, or they will become rubbery.
4. Add the Sauce: Pour the prepared honey garlic sauce over the
cooked shrimp. Bring the sauce to a simmer, stirring constantly,
until it thickens and coats the shrimp beautifully. This usually
takes 1-3 minutes. The shrimp will soak up the flavors, making this
honey garlic shrimp recipe truly shine.
5. Garnish and Serve: Remove from heat immediately. Garnish with
chopped green onions and sesame seeds. Serve hot over rice, noodles,
or with your favorite roasted vegetables.
Nutritional Benefits & Advantages
Shrimp is a lean protein powerhouse, offering numerous health benefits. It’s an excellent source of protein, providing essential amino acids for muscle growth and repair. It’s also packed with selenium, a powerful antioxidant, and iodine, crucial for thyroid function. This dish, especially when paired with brown rice and a generous serving of vegetables, offers a balanced meal rich in nutrients. The garlic also contributes immune-boosting properties, while honey provides natural sweetness.
Tips Variations & Cooking Advice
- Spice it up: Add more sriracha or a pinch of red pepper flakes for
extra heat.
- Citrus Burst: A squeeze of fresh lime or lemon juice at the end
can brighten the flavors.
- Ginger Infusion: For an extra layer of flavor, add ½ teaspoon of
freshly grated ginger to the sauce.
- Vegetable Boost: Toss in some quick-cooking vegetables like snap
peas, bell peppers, or broccoli florets during the last few minutes
of cooking.
- Gluten-Free: Easily make this recipe gluten-free by using
tamari (gluten-free soy sauce) instead of regular soy sauce.
- Keto-Friendly: Substitute honey with a keto-friendly liquid
sweetener and serve with cauliflower rice or zoodles.
Common Mistakes to Avoid
- Overcooking the Shrimp: This is the most common mistake. Shrimp
cooks quickly; once it turns pink and opaque, it’s done. Overcooked
shrimp becomes tough and rubbery.
- Not Drying the Shrimp: Wet shrimp will steam rather than sear,
resulting in a less desirable texture. Pat them absolutely dry
before cooking.
- Crowding the Pan: Overcrowding lowers the pan temperature,
preventing a good sear and leading to steamed shrimp. Cook in
batches if necessary.
- Skipping the Fresh Garlic: While garlic powder can work in a
pinch, fresh minced garlic offers a far superior flavor profile.
Storage & Meal Prep Tips
Leftover Honey Garlic Shrimp can be stored in an airtight container in the refrigerator for up to 2-3 days. While not ideal for freezing (shrimp’s texture can change upon thawing), it reheats well in a microwave or a skillet over low heat. For meal prep, cook the shrimp and store it separately from your chosen carb (rice, quinoa) and vegetables. This prevents sogginess and maintains freshness.
Conclusion
There you have it – a magnificent, easy-to-follow guide to creating the most incredible Honey Garlic Shrimp right in your own kitchen. This vibrant, flavorful dish is a testament to the fact that home cooking can be both delightful and straightforward. We encourage you to try this amazing honey garlic shrimp recipe and experience the satisfaction of a truly homemade meal that rivals any restaurant offering. Share your creations, experiment with variations, and let us know your success stories in the comments below! Happy cooking!
FAQs
Q1: Can I use pre-cooked shrimp for this recipe?
A1: While you can, it’s not recommended. Pre-cooked shrimp will likely
become overcooked and rubbery, as they only need to be heated through.
Start with raw shrimp for the best texture and flavor.
Q2: What can I serve with Honey Garlic Shrimp?
A2: This dish pairs wonderfully with steamed white or brown rice,
quinoa, lo mein noodles, or a side of stir-fried vegetables like
broccoli, asparagus, or bell peppers.
Q3: How do I know if my shrimp is cooked through?
A3: Raw shrimp is grayish and translucent. As it cooks, it turns pink and
opaque, curling into a “C” shape. If it forms a tight “O” shape, it’s
overcooked.
Q4: Can I make the sauce in advance?
A4: Yes, you can prepare the honey garlic sauce up to 2-3 days in
advance and store it in an airtight container in the refrigerator. This
can significantly speed up your dinner prep on a busy night.