Craving a Taste of Childhood? Unlock the Magic of Homemade Candied Treats!
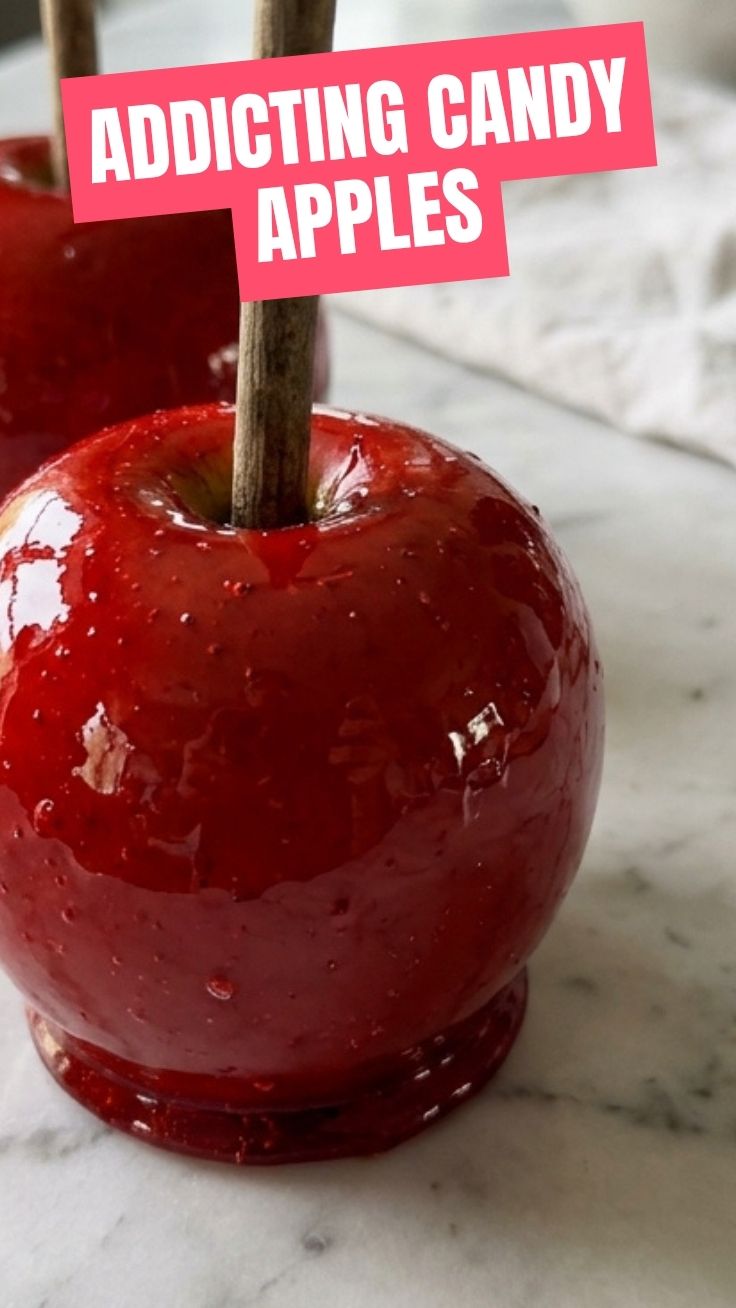
Remember that irresistible crunch, followed by a burst of sweet apple flavor, often found at fall festivals and carnivals? What if you could recreate that enchanting experience in your own kitchen, perfectly tailored to your cravings? Preparing delightful treats like Candy Apples at home isn’t just about saving money; it’s about the joy of creation, the control over ingredients, and the unforgettable aroma that fills your home. This guide will walk you through crafting perfect Candy Apples and even explore the equally delicious world of caramel apples, proving that gourmet treats are within everyone’s reach.
Ingredients & Kitchen Tools
Gather your culinary arsenal before embarking on this sweet adventure!
- 6-8 Medium Apples: Honeycrisp or Granny Smith are ideal choices for their crisp texture and ability to hold up well under the candy coating. Wash and thoroughly dry them.
- 2 cups Granulated Sugar: The foundation of our candy coating, providing sweetness and structure.
- 1/2 cup Light Corn Syrup: Prevents crystallization, ensuring a smooth, glossy finish.
- 1 cup Water: Dissolves the sugar and corn syrup for the candy base.
- 1/2 teaspoon Red Food Coloring (gel or liquid): Optional, but gives Candy Apples their classic vibrant hue.
- 1 teaspoon Vanilla Extract: Adds depth of flavor to the candy.
- Wooden Skewers (6-8): For easy handling and dipping.
- Candy Thermometer: Crucial for achieving the perfect candy consistency. Essential!
- Heavy-Bottomed Saucepan (3-quart minimum): To prevent scorching and ensure even heating.
- Baking Sheet lined with Parchment Paper or Silicone Mat: For cooling without sticking.
- Pastry Brush (optional): To brush down sugar crystals from the sides of the pan.
Prep Time & Cooking Schedule
- Prep Time: 20-30 minutes (includes washing apples, inserting sticks, and gathering ingredients).
- Cook Time: 15-20 minutes (for bringing the candy mixture to temperature).
- Cooling Time: 30-45 minutes (for the candy to set completely).
This recipe is best made when you have a dedicated block of time. The candy mixture heats up quickly, requiring consistent attention. Plan to start approximately an hour before you want to enjoy your treats.
Step-by-Step Instructions
1. Prepare the Apples: Thoroughly wash and dry all apples. This is crucial for the candy to adhere properly. Insert a wooden skewer firmly into the stem end of each apple, extending about halfway through.
2. Combine Ingredients: In your heavy-bottomed saucepan, combine the granulated sugar, light corn syrup, and water. Stir gently to mix.
3. Heat the Mixture: Place the saucepan over medium-high heat. Attach your candy thermometer to the side of the pot, ensuring it doesn’t touch the bottom. Bring the mixture to a boil without stirring. If sugar crystals form on the sides of the pan, use a wet pastry brush to gently brush them down into the liquid.
4. Reach Candy Stage: Continue to boil the mixture until the candy thermometer registers 300-310°F (149-154°C), also known as the “hard crack” stage. This is where your Candy Apples will get their iconic snap! Immediately remove the pan from the heat.
5. Add Flavor and Color: Carefully stir in the red food coloring (if using) and vanilla extract. Be quick, as the candy will begin to cool.
6. Dip the Apples: Working quickly and carefully, tilt the saucepan to pool the candy mixture. Dip each apple into the hot candy, rotating it to ensure an even, complete coating. Allow any excess candy to drip back into the pan.
7. Cool and Set: Place the dipped apples onto the prepared baking sheet. Allow them to cool completely at room temperature until the candy coating is hard and shiny. For those interested in an alternative, the same technique can be adapted for caramel apples, just substitute the candy recipe for a rich caramel the next time!
Nutritional Benefits & Advantages
While Candy Apples are undeniably a treat, they do offer some surprising benefits. Apples are a good source of dietary fiber, which aids digestion, and contain vitamin C, an essential antioxidant. The homemade aspect means you control the quality of ingredients, avoiding artificial preservatives often found in store-bought versions. Opting for organic apples can further enhance their nutritional profile while offering peace of mind about pesticide exposure.
Tips Variations & Cooking Advice
- Spiced Candy: Add a pinch of cinnamon or apple pie spice to the candy mixture for a warming, autumnal twist.
- Chocolate Drizzle: Once cooled, drizzle melted white or dark chocolate over your Candy Apples for an extra layer of indulgence.
- Nutty Coating: For caramel apples, a common variation is to roll the fresh caramel-dipped apples in chopped nuts like peanuts or pecans before they set. This also works beautifully with candy apples.
- Smaller Portions: Use smaller “lunchbox” apples for mini candy apples, perfect for parties or as bite-sized treats.
- Food Safety: Always ensure your apples are thoroughly dry. Any moisture will cause the candy coating to crystallize or slide off.
Common Mistakes to Avoid
- Not Drying Apples: As mentioned, wet apples are the enemy of a smooth, adhering candy coating.
- Skipping the Candy Thermometer: Guessing the temperature almost guarantees failure. Invest in one; it’s a game-changer for candy making.
- Stirring While Boiling: Once the sugar, corn syrup, and water are mixed and on the stove, avoid stirring. Stirring can introduce sugar crystals, leading to a grainy candy.
- Overheating or Underheating: Too hot, and the candy can burn or become brittle; too cool, and it won’t set properly or will be too thick to coat evenly. Stick to the 300-310°F range.
- Dipping Too Slowly: The candy hardens quickly. Work efficiently to ensure optimal coating.
Storage & Meal Prep Tips
Homemade Candy Apples are best enjoyed within 1-2 days of preparation. Store them individually wrapped in cellophane or in an airtight container at room temperature. Refrigeration can cause the candy to become sticky and dull. They do not freeze well. For meal prep, consider preparing the apples in advance (washing, drying, and skewering) and making the candy mixture just before you plan to serve.
Conclusion
Crafting your own Candy Apples is a truly rewarding experience, transforming simple fruit into a dazzling and delicious treat. With a little precision and the right tools, you can achieve that perfect glossy crunch and rich flavor that evokes nostalgic memories. Don’t be intimidated by the candy-making process; practice makes perfect! We encourage you to give this recipe a try, discover the simple joy of homemade sweets, and perhaps even experiment with making your own caramel apples. Share your creations with us!
FAQs
Q1: Why did my candy coating turn grainy?
A1: Graininess often occurs due to sugar crystals forming. This can happen if you stir the mixture too much while it’s boiling, or if sugar crystals adhere to the sides of the pan and fall back in. Using a wet pastry brush to wipe down the sides during boiling can help prevent this.
Q2: My candy mixture is too thick to dip the apples. What went wrong?
A2: This usually means the candy mixture cooled down too much before you finished dipping. Reheat it gently over low heat until it reaches the desired dipping consistency again, ensuring it doesn’t go much past the ideal temperature.
Q3: Can I use other types of apples?
A3: Yes, but choose firm, crisp apples like Fuji or Gala. Softer varieties tend to get mushy under the hot candy coating. Granny Smith is excellent for a tart counterpoint to the sweet candy.
Q4: How can I make a smaller batch?
A4: You can halve all the ingredients for a smaller batch. Ensure your saucepan is still heavy-bottomed, even if smaller, and adjust your cooking time predictions slightly as smaller volumes heat faster.
Q5: Is there a substitute for corn syrup?
A5: While corn syrup is highly recommended for its anti-crystallization properties, you can try substituting it with an equal amount of liquid glucose or golden syrup. However, results might vary slightly in terms of texture and shine.