Rustic Delight: Crafting the Perfect Homemade Blackberry Cobbler
Tired of the same old dessert routine? Imagine a warm, bubbling bake brimming with juicy, tart blackberries, crowned with a golden, buttery biscuit topping. Doesn’t that sound like the ultimate comfort food? There’s an undeniable charm and satisfaction in preparing homemade Blackberry Cobbler from scratch. Beyond the incredible aroma that fills your kitchen, making it yourself ensures you control the quality of ingredients, customize the sweetness, and savor a truly authentic flavor profile. This isn’t just about baking; it’s about creating memories and enjoying a timeless classic that brings smiles to every face. If you’re looking for delightful dessert recipes, this cobbler is an absolute must-try.
Ingredients & Kitchen Tools
- For the Filling:
* 6 cups Fresh or Frozen Blackberries: (If using frozen, do not thaw.) The star of our show, providing tartness and vibrant color.
* ¾ cup Granulated Sugar: Adjust to your blackberries’ sweetness.
* ¼ cup All-Purpose Flour: Thickens the berry juices into a luscious sauce.
* 1 ½ tablespoons Lemon Juice: Brightens the flavor and enhances the berries’ natural acidity.
* 1 teaspoon Vanilla Extract: Adds a warm, aromatic depth.
* Pinch of Salt: Balances the sweetness.
- For the Topping:
* 1 ½ cups All-Purpose Flour: Forms the base of our tender biscuit topping.
* ¼ cup Granulated Sugar: For a touch of sweetness in the topping.
* 2 teaspoons Baking Powder: Provides lift and a fluffy texture.
* ½ teaspoon Salt: Enhances the overall flavor.
* ½ cup (1 stick) Unsalted Butter, very cold and cubed: Creates flakiness and richness.
* ½ cup Buttermilk (or regular milk + 1 tsp lemon juice/vinegar): Adds moisture and a slight tang, promoting tenderness.
* 1 large Egg Yolk (optional): For an extra rich, golden crust.
* 1 tablespoon Granulated Sugar (for sprinkling, optional): Adds sparkle and a sweet crunch.
- Kitchen Tools:
* 9×13 inch baking dish (or 2-quart casserole dish): The perfect size for this recipe.
* Large mixing bowls: For combining ingredients.
* Pastry blender or two forks: For cutting butter into flour.
* Measuring cups and spoons: For accuracy.
* Whisk: For dry ingredients.
* Spatula: For stirring and scraping.
Prep Time & Cooking Schedule
- Prep Time: 20 minutes
- Cook Time: 45-55 minutes
- Resting Time: 15-20 minutes (before serving)
This recipe is ideal for a weekend baking project or a special weeknight treat. The prep is quick, allowing you to get it into the oven efficiently. The resting time post-baking is crucial; it allows the berry filling to set and prevents it from being too runny when served, ensuring each scoop holds its delightful shape.
Step-by-Step Instructions
1. Preheat & Prepare: Preheat your oven to 375°F (190°C). Lightly grease a 9×13 inch baking dish.
2. Combine Filling Ingredients: In a large bowl, gently combine the blackberries, ¾ cup granulated sugar, ¼ cup flour, lemon juice, vanilla extract, and a pinch of salt. Toss carefully until the blackberries are evenly coated. Pour the mixture into your prepared baking dish.
3. Prepare the Topping: In another large bowl, whisk together 1 ½ cups flour, ¼ cup granulated sugar, baking powder, and ½ teaspoon salt.
4. Cut in Butter: Add the very cold, cubed butter to the dry ingredients. Using a pastry blender or two forks, cut the butter into the flour mixture until it resembles coarse crumbs with some pea-sized pieces of butter remaining. This is key for a tender, flaky topping.
5. Add Wet Ingredients: Gradually add the buttermilk (and egg yolk, if using) to the flour mixture, mixing gently with a fork until just combined. Be careful not to overmix; a slightly shaggy dough is perfect.
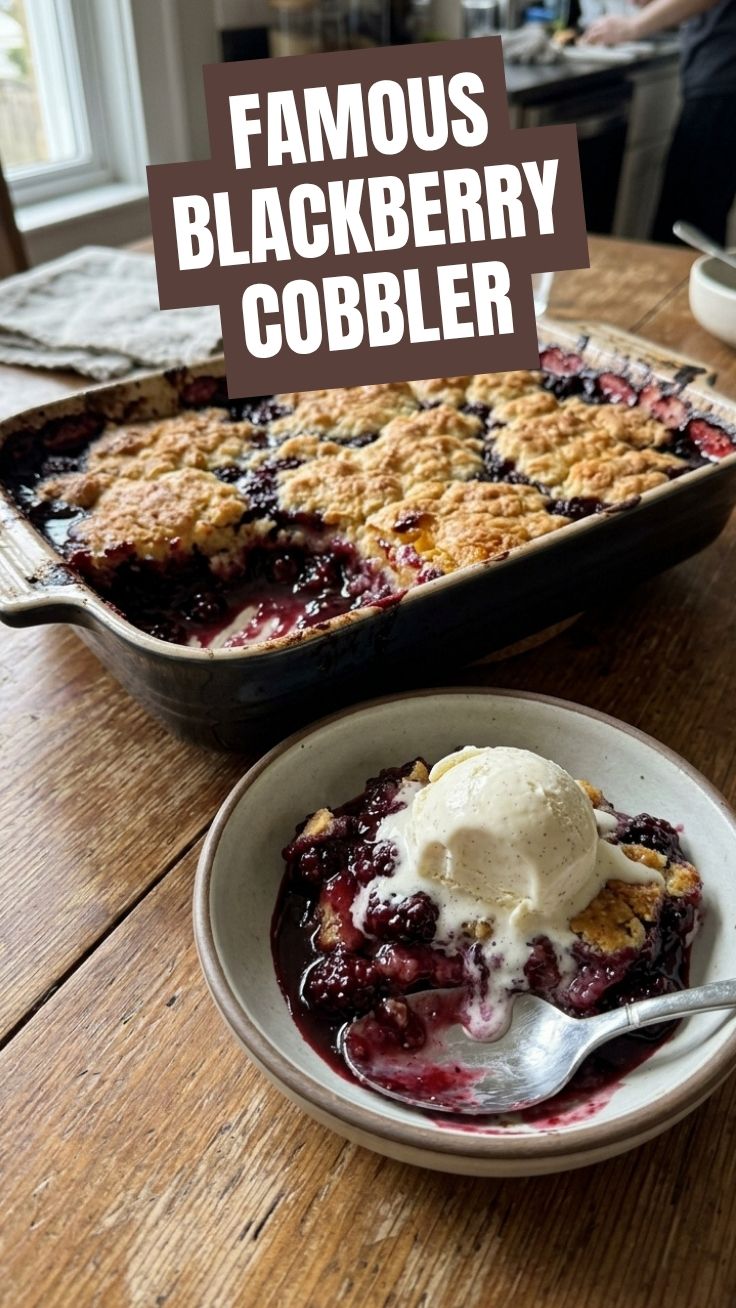
6. Assemble the Cobbler: Drop spoonfuls of the biscuit topping over the berry filling, spreading them out as evenly as possible. Don’t worry about covering every inch; the gaps will allow the delicious berry filling to bubble through. If desired, sprinkle the remaining tablespoon of sugar over the topping for added crunch and shine. This is when your kitchen starts to smell incredible, hinting at the perfect Blackberry Cobbler you’re about to enjoy, a truly classic addition to any collection of dessert recipes.
7. Bake: Bake for 45-55 minutes, or until the topping is golden brown and the berry filling is bubbly and thick. The exact baking time may vary depending on your oven.
8. Cool & Serve: Let the cobbler cool for at least 15-20 minutes before serving. This allows the filling to set and prevents it from being too runny. Serve warm with a scoop of vanilla ice cream or a dollop of whipped cream.
Nutritional Benefits & Advantages
Blackberries are nutritional powerhouses, rich in antioxidants, fiber, and Vitamin C and K. This Blackberry Cobbler provides a good source of dietary fiber from the fruit, aiding digestion. While it is a dessert, the focus on fresh fruit ensures you’re getting valuable nutrients alongside your indulgence. Homemade versions also generally contain fewer artificial ingredients and preservatives than store-bought options.
Tips, Variations & Cooking Advice
- Mixed Berry Cobbler: Swap out half the blackberries for raspberries, blueberries, or sliced strawberries for a vibrant mixed-berry delight.
- Spice it Up: Add a pinch of cinnamon or nutmeg to the berry filling for a warm, autumnal flavor.
- Gluten-Free Version: Use a 1:1 gluten-free flour blend for both the filling thickener and the topping. Ensure your baking powder is also gluten-free.
- Dairy-Free Option: Use plant-based butter and a dairy-free milk alternative (like almond or oat milk) for the buttermilk substitute.
- Crispier Topping: For an even crispier topping, mix in a tablespoon of cornmeal with the flour for the topping.
- Sweetness Adjustment: Taste your blackberries. If they’re particularly tart, you might want to add an extra tablespoon or two of sugar to the filling.
Common Mistakes to Avoid
- Overmixing the Topping: Overmixing develops gluten, leading to a tough, bready topping instead of a tender, flaky one. Mix until just combined.
- Serving Immediately: While tempting, serving the cobbler hot out of the oven can result in a runny filling. The 15-20 minute resting period is crucial for the filling to set.
- Warm Butter: Using warm or room-temperature butter for the topping will result in a less flaky texture. Always use very cold butter, ideally cut into cubes and even chilled briefly before use.
- Under-baking: An under-baked cobbler will have a pale topping and a raw-tasting filling. Look for a deep golden-brown topping and a visibly bubbly, thick filling.
Storage & Meal Prep Tips
- Storage: Cover leftover Blackberry Cobbler tightly with plastic wrap or aluminum foil and store at room temperature for up to 2 days, or in the refrigerator for up to 4 days.
- Reheating: Reheat individual portions in the microwave for 30-60 seconds, or in a preheated oven at 350°F (175°C) for 10-15 minutes until warmed through.
- Freezing: You can freeze baked cobbler. Once completely cooled, wrap it tightly in plastic wrap and then in foil. It can be frozen for up to 3 months. Thaw overnight in the refrigerator and reheat as desired.
Conclusion
There’s nothing quite like the comforting aroma and taste of a homemade Blackberry Cobbler. This recipe delivers a perfect balance of tart fruit and sweet, tender topping, making it a stellar addition to your collection of dessert recipes. Whether it’s for a family gathering or a quiet evening in, this cobbler promises warmth, flavor, and satisfaction. Give it a try, experiment with your own twists, and share your delicious creations with us!
FAQs
Q1: Can I use frozen blackberries without thawing?
A1: Yes, absolutely! In fact, it’s often recommended not to thaw frozen berries for cobbler. This helps prevent the filling from becoming too watery. Just toss them directly into the filling mixture.
Q2: What if I don’t have buttermilk for the topping?
A2: You can easily make a buttermilk substitute! Add 1 tablespoon of lemon juice or white vinegar to a liquid measuring cup, then fill the rest of the way with regular milk (up to ½ cup). Let it sit for 5 minutes until it curdles slightly before using.
Q3: How do I know when the cobbler is perfectly baked?
A3: Look for a deep golden-brown crust on top and intensely bubbly filling around the edges, indicating the fruit juices have thickened properly. Insert a small knife or skewer into the fruit filling; it should come out with thickened juices, not watery.
Q4: Can I make this cobbler ahead of time?
A4: You can prepare the filling and topping ingredients separately a day in advance and store them in the refrigerator. Assemble and bake just before serving for the best results. Alternatively, bake the entire cobbler a few hours ahead and gently reheat before serving.