Craving the Ultimate Burger Experience? Your Kitchen, Your Rules!
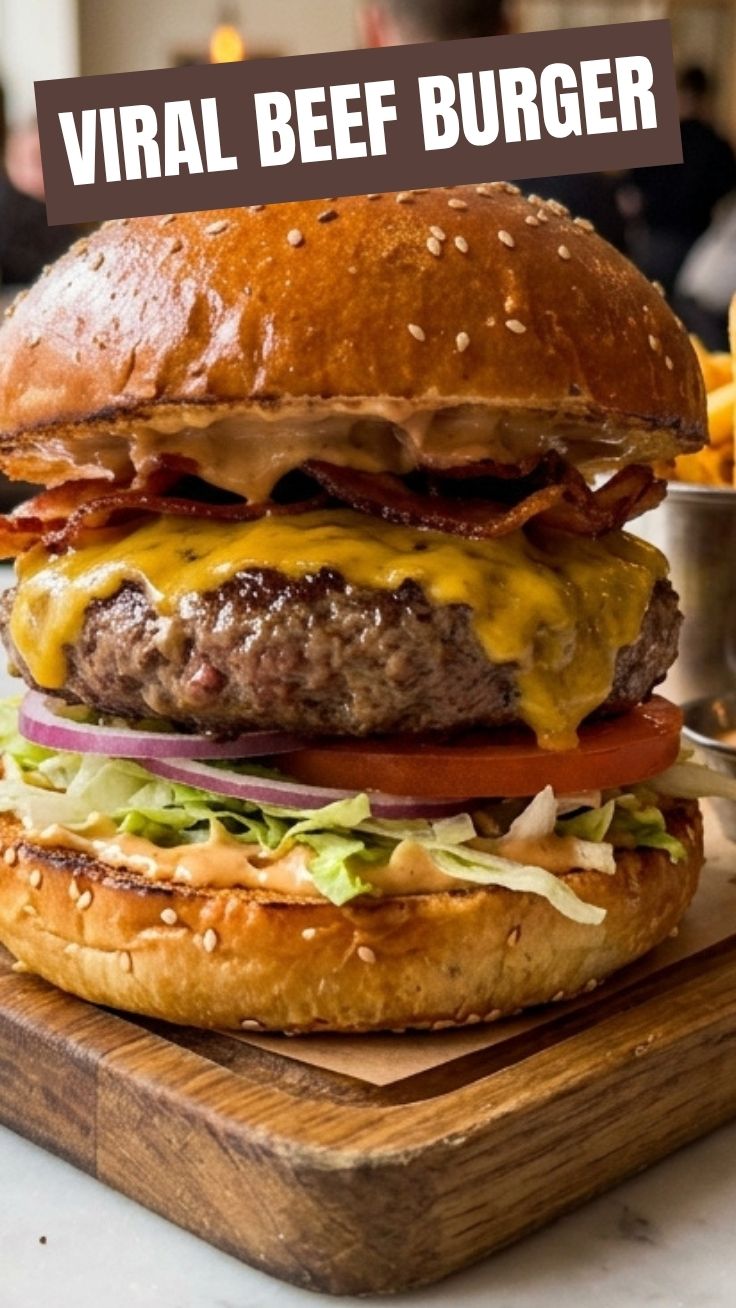
Are you tired of bland, uninspiring burgers that leave you feeling… well, just okay? Imagine sinking your teeth into a juicy, perfectly seasoned Beef Burger, crafted with love and exactly to your preference, right in your own kitchen. This isn’t just about cooking; it’s about reclaiming your culinary power and transforming a classic into a personalized masterpiece. Forget takeout; mastering this burger recipe at home not only guarantees superior flavor and quality but also gives you complete control over ingredients, ensuring a wholesome and incredibly satisfying meal every single time. Get ready to impress yourself and your loved ones with the best burger you’ve ever tasted!
Ingredients & Kitchen Tools
To embark on this delicious journey, gather these culinary essentials:
- Ground Beef (80/20 lean-to-fat ratio): 1.5 lbs – The ideal ratio for maximum juiciness and flavor.
- Burger Buns (Brioche or Potato Recommended): 4-6 – Choose a sturdy bun that can hold up to all the deliciousness.
- Cheese Slices (Cheddar, American, or Provolone): 4-6 slices – Essential for that classic melty finish.
- Lettuce Leaves (Crisp varieties like Romaine or Iceberg): 4-6 leaves – For a refreshing crunch.
- Tomato (Ripe, Sliced): 1 medium – Adds a burst of freshness and acidity.
- Red Onion (Thinly Sliced): 1/2 small – Provides a pungent bite, optional.
- Pickles (Dill or Bread & Butter Slices): To taste – A tangy counterpoint to the rich beef.
- Mayonnaise: 1/4 cup – The creamy binder for many burger sauces.
- Ketchup: 1/4 cup – Classic sweet and tangy condiment.
- Mustard (Dijon or Yellow): 2 tablespoons – Adds a zesty kick.
- Salt & Freshly Ground Black Pepper: To taste – The fundamental enhancers.
- Olive Oil or Vegetable Oil: 1 tablespoon – For grilling or pan-frying.
- Optional Toppings: Bacon, sautéed mushrooms, caramelized onions, avocado slices, fried egg.
Kitchen Tools:
- Large Mixing Bowl: For combining the ground beef.
- Patties Press or Your Hands: For forming uniform patties.
- Grill, Cast Iron Skillet, or Frying Pan: For cooking the burgers.
- Spatula: For flipping and serving.
- Meat Thermometer: For checking doneness (optional, but recommended for precision).
Prep Time & Cooking Schedule
- Prep Time: 15 minutes – This includes forming patties and slicing all your fresh toppings.
- Cook Time: 8-12 minutes – Depending on your desired doneness and cooking method.
- Resting Time (for patties): 5 minutes – Crucial for juices to redistribute, ensuring a tender burger.
This efficient schedule allows you to have a gourmet burger on the table in under 30 minutes, making it perfect for weeknight meals or spontaneous weekend gatherings.
Step-by-Step Instructions
1. Prepare the Patties: In a large bowl, gently combine the ground beef with salt and pepper. Avoid overmixing, as this can lead to tough burgers. Divide the mixture into 4-6 equal portions and form them into patties about 3/4 inch thick. Make a small indentation in the center of each patty with your thumb to prevent it from bulging while cooking. This is key to a perfectly flat, evenly cooked Beef Burger.
2. Heat Your Cooking Surface: Heat your grill, cast iron skillet, or frying pan over medium-high heat. Add a tablespoon of olive oil if using a skillet. You want a good, searing heat to create that delicious crust.
3. Cook the Burgers: Place the patties on the hot cooking surface. Cook for 3-4 minutes per side for medium-rare, 4-5 minutes for medium, and 5-6 minutes for well-done. Flip only once to achieve a great sear. During the last minute of cooking, place a slice of cheese on each patty to melt. This step is a cornerstone of any fantastic burger recipe.
4. Toast the Buns: While the burgers are cooking, lightly butter or brush your buns with oil and toast them on the grill or in a separate pan until golden brown. This adds texture and prevents sogginess.
5. Assemble Your Masterpiece: Once cooked, remove the burgers from the heat and let them rest for 5 minutes. Spread mayonnaise, ketchup, and mustard on the toasted buns. Layer with lettuce, tomato, onion, pickles, and finally, your perfectly cooked, cheesy burger patty.
Nutritional Benefits & Advantages
Crafting your own burgers offers significant nutritional advantages. You control the quality of the beef, opting for grass-fed options often higher in Omega-3 fatty acids. By choosing nutrient-rich toppings like fresh lettuce, tomatoes, and onions, you’re boosting your intake of vitamins, minerals, and fiber. Home-cooked meals also mean less sodium, unhealthy fats, and preservatives found in many commercial fast-food options. It’s a balanced meal providing protein for muscle repair and energy, healthy fats, and essential micronutrients.
Tips, Variations & Cooking Advice
- Flavor Boosts: Mix in a teaspoon of Worcestershire sauce, a dash of garlic powder, or finely chopped herbs (parsley, chives) into the ground beef mixture for extra flavor.
- Ingredient Swaps: Explore different cheeses like blue cheese, Monterey Jack, or even feta. Experiment with turkey or chicken patties for a leaner option.
- Alternative Cooking Methods: If you don’t have a grill, a well-seasoned cast iron skillet yields an incredible crust. You can also bake burgers in the oven at 400°F (200°C) for 15-20 minutes, though they won’t have the same sear.
- Dietary Adaptations: For gluten-free, use gluten-free buns or serve as a lettuce wrap. For lower carb, ditch the bun entirely.
Common Mistakes to Avoid
- Overmixing the Meat: This is the cardinal sin of burger making! Overworked meat becomes tough and dense. Gently combine ingredients.
- Pressing Patties During Cooking: Don’t press down on the burgers with your spatula. This squeezes out all the delicious juices, leading to dry, flavorless patties.
- Flipping Too Often: Flip only once to allow a proper crust to form on each side.
- Not Seasoning Enough: Salt and pepper are your friends! Don’t be shy.
- Skipping the Rest: Resting allows muscle fibers to relax and juices to redistribute, making for a much juicier burger.
Storage & Meal Prep Tips
Cooked burger patties can be stored in an airtight container in the refrigerator for up to 3-4 days. For longer storage, cooked patties can be individually wrapped and frozen for up to 2-3 months. To reheat, thaw overnight in the refrigerator, then warm gently in a skillet over medium-low heat or in a microwave until heated through. Uncooked patties can also be prepared ahead of time and stored in the fridge for up to 24 hours, separating them with parchment paper.
Conclusion
There you have it – the ultimate guide to crafting a spectacular Beef Burger right in your own kitchen! With fresh ingredients, a little patience, and these step-by-step instructions, you’ll discover that mastering this burger recipe is not just achievable, but incredibly rewarding. So fire up that grill, gather your toppings, and prepare for a truly exceptional culinary experience. Don’t be shy about experimenting with flavors and making this recipe your own. We’d love to see your creations – share your burger masterpieces and tips in the comments below!
FAQs
Q1: How do I know when my burger is done?
A1: A meat thermometer is your best friend! For medium-rare, aim for 130-135°F (54-57°C); medium, 135-140°F (57-60°C); medium-well, 140-150°F (60-66°C); well-done, 155°F+ (68°C+).
Q2: Can I use different types of ground meat?
A2: Absolutely! Ground turkey, chicken, or even a blend of beef and pork can work. Adjust cooking times as leaner meats cook faster.
Q3: My burgers sometimes fall apart. What am I doing wrong?
A3: This often happens if the meat isn’t cold enough or if the patties are too loose. Ensure your meat is chilled before forming and gently but firmly shape the patties. Avoid adding too many liquid ingredients to the mixture.
Q4: What’s the best way to get a good sear on my burger?
A4: High heat is key! Preheat your skillet or grill well before adding the patties. A cast-iron skillet is exceptional for achieving a uniform, dark crust. Don’t flip too often.
Q5: How can I prevent my buns from getting soggy?
A5: Toasting the buns creates a barrier against the burger juices and condiments. You can also spread a thin layer of mayo directly on the toasted bun before adding other toppings.