Master the Art of Perfect BBQ Ribs at Home
Are you tired of spending a fortune on mediocre restaurant ribs, or perhaps intimidated by the thought of making them yourself? Imagine sinking your teeth into tender, smoky, fall-off-the-bone BBQ Ribs right in your backyard. This comprehensive guide will transform you into a rib master, proving that achieving restaurant-quality results at home is not only possible but incredibly rewarding. Learning to prepare these succulent ribs yourself offers immense value, from customizing flavors to ensuring the highest quality ingredients. Plus, mastering the art of grilling opens a world of culinary possibilities for outdoor cooking enthusiasts.
Ingredients & Kitchen Tools
Crafting the perfect rack of ribs starts with the right components. Here’s what you’ll need:
- Pork Spareribs or Baby Back Ribs (2 racks, about 2-3 lbs each): The foundation of our dish. Baby back ribs are leaner and more tender, while spareribs are meatier and richer.
- Yellow Mustard (2 tbsp): Acts as a binding agent for the rub, helping it adhere to the meat.
- Apple Cider Vinegar (1/2 cup): Used in the spritz, adds moisture and a touch of acidity.
- Water (1/2 cup): Dilutes the apple cider vinegar for the spritz.
- Your Favorite BBQ Rub (1/2 cup): A blend of spices for flavor and crust. Store-bought or homemade works best.
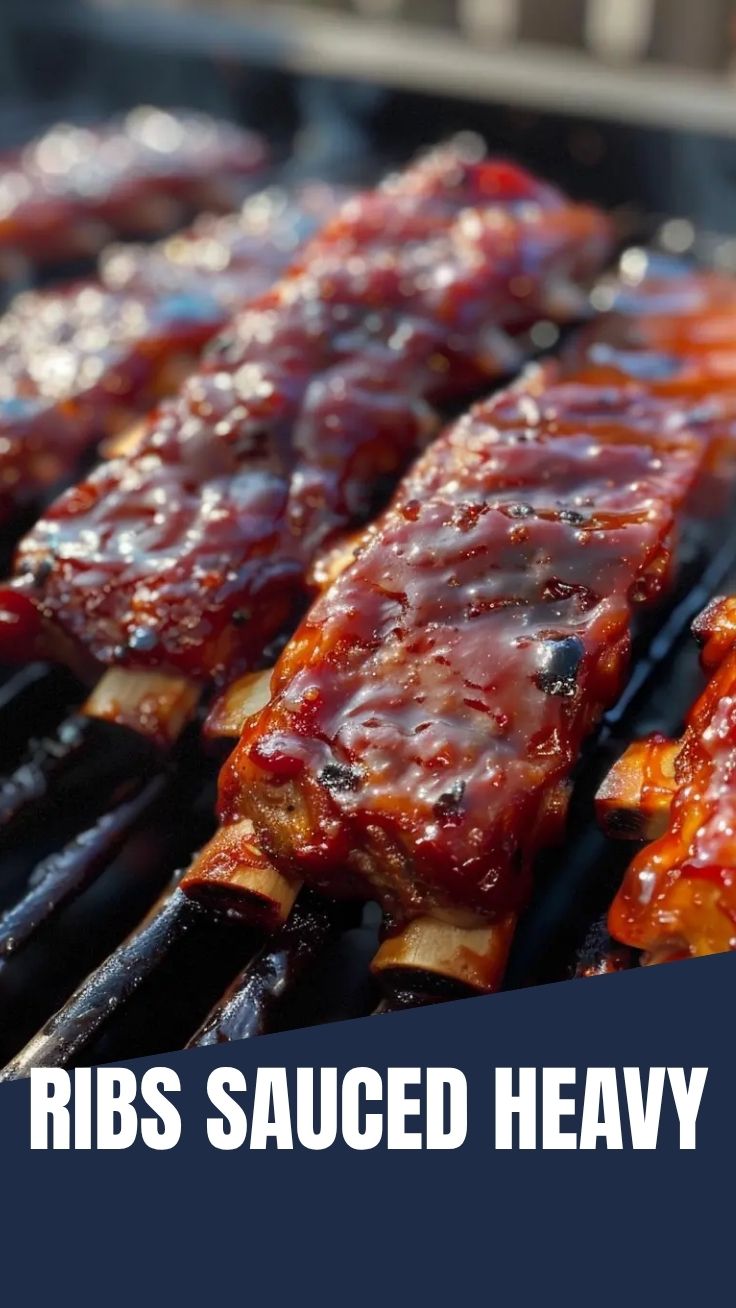
- Your Favorite BBQ Sauce (1 cup): For glazing the ribs towards the end of cooking.
- Olive Oil (1 tbsp, optional): Can be used as an alternative binder to mustard.
- Foil (heavy-duty): Essential for wrapping the ribs during the cooking process to tenderize them.
- Charcoal Grill or Gas Grill: Your primary cooking apparatus for achieving that classic smoky flavor.
- Meat Thermometer: For ensuring the ribs reach a safe internal temperature and desired doneness.
- Spray Bottle: For spritzing the ribs to keep them moist.
- Sharp Knife: For trimming excess fat and slicing the ribs.
- Cutting Board: A stable surface for preparation and carving.
- Baking Sheet: Useful for carrying ribs and resting.
- Tongs: For safely handling hot ribs on the grill.
- Basting Brush: For applying BBQ sauce.
- Paper Towels: For patting down the ribs.
Prep Time & Cooking Schedule
Planning is key for succulent ribs. This schedule ensures peak flavor and tenderness.
- Prep Time: 20-30 minutes (trimming, applying rub)
- Marinating Time (Optional): 2-4 hours or overnight (for deeper flavor penetration).
- Cook Time: 3-4 hours (depending on rib type and grill temperature).
* Smoking/Indirect Heat: 2-2.5 hours
* Wrapping: 1-1.5 hours
* Unwrapped/Saucing: 30 minutes
- Resting Time: 15-20 minutes (crucial for juice redistribution).
Step-by-Step Instructions
1. Prepare the Ribs: Pat the ribs dry with paper towels. On the bone side, locate the thin membrane (silverskin) and remove it by gently lifting a corner with a knife and pulling it off with paper towels for grip. This ensures tender ribs and better flavor absorption. Trim any excess fat.
2. Apply Binder & Rub: Spread a thin layer of yellow mustard evenly over both sides of the ribs. This acts as a binder. Generously apply your favorite BBQ rub, ensuring full coverage. If you’re sensitive to mustard, olive oil can be used instead.
3. Rest (Optional but Recommended): For maximum flavor, let the seasoned ribs rest in the refrigerator for at least 2 hours, or ideally, overnight. This allows the rub to penetrate the meat.
4. Set Up Your Grill for Indirect Heat: For perfect BBQ Ribs, maintaining a consistent temperature is crucial. If using a charcoal grill, arrange coals to one side for indirect heat, aiming for 250-275°F (120-135°C). For a gas grill, light burners on one side and place ribs on the unlit side, achieving the same temperature. Add wood chunks (hickory, apple, pecan) for smoke flavor if desired. This careful temperature management is vital for successful grilling.
5. Smoke/Cook Phase (Approx. 2-2.5 hours): Place the ribs bone-side down on the indirect heat side of the grill. Close the lid and maintain the temperature. Spritz the ribs every 45 minutes with the apple cider vinegar and water mixture to keep them moist and prevent drying out.
6. Wrap Phase (Approx. 1-1.5 hours): Remove the ribs from the grill. Place each rack on a large piece of heavy-duty foil. Add a splash of apple cider vinegar or apple juice to the foil packet (about ¼ cup per rack) if desired for extra moisture. Tightly wrap the ribs, ensuring no steam can escape. Return them to the grill, bone-side down, still over indirect heat. Continue cooking until the ribs are very tender – they should bend easily when lifted with tongs.
7. Sauce Phase (Approx. 30 minutes): Carefully unwrap the ribs, discarding the liquid in the foil. Liberally brush your favorite BBQ sauce on both sides of the ribs. Return them to the grill, unwrapped, over indirect heat. Close the lid and cook for another 30 minutes, or until the sauce has caramelized and set.
8. Rest and Serve: Remove the ribs from the grill and let them rest on a cutting board, loosely tented with foil, for 15-20 minutes. This allows the juices to redistribute, resulting in more tender and flavorful ribs. Slice between the bones and serve.
Nutritional Benefits & Advantages
Pork ribs, while a treat, offer some nutritional benefits. They are a good source of protein, essential for muscle building and repair. They also provide B vitamins (like B12) which are crucial for energy and nerve function, along with minerals such as phosphorus and zinc. When prepared at home, you have complete control over the amount of salt, sugar, and fat, making them a healthier option than many restaurant versions. Choosing quality rubs and lower-sugar BBQ sauces further enhances their dietary advantages.
Tips, Variations & Cooking Advice
- Flavor Variations: Experiment with different spice rubs (spicy, smoky, sweet) and BBQ sauces (Carolina Gold, Kansas City style, Texas-style).
- Ingredient Swaps: Use boneless country-style ribs for a quicker cook time. Replace apple cider vinegar with apple juice or beer for different moisture and flavor profiles in the spritz.
- Alternative Cooking Methods:
* Oven-Baked: Follow smoking and wrapping steps, but bake at 275°F (135°C) in the oven. Finish under the broiler for caramelization.
* Smoker: For true BBQ aficionados, a dedicated smoker offers unparalleled smoky flavor.
* Instant Pot/Pressure Cooker: Can quickly tenderize ribs before finishing on the grill or under a broiler.
- Portion Changes: Adjust the number of racks based on your guest count; generally, expect 1/2 to 1 rack per person. For smaller portions, consider cutting racks in half before cooking.
- Dietary Adaptations:
* Gluten-Free: Ensure your BBQ rub and sauce are certified gluten-free.
* Low-Sugar: Opt for sugar-free or low-sugar BBQ sauces and rubs.
Common Mistakes to Avoid
- Not Removing the Membrane: This tough membrane makes ribs chewy and prevents rub penetration. Always remove it!
- Cooking at Too High a Temperature: High heat dries out ribs and makes them tough. Low and slow is the mantra for tender ribs.
- Not Spritzing: The spritz helps maintain moisture, especially during longer cooks, contributing to juicier ribs.
- Not Wrapping: The foil wrap creates a steaming environment, essential for breaking down tough connective tissue and achieving fall-off-the-bone tenderness.
- Saucing Too Early: Applying sauce too soon can cause it to burn and become bitter. Wait until the last 30 minutes.
- Rushing the Rest Time: Just like a steak, ribs need to rest. Skipping this step results in dry, less flavorful meat.
Storage & Meal Prep Tips
- Refrigeration: Store leftover cooked ribs in an airtight container in the refrigerator for 3-4 days.
- Freezing: For longer storage, freeze ribs in an airtight freezer-safe bag or container for up to 3 months. Thaw overnight in the refrigerator before reheating.
- Reheating:
* Oven: Preheat oven to 250-275°F (120-135°C). Place ribs in a baking dish with a splash of water, cover tightly with foil, and heat until warmed through (30-45 minutes).
* Grill: Reheat over indirect medium heat, wrapped in foil, until warmed (20-30 minutes). You can finish them unwrapped over direct heat briefly to re-crisp the sauce.
* Microwave: Not recommended as it can make ribs rubbery, but if necessary, use short bursts on medium power.
Conclusion
Mastering homemade BBQ Ribs is an incredibly satisfying culinary journey. By following this detailed guide, you’ve unlocked the secrets to tender, flavorful ribs that will impress anyone. The key lies in methodical preparation, precise temperature control, and the magic of low-and-slow grilling. Don’t be afraid to experiment with rubs and sauces to find your perfect flavor profile. We encourage you to try this recipe, share your delicious results in the comments, and explore other fantastic grilled creations on our blog! Your backyard BBQ game just got a major upgrade!
FAQs
Q1: How do I know when my ribs are done?
A1: The most reliable method is to check for tenderness. When you pick up a rack with tongs, it should have a significant bend and almost break in the middle. The meat should pull away from the bone easily. For precise measurement, the internal temperature should be around 195-203°F (90-95°C), where collagen breaks down completely.
Q2: Can I use different types of wood for smoking?
A2: Absolutely! Different woods impart distinct flavors. Hickory offers a strong bacon-like smoke, apple and pecan provide a milder, sweeter fruitwood smoke, and cherry gives a beautiful mahogany color with a delicate flavor. Experiment to find your favorite!
Q3: My ribs are tough, what did I do wrong?
A3: Tough ribs are usually a result of not cooking them long enough or at too high a temperature. The connective tissues and collagen in ribs need time and low heat to break down and become tender. Ensure your grill temperature is consistent and give the ribs ample time in the wrap phase. Also, always remove the membrane!
Q4: Can I marinate the ribs in a liquid marinade instead of just a dry rub?
A4: Yes, you can! A liquid marinade (e.g., apple juice, beer, or a vinegar-based mix) can add moisture and flavor. If using, marinate for 4-12 hours in the refrigerator, then pat dry before applying the rub. The dry rub adds crucial bark and crust, so it’s good to use both or choose your preferred method.
Q5: What’s the best way to get a good “bark” (crispy crust) on my ribs?
A5: A good bark comes from adequate drying of the surface before cooking, a well-balanced rub, and enough time exposed to smoke and heat (unwrapped). Avoid over-spritzing or saucing too early, as excess moisture can hinder bark formation. Ensuring the final unwrapped phase allows the sauce to caramelize and the bark to crisp up is key.