Unleash Your Inner Chef: Master the Art of No-Bake Peanut Butter Bars
Are you constantly searching for that perfect sweet treat that satisfies your cravings without demanding hours in the kitchen? Do you dream of a delightful dessert that’s both incredibly easy to make and universally loved? Look no further! Today, we’re diving into the wonderful world of No-Bake Peanut Butter Bars, a recipe that promises maximum flavor with minimal effort. Preparing these delectable bars at home isn’t just about saving time; it’s about controlling ingredients, customizing to your taste, and sharing a genuinely wholesome treat with loved ones. Forget complicated baking processes; these bars are a testament to the joy of straightforward, delicious No-Bake Dessert Recipes. They’re perfect for busy weeknights, last-minute gatherings, or simply when you need a quick, satisfying indulgence.
Ingredients & Kitchen Tools
To embark on your No-Bake Peanut Butter Bars journey, gather these simple ingredients and essential tools:
- 1 ½ cups graham cracker crumbs: The foundation of our crust, providing a classic, slightly sweet crunch. You can substitute with crushed vanilla wafers or digestive biscuits for a different flavor profile.
- ½ cup unsalted butter, melted: Binds the crust together, ensuring a firm, delicious base. Coconut oil (melted) works well as a dairy-free alternative.
- 1 cup creamy peanut butter: The star of the show! Use your favorite brand, aiming for a natural peanut butter for a less sugary option.
- 1 cup powdered sugar: Adds sweetness and helps create a smooth, firm peanut butter layer. Adjust to your desired sweetness level.
- ¼ cup unsalted butter, softened: Contributes to the creamy texture of the peanut butter filling.
- 1 teaspoon vanilla extract: Enhances all the flavors, adding warmth and depth.
- 1 cup semi-sweet chocolate chips: The perfect topping for that classic peanut butter and chocolate pairing. Dark chocolate chips offer a richer flavor.
- 2 tablespoons vegetable oil or coconut oil: Helps thin the melted chocolate for a smooth, pourable ganache.
Kitchen Tools:
- 9×13 inch baking pan: The ideal size for these bars. Glass or metal pans work equally well.
- Parchment paper: Essential for easy removal of the bars from the pan and minimal cleanup.
- Large mixing bowl: For combining the crust ingredients and the peanut butter filling.
- Medium microwave-safe bowl: For melting the chocolate.
- Rubber spatula or wooden spoon: For mixing and spreading.
- Measuring cups and spoons: For precise ingredient measurements.
Prep Time & Cooking Schedule
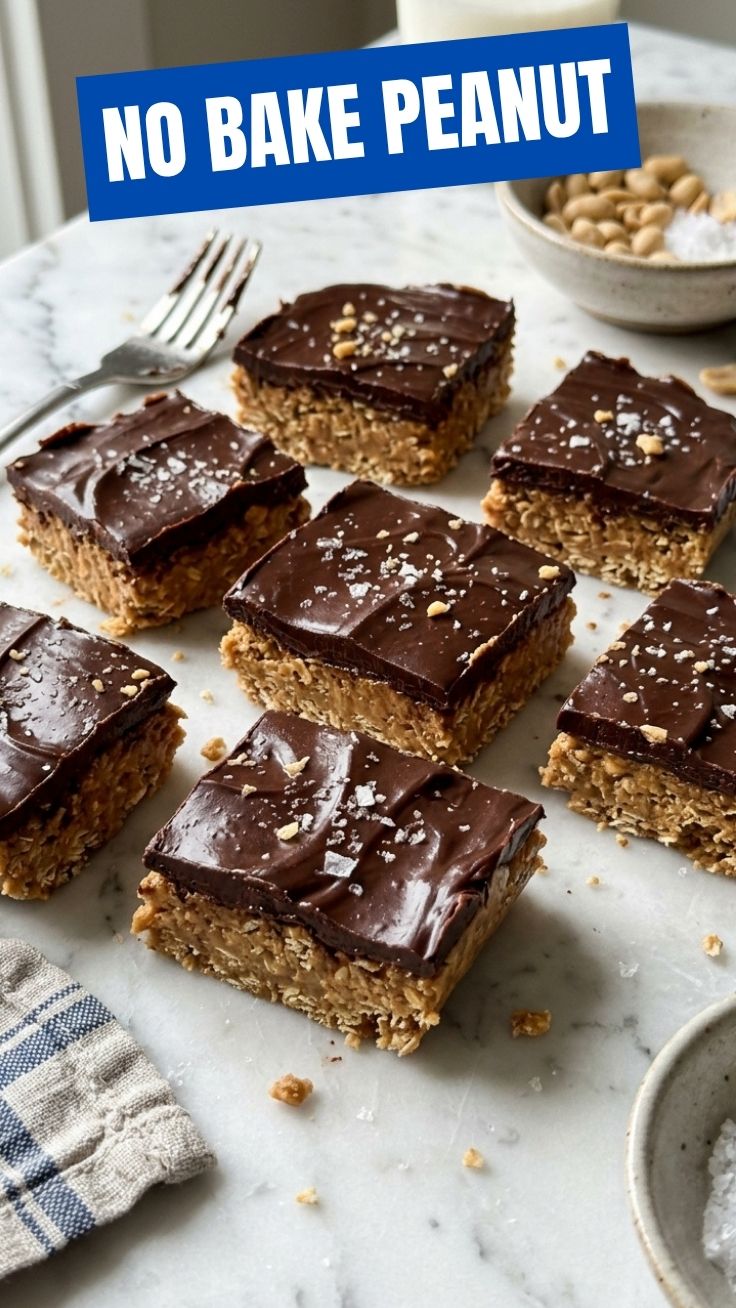
One of the greatest appeals of these bars is their minimal time commitment. The prep time is a speedy 15 minutes, primarily involving crumbling crackers and mixing ingredients. There is no cook time in the traditional sense, as this is a no-bake recipe. However, there’s a crucial resting time of at least 2 hours in the refrigerator. This chilling period is essential for the bars to set properly, making them easy to cut and ensuring that perfect firm texture. Ideally, prepare these in the morning or early afternoon for an evening treat, or even the night before for a grab-and-go option.
Step-by-Step Instructions
Let’s get started on creating these irresistible No-Bake Peanut Butter Bars:
1. Prepare the Pan: Line a 9×13 inch baking pan with parchment paper, leaving an overhang on the sides for easy lifting. This is a critical step for effortless removal!
2. Make the Crust: In a large mixing bowl, combine the graham cracker crumbs and ½ cup of melted butter. Mix thoroughly until the crumbs are evenly moistened. Press this mixture firmly into the bottom of the prepared pan, creating a compact base. Use the back of a spoon or a flat-bottomed glass for an even press. Place in the refrigerator to chill while you prepare the filling.
3. Whip the Peanut Butter Filling: In the same large mixing bowl (no need to wash it!), combine 1 cup creamy peanut butter, 1 cup powdered sugar, ¼ cup softened butter, and 1 teaspoon vanilla extract. Mix with a rubber spatula or electric mixer on low speed until smooth and well combined. The mixture should be thick and pliable.
4. Assemble the Layers: Retrieve the chilled crust from the refrigerator. Evenly spread the peanut butter filling over the graham cracker crust. Take your time to ensure an even layer from edge to edge.
5. Create the Chocolate Topping: In a medium microwave-safe bowl, combine the chocolate chips and 2 tablespoons of vegetable or coconut oil. Microwave in 30-second intervals, stirring well after each, until the chocolate is completely melted and smooth. Be careful not to overheat.
6. Pour and Chill: Pour the melted chocolate evenly over the peanut butter layer. Use a spatula to gently spread it to cover the entire surface.
7. Set the Bars: Place the pan back into the refrigerator for at least 2 hours, or until the chocolate topping is firm and the bars are completely set. This setting time is crucial for perfect slicing and enjoying these delightful No-Bake Dessert Recipes.
8. Slice and Serve: Once firm, lift the bars out of the pan using the parchment paper overhang. Carefully slice them into squares or rectangles using a sharp knife. For clean cuts, wipe the knife with a warm, damp cloth between slices.
Nutritional Benefits & Advantages
These bars aren’t just delicious; they offer several nutritional advantages too! Peanut butter is a fantastic source of plant-based protein and healthy fats, providing sustained energy and satiety. Graham crackers offer a good base carbohydrate. While they are a dessert, their homemade nature allows for ingredient control. Using natural peanut butter reduces added sugars, and you can opt for dark chocolate for added antioxidants. These bars are a more wholesome alternative to many store-bought desserts, letting you enjoy a sweet treat with some beneficial components.
Tips, Variations & Cooking Advice
- Nut Butter Alternatives: Not a fan of peanut butter? Use almond butter, cashew butter, or even sunflower seed butter for a nut-free option.
- Chocolate Customization: Experiment with white chocolate, milk chocolate, or a mix. A sprinkle of sea salt on top of the chocolate layer elevates the flavors beautifully.
- Add-ins: Fold mini chocolate chips, shredded coconut, or chopped nuts (like walnuts or pecans) into the peanut butter layer for added texture and flavor.
- Spiced Twist: Add a pinch of cinnamon or a dash of pumpkin spice to the peanut butter filling for a seasonal twist.
- Vegan Version: Use vegan butter sticks, natural peanut butter (ensure no honey), and dairy-free chocolate chips along with coconut oil for binding.
- Portion Control: Cut into smaller squares for perfect bite-sized snacks, especially when serving a crowd.
Common Mistakes to Avoid
- Not Chilling Long Enough: This is the most common mistake. Rushing the chilling process will result in gooey, difficult-to-cut bars. Be patient!
- Overheating Chocolate: When melting chocolate chips, do it in short bursts in the microwave or a double boiler to prevent scorching, which can make the chocolate seize up or taste burnt.
- Uneven Crust/Filling: Take the time to press the crust evenly and spread the filling smoothly. This ensures consistent texture and a visually appealing bar.
- Not Lining the Pan: Skipping parchment paper can lead to a sticky, frustrating removal process. Don’t skip this step!
Storage & Meal Prep Tips
Store No-Bake Peanut Butter Bars in an airtight container in the refrigerator for up to 1 week. If layering them, place parchment paper between the layers to prevent sticking. For longer storage, these bars freeze beautifully. Wrap individual bars or a stack in plastic wrap, then place them in a freezer-safe bag or container for up to 1 month. Thaw in the refrigerator for a few hours or at room temperature for about 30 minutes before enjoying. They’re a fantastic make-ahead option for meal prepping snacks or desserts for the week.
Conclusion
There you have it – the ultimate guide to creating unbelievably delicious and incredibly easy No-Bake Peanut Butter Bars! This recipe proves that you don’t need a hot oven or complex techniques to achieve dessert perfection. The simple ingredients, straightforward steps, and glorious outcome make these bars a truly indispensable addition to your culinary repertoire. Whether you’re a seasoned baker or a kitchen novice, these bars are guaranteed to be a hit. So, roll up your sleeves, gather your ingredients, and whip up a batch of these fantastic No-Bake Dessert Recipes. Don’t forget to share your creations and tell us what you think in the comments below!
FAQs
Q1: Can I use crunchy peanut butter instead of creamy?
A1: Yes, absolutely! Crunchy peanut butter will add a delightful texture to the bars. Just ensure it’s well mixed with the other filling ingredients.
Q2: My chocolate topping isn’t smooth. What went wrong?
A2: This usually happens if the chocolate was overheated or if it seized up due to a drop of water. Make sure to melt it in short bursts and stir well, or use a double boiler for more control.
Q3: How can I make these bars less sweet?
A3: You can reduce the amount of powdered sugar in the peanut butter layer by ¼ cup, or use unsweetened graham cracker crumbs. Opting for dark chocolate can also help balance the sweetness.
Q4: Do these bars need to be refrigerated constantly?
A4: Yes, due to the butter and peanut butter filling, it’s best to store them in the refrigerator to maintain their firm texture and freshness. They can be left at room temperature for a short period (1-2 hours) for serving.