Master the Art of Melt-in-Your-Mouth 【Perfect Baby Back Ribs at Home!】
Imagine the aroma of smoky, tender meat wafting through your kitchen, each bite of Baby Back Ribs effortlessly falling off the bone. Does that sound like a restaurant-quality dream? What if I told you that achieving perfectly succulent BBQ Ribs at home is not only possible but incredibly rewarding? While grilling can seem intimidating, especially when aiming for that elusive tenderness, mastering grilled Baby Back Ribs is a culinary triumph that brings immense satisfaction and incredible flavor to your table. Forget overpriced takeout; this comprehensive guide will empower you to create a backyard feast that will have everyone reaching for seconds.
Ingredients & Kitchen Tools
- 2 Racks (approx. 4-5 lbs total) Baby Back Ribs: Choose meaty racks with good marbling for optimal flavor and tenderness.
- ½ cup Brown Sugar (packed): Adds sweetness and aids in caramelization.
- ¼ cup Smoked Paprika: Provides a deep, smoky undertone.
- 2 tbsp Garlic Powder: Essential aromatic.
- 1 tbsp Onion Powder: Balances the garlic with a milder onion flavor.
- 1 tbsp Black Pepper (freshly ground): Adds a pungent kick.
- 1 tsp Cayenne Pepper (optional): For a touch of heat.
- 1 tsp Chili Powder: Deepens the spice profile.
- 2 tbsp Kosher Salt: Enhances all flavors.
- 1 cup Apple Cider Vinegar: For spritzing, adds moisture and helps tenderize.
- ½ cup Apple Juice (or water): For the spritz.
- 1 ½ cups Your Favorite BBQ Sauce: The finishing glaze.
- Large Roasting Pan with Rack: To catch drippings and allow even airflow.
- Heavy-Duty Aluminum Foil: For wrapping the ribs.
- Basting Brush: For applying BBQ sauce.
- Meat Thermometer: Ensures ribs reach a safe internal temperature (and optimal tenderness).
- Paper Towels: For patting ribs dry.
- Sharp Knife: For cutting the finished ribs.
- Baking Sheet: For carrying ribs.
- Tongs: For handling hot ribs.
Prep Time & Cooking Schedule
- Prep Time: 20-30 minutes (includes membrane removal and seasoning).
- Marinating Time (Optional): 2-4 hours or overnight for deeper flavor penetration.
- Cook Time: 3-4 hours (depending on thickness and desired tenderness).
- Resting Time: 15-20 minutes (crucial for juicy ribs).
Plan to start your ribs well in advance of mealtime. The low and slow cooking method yields the best results, so don’t rush the process!
Step-by-Step Instructions
1. Prepare the Ribs: Start by removing the thin membrane from the bone side of the Baby Back Ribs. This is crucial for tenderness. Use a knife to lift a corner of the membrane, then grip it with a paper towel and pull it off. Pat the ribs completely dry with paper towels.
2. Make the Dry Rub: In a small bowl, combine the brown sugar, smoked paprika, garlic powder, onion powder, black pepper, cayenne pepper (if using), chili powder, and kosher salt. Mix thoroughly.
3. Season Generously: Rub the spice mixture evenly over both sides of the ribs, pressing it gently to adhere. For enhanced flavor, you can cover and refrigerate the seasoned ribs for 2-4 hours or even overnight.
4. Prepare for Cooking: Preheat your grill or oven to 275°F (135°C). If using a grill, set it up for indirect heat. If using an oven, place the ribs on a rack in a roasting pan.
5. Initial Cook (Smoke/Roast): Cook the ribs for 2-2.5 hours, bone-side down. This allows them to absorb smoke flavor (if grilling) and start tenderizing.
6. The Foil Wrap (The “Crutch”): In a mixing bowl, combine the apple cider vinegar and apple juice (or water) for your spritz solution. Lay out two large sheets of heavy-duty aluminum foil per rack of ribs, overlapping them slightly to create a strong seal. Place a rack of ribs bone-side up on the foil. Spritz generously with the apple cider vinegar mixture. Tightly wrap the ribs in the foil, creating a sealed packet.
7. Continue Cooking: Return the wrapped ribs to the grill or oven. Cook for another 1-1.5 hours, or until the ribs bend easily and an internal temperature of 200-205°F (93-96°C) is reached when probed with a meat thermometer. This is where the magic of the BBQ Ribs truly begins to shine, as the steamy environment inside the foil breaks down connective tissue.
8. The Unveiling & Sauce: Carefully unwrap the ribs. They should be very tender.
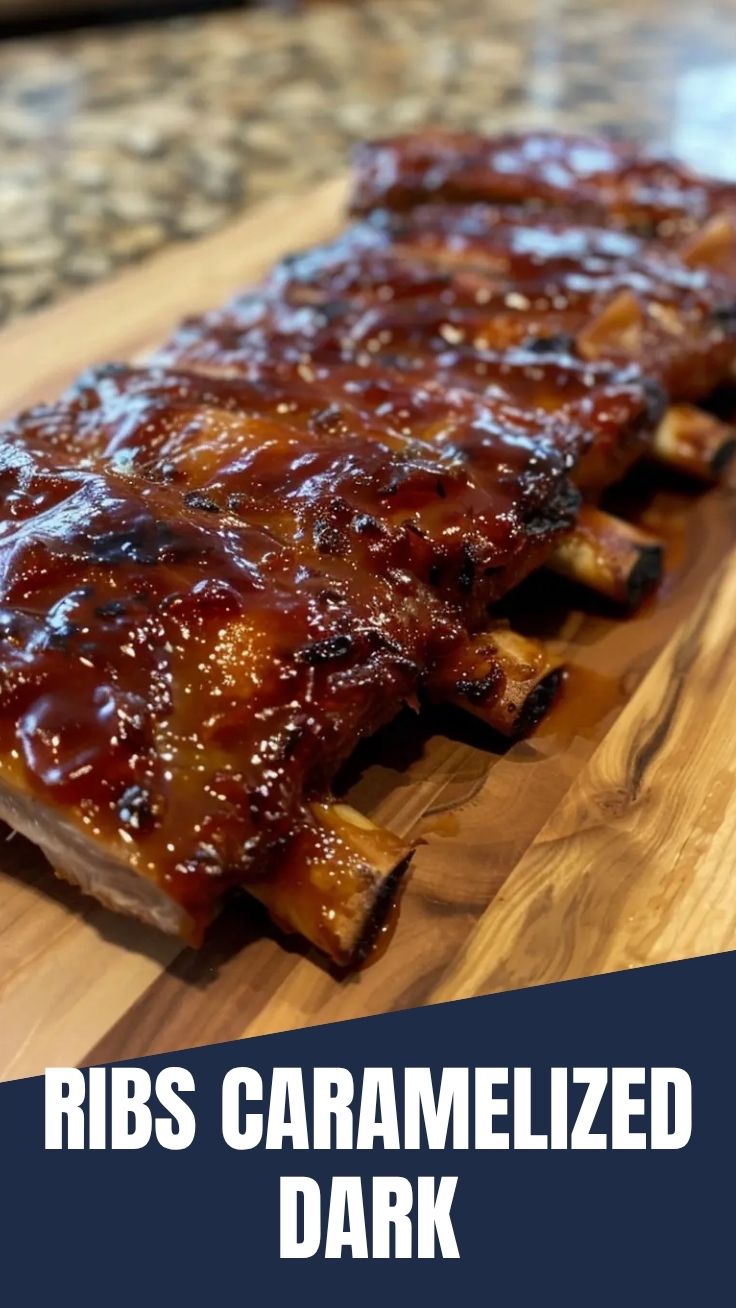
9. Sauce & Sear (Optional): If you desire a caramelized, sticky glaze, brush the ribs generously with your favorite BBQ sauce. Return them to the grill (direct heat for a few minutes per side) or oven (under the broiler for 5-7 minutes, watching carefully) until the sauce is bubbly and slightly caramelized.
10. Rest & Serve: Transfer the ribs to a cutting board, tent loosely with foil, and let them rest for 15-20 minutes. This allows the juices to redistribute, ensuring maximum tenderness. Slice between the bones and serve immediately.
Nutritional Benefits & Advantages
Pork ribs, especially when cooked lean, offer a good source of protein, essential for muscle repair and growth. They also provide valuable B vitamins (niacin, B6, B12), which are crucial for energy metabolism and nervous system function. When compared to highly processed fast food, homemade grilled ribs allow for complete control over ingredient quality, sugar content in sauces, and fat levels, making them a healthier and more satisfying indulgence. The act of cooking at home also promotes mindfulness and provides a sense of accomplishment.
Tips, Variations & Cooking Advice
- For Extra Smoke Flavor: If grilling, add wood chips (hickory or applewood work well) during the initial smoke phase.
- Spicy Kick: Add a pinch more cayenne or a dash of hot sauce to your rub or BBQ sauce.
- Herbaceous Ribs: Incorporate dried oregano, thyme, or rosemary into your dry rub for an aromatic twist.
- Mustard Binder: Before applying the dry rub, lightly coat the ribs with yellow mustard. It helps the rub adhere and doesn’t impart a mustard flavor to the finished product.
- Oven Method: Cook entirely in the oven at 275°F (135°C), following the same timing guidelines.
- Air Fryer Finish: For crispy edges and caramelized sauce, after unwrapping and saucing, air fry the ribs at 375°F (190°C) for 5-10 minutes, flipping halfway.
- Don’t Overcook: While “fall-off-the-bone” is often desired, true pitmasters aim for ribs with a slight tug, meaning the meat pulls away cleanly but still offers a tender bite.
Common Mistakes to Avoid
- Skipping the Membrane Removal: This tough membrane makes ribs chewy and prevents the rub from penetrating, resulting in an inferior texture.
- High Heat Cooking: Ribs require low and slow cooking to break down tough connective tissues. High heat will result in dry, tough meat.
- Not Wrapping Tightly: A loose foil wrap allows steam to escape, hindering the tenderizing process. Ensure a tight seal.
- No Resting Time: Cutting into ribs immediately after cooking will cause juices to run out, leading to drier meat. Always rest your ribs!
- Over-Saucing: While delicious, too much sauce can hide the natural flavor of the pork. Apply judiciously, especially during the final glaze.
Storage & Meal Prep Tips
Leftover ribs can be stored in an airtight container in the refrigerator for up to 3-4 days. To reheat, wrap them in foil with a splash of apple juice or water and warm in a 300°F (150°C) oven until heated through, or microwave gently to prevent drying out. You can also freeze cooked, unsauced ribs in freezer-safe bags for up to 3 months. Thaw in the refrigerator overnight and reheat as directed, adding sauce during the final stage.
Conclusion
There you have it – your definitive guide to creating irresistibly tender and flavorful Baby Back Ribs right in your own backyard or kitchen. By following these steps and embracing the magic of low and slow cooking, you’ll impress friends and family with your pitmaster prowess and serve up some of the best BBQ Ribs they’ve ever tasted. Don’t be afraid to experiment with different rubs and sauces to find your perfect combination. Give this recipe a try and share your delicious results!
FAQs
- Q: Can I use spare ribs instead of baby back ribs?
A: Yes, you can! Spare ribs are larger and meatier, so they will require a longer cooking time (often 4-5 hours total). The method remains largely the same.
- Q: How do I know when the ribs are done without a thermometer?
A: The “bend test” is a good indicator. If you pick up a rack of ribs with tongs in the middle, they should bend significantly, and the meat should start to tear easily at the bend, but not completely fall apart.
- Q: My ribs are tough – what went wrong?
A: Tough ribs are usually a sign of insufficient cooking time or too high a temperature. Ensure you’re cooking low and slow, and that the internal temperature reaches 200-205°F (93-96°C) for optimal tenderness. Not removing the membrane can also contribute to chewing.
- Q: Can I make these ribs ahead of time for a party?
A: Absolutely! You can cook the ribs through the foil-wrap stage, let them cool, and refrigerate. Before serving, reheat gently, then apply the BBQ sauce and caramelize as directed.
- Q: What if I don’t have apple cider vinegar or apple juice?
A: You can use water, beer, or even chicken broth as alternatives for the spritz/braising liquid in the foil. The goal is to create a moist, steamy environment.