Master the Perfect Smash Burger: Your Ultimate Guide to Juiciness and Flavor
Ever dreamt of crafting that restaurant-quality Smash Burger right in your own kitchen? The kind with a crispy, caramelized crust, juicy interior, and layers of flavor that make every bite an experience? You’re in the right place! Preparing this beloved classic at home isn’t just about saving money; it’s about customizing every element to your exact preference, creating a truly personalized culinary masterpiece. This comprehensive Smash Burger guide will walk you through every step, ensuring your homemade Burger Recipe becomes an instant favorite. Let’s delve into the secrets behind achieving smash burger perfection.
Ingredients & Kitchen Tools
Crafting the perfect burger starts with quality ingredients and the right gear.
- Ground Beef (80/20 Chuck): The ideal fat-to-lean ratio for juicy burgers. Don’t go too lean!
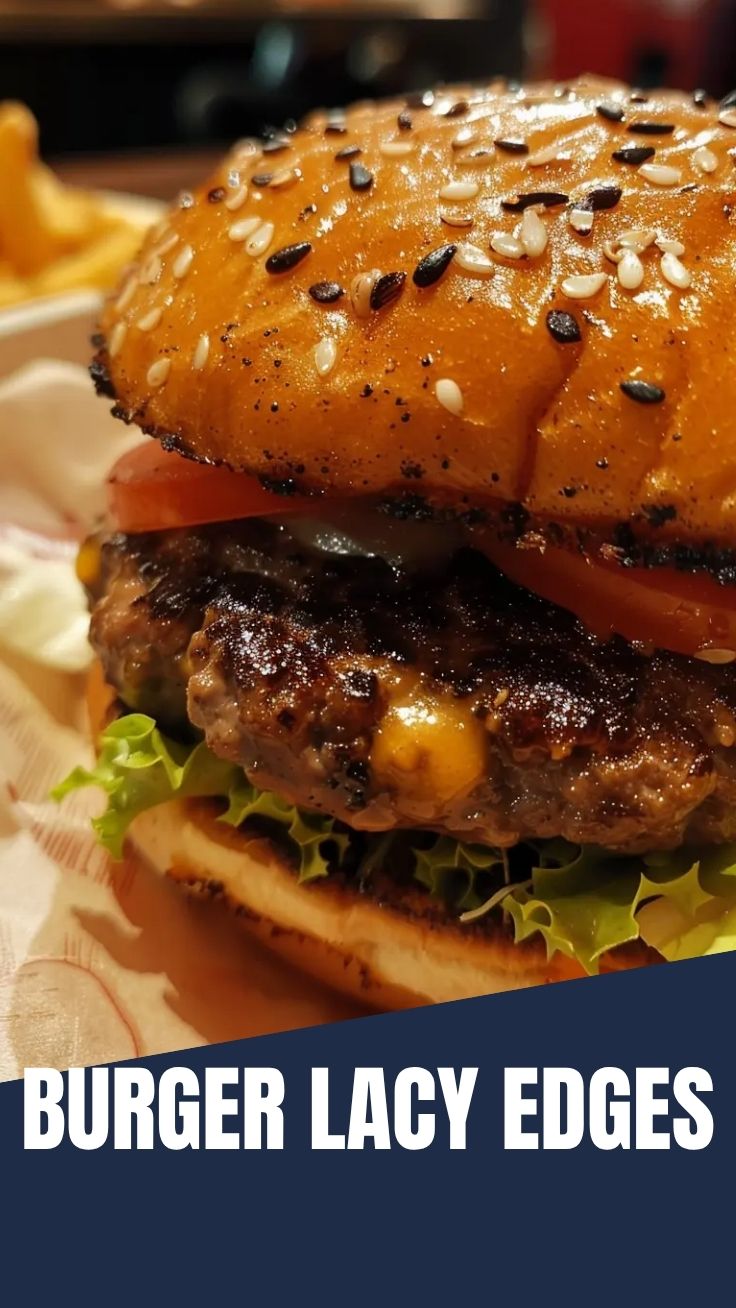
- Burger Buns (Brioche or Potato): Soft yet sturdy enough to hold up to the juicy patty and toppings.
- Cheese Slices (American, Cheddar, Provolone): Melts beautifully and adds a creamy tang.
- Butter (Unsalted): For toasting buns and adding flavor to the griddle.
- Salt (Kosher or Sea): Essential for seasoning the patties and bringing out the beef’s flavor.
- Black Pepper (Freshly Ground): Adds a subtle kick.
- Toppings (Lettuce, Tomato, Onion, Pickles): Classic choices for freshness and crunch.
- Sauces (Ketchup, Mustard, “Special Sauce”): Customize to your liking.
- Cast Iron Skillet or Griddle: Essential for achieving that perfect crust.
- Sturdy Metal Spatula: A thin, strong spatula is crucial for scraping and flipping.
- Smash Burger Press or Heavy Flat Spatula: For pressing the patties.
- Mixing Bowl: For preparing ingredients.
- Tongs: For handling buns and toppings.
Prep Time & Cooking Schedule
- Prep Time: 15 minutes (Includes seasoning meat, prepping toppings, and slicing buns).
- Cook Time: 8-10 minutes (Per batch of burgers, as they cook very quickly).
- Resting Time: 1-2 minutes (For assembled burgers, allowing flavors to meld slightly).
This recipe is designed for efficiency. Once your griddle is hot, the cooking process is rapid, making it perfect for a weeknight meal or a quick weekend treat. Plan to have all your ingredients prepped and ready to go before you even touch the heat.
Step-by-Step Instructions
Follow these steps for a glorious Smash Burger experience at home:
1. Prep Your Ingredients: Slice your buns, wash and dry your lettuce, slice tomatoes and onions, and have your cheese ready. Form your ground beef into loose, roughly 2-3 ounce balls. Season all sides generously with salt and pepper. This foundational Burger Recipe is all about those initial steps!
2. Heat Your Cooking Surface: Place your cast iron skillet or griddle over medium-high heat. Allow it to preheat for at least 5-7 minutes until smoking lightly. This intense heat is critical for the “smash.”
3. Toast the Buns: Melt a pat of butter on the griddle. Place the cut sides of your buns down and toast until golden brown, about 1-2 minutes. Remove and set aside.
4. Smash ‘Em Down: Add a small pat of butter to the hot griddle. Place a beef ball onto the hot surface. Immediately place parchment paper over the beef ball (to prevent sticking to your press) and use your smash burger press or heavy spatula to firmly press down on the beef for 10-15 seconds, creating a thin patty. This is where the magic happens, forming that incredible crust.
5. Cook and Flip: Cook the patty undisturbed for 2-3 minutes until a deep brown, crispy crust forms and the edges start to curl. Using your sturdy metal spatula, scrape under the patty to release it, then flip it.
6. Add Cheese: Immediately place a slice of cheese on top of the cooked side of the patty. Cook for another 1-2 minutes until the cheese is melted and bubbly, and the bottom side has a good sear.
7. Assemble Your Burger: Carefully transfer the cheesy patty to a toasted bun. Add your desired toppings and sauces. Repeat the process for additional burgers.
Nutritional Benefits & Advantages
Beyond the incredible taste, a homemade Smash Burger offers various advantages. Using 80/20 ground beef provides a good source of protein, iron, and B vitamins, essential for energy and muscle health. By preparing it yourself, you control the quality of ingredients, reduce sodium content, and avoid artificial additives often found in fast food. Plus, adding fresh vegetables like lettuce, tomato, and onion boosts fiber and vitamin intake.
Tips, Variations & Cooking Advice
- Double Smash: For an extra meaty burger, make two thin patties and stack them with cheese in between.
Onion Burger: Place thinly sliced raw onions directly onto the beef ball before* smashing. The onions will caramelize into the patty as it cooks.
Flavor Boosts: Mix a pinch of garlic powder or onion powder into your ground beef before* forming balls for an added layer of flavor.
- DIY Special Sauce: Combine mayonnaise, ketchup, relish, a dash of hot sauce, and a pinch of sugar for a classic diner-style sauce.
- Dietary Adaptations: Opt for gluten-free buns or a lettuce wrap for a low-carb alternative. Use dairy-free cheese for those with sensitivities.
Common Mistakes to Avoid
- Overworking the Meat: Handle the ground beef as little as possible to avoid tough burgers. Form loose balls.
- Not Enough Heat: A scorching hot griddle is non-negotiable for a proper “smash” and crispy crust.
- Pressing Too Hard/Long: Press firmly but for only 10-15 seconds. Don’t keep pressing throughout cooking, or you’ll squeeze out all the precious juices.
- Flipping Too Early: Patience is key! Wait for that deep brown crust to form before flipping.
- Using Lean Meat: Avoid lean ground beef (90/10 or higher) as it won’t provide the necessary fat for a juicy, flavorful Smash Burger.
Storage & Meal Prep Tips
While smash burgers are best enjoyed fresh off the griddle, leftovers can be stored.
- Refrigeration: Store cooked patties and assembled burgers separately in airtight containers for up to 2-3 days.
- Reheating: Reheat patties gently in a skillet over medium heat to avoid drying them out. Add a splash of water and cover for a minute to create steam and help re-melt the cheese. Toast fresh buns if possible.
- Meal Prep: You can form and season your beef balls up to a day in advance and store them in the refrigerator, covered. Prepare all your toppings ahead of time to make assembly quick on cooking day.
Conclusion
Crafting the perfect Smash Burger at home is a truly rewarding culinary endeavor. By focusing on high heat, proper smashing technique, and quality ingredients, you can achieve that irresistible crispy crust and juicy interior that rivals any restaurant. This detailed guide has provided you with all the insights needed to master this fantastic Burger Recipe. We encourage you to try it out, experiment with your favorite toppings, and share your delicious results! Happy smashing!
FAQs
Q1: Can I use a regular frying pan instead of cast iron?
A1: A regular heavy-bottomed frying pan can work, but cast iron or a griddle retains heat much better, which is crucial for achieving that characteristic smash burger crust.
Q2: What’s the best way to prevent the patty from sticking to my press?
A2: Always place a small square of parchment paper over the beef ball before pressing. This acts as a non-stick barrier between the meat and your press.
Q3: How do I know when the griddle is hot enough?
A3: Your griddle is hot enough when you can see a wispy smoke, and a few drops of water dance and evaporate instantly. Don’t be afraid to get it very hot!
Q4: Should I add anything to the ground beef?
A4: For a classic smash burger, only salt and pepper are needed on the exterior. Anything mixed into the meat itself can prevent that perfect crispy surface from forming.
Q5: Can I make smash burgers ahead of time for a party?
A5: Smash burgers are best enjoyed immediately after cooking. The crust loses its crispiness over time. However, you can prep all your ingredients (form balls, slice toppings) in advance.