Unleash Your Inner Chef: Master the Art of Homemade Crispy Coconut Shrimp!
Ever dreamed of biting into a perfectly golden, intensely flavorful, and delightfully crunchy Coconut Shrimp, fresh from your own kitchen? The good news is, it’s not just a restaurant fantasy! Crafting this beloved appetizer at home offers an unparalleled experience – you control the quality of ingredients, the crispy-to-succulent ratio, and the final burst of tropical flavor. Forget lackluster frozen options; this comprehensive guide empowers you to create an absolutely irresistible coconut shrimp recipe that will impress even the most discerning palates. By the end of this post, you’ll be a master of this culinary delight, ready to serve up a taste of paradise.
Ingredients & Kitchen Tools
To embark on your delicious journey of creating the perfect crispy Coconut Shrimp, gather these essentials:
- Shrimp (1 lb): Large or jumbo (16/20 count), peeled and deveined with tails on for presentation and easy handling. Fresh is best, but good quality frozen will work if thawed properly.
- All-Purpose Flour (½ cup): The initial dry coating for better adhesion of subsequent layers.
- Eggs (2 large): Whisked, creating the binder for the coconut.
- Panko Breadcrumbs (1 cup): Japanese-style breadcrumbs for superior crispiness and a lighter texture compared to regular breadcrumbs.
- Sweetened Flaked Coconut (1 cup): The star of the show, providing that signature tropical sweetness and texture. Ensure it’s flaked, not shredded, for the best coating.
- Salt & Black Pepper (to taste): Essential seasonings to enhance the shrimp’s natural flavor.
- Vegetable Oil (4-6 cups): Or another high smoke point oil like canola or peanut oil, for deep frying.
- Optional Dipping Sauce: Sweet chili sauce, mango salsa, or a homemade lime-cilantro aioli.
- Large Mixing Bowls (3): For the dredging station (flour, egg, coconut/panko).
- Shallow Dish/Plate: For the flour.
- Whisk: For the eggs.
- Tongs: For handling the shrimp during breading and frying.
- Heavy-Bottomed Pot or Dutch Oven: For deep frying, ensuring even heat distribution.
- Slotted Spoon or Spider Skimmer: To safely remove fried shrimp from oil.
- Wire Rack with Paper Towels: For draining excess oil and maintaining crispiness.
- Meat Thermometer: Crucial for precise oil temperature control.
Prep Time & Cooking Schedule
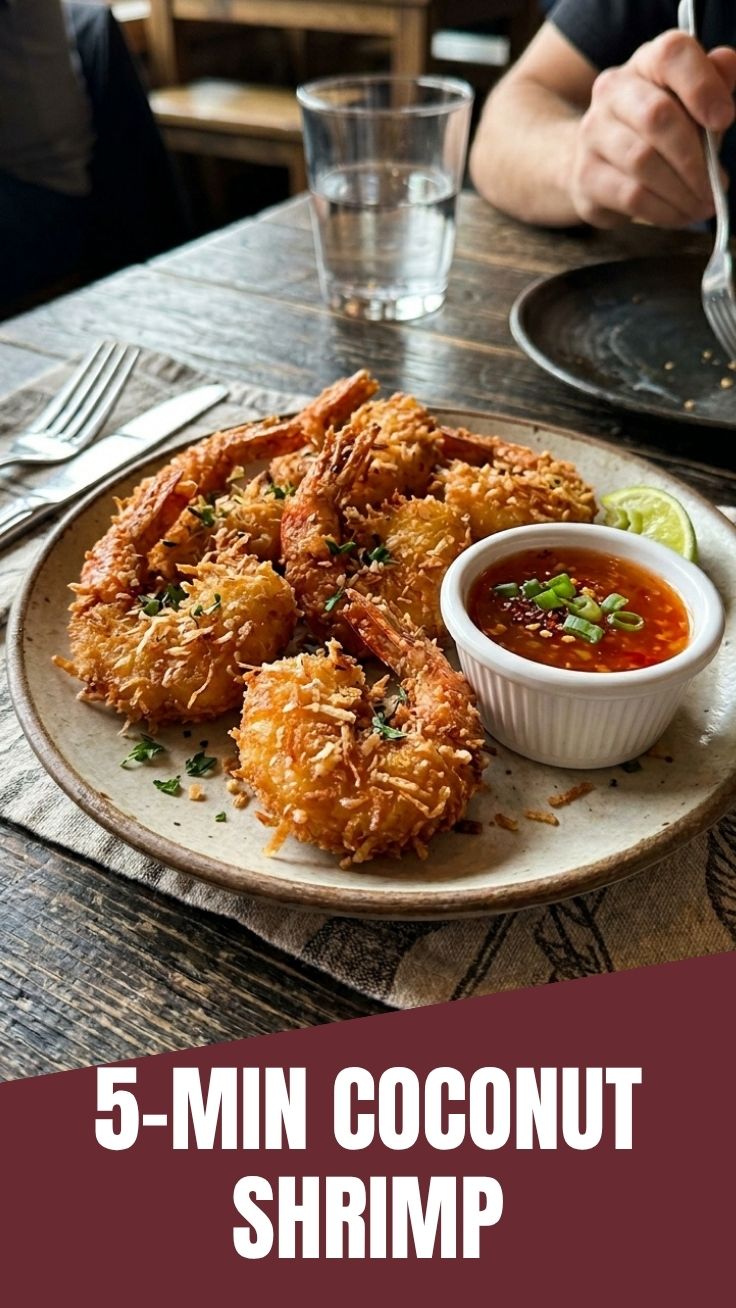
- Prep Time: 20-25 minutes
* This includes thawing and drying shrimp, setting up the dredging station, and preparing your frying area.
- Cook Time: 2-3 minutes per batch (total 10-15 minutes, depending on batch size)
* Frying time for each shrimp is very quick to prevent overcooking.
- Resting Time: 2-3 minutes
* Allows excess oil to drain and keeps the shrimp crispy before serving.
Plan your cooking so the shrimp is fried right before serving for optimal crispiness. You can prepare the dredging station in advance and keep the shrimp refrigerated until frying time.
Step-by-Step Instructions
1. Prepare the Shrimp: Pat the peeled and deveined shrimp very dry with paper towels. This is a critical step for ensuring the coating adheres properly and for maximum crispiness. Season lightly with salt and pepper.
2. Set Up Dredging Station: In three separate shallow dishes or bowls, set up your dredging station:
* Dish 1: All-purpose flour.
* Dish 2: Whisked eggs.
* Dish 3: A mixture of panko breadcrumbs and sweetened flaked coconut. Mix these thoroughly to ensure an even coating.
3. Coat the Shrimp: Working one shrimp at a time, dredge it first in flour, shaking off any excess. Then, dip it into the whisked egg, allowing excess to drip off. Finally, roll the shrimp in the panko and coconut mixture, pressing gently to ensure a thick, even coating. Place the coated shrimp on a clean plate or baking sheet. This careful breading technique is key to achieving that perfect homemade Coconut Shrimp.
4. Heat the Oil: In a heavy-bottomed pot or Dutch oven, pour enough vegetable oil to reach about 2-3 inches deep. Heat the oil over medium-high heat until it reaches 350-375°F (175-190°C). Use a meat thermometer for accuracy. Proper oil temperature is crucial for a perfectly cooked coconut shrimp recipe without being greasy.
5. Fry the Shrimp: Carefully add 4-5 coated shrimp to the hot oil, ensuring not to overcrowd the pot, which can lower the oil temperature. Fry for 2-3 minutes, turning occasionally, until golden brown and crispy. The shrimp cooks very quickly.
6. Drain and Serve: Remove the fried shrimp with a slotted spoon or spider skimmer and transfer them to a wire rack lined with paper towels to drain excess oil. Serve immediately with your favorite dipping sauce.
Nutritional Benefits & Advantages
Shrimp is a fantastic source of lean protein, essential for muscle repair and growth, and generally low in calories. It’s also rich in vital nutrients like selenium, vitamin B12, iron, and phosphorus. The addition of coconut, while contributing sweetness and flavor, also provides healthy fats. Making this dish at home allows you to control the amount and type of oil used for frying, and you can opt for healthier dipping sauces, reducing added sugars and sodium often found in store-bought options.
Tips Variations & Cooking Advice
- Air Fryer Option: For a lighter version, preheat your air fryer to 375°F (190°C). Lightly spray the coated shrimp with cooking spray, then air fry for 8-12 minutes, flipping halfway, until golden and crispy.
- Spice It Up: Add a pinch of cayenne pepper or a dash of hot sauce to the egg wash for a subtle kick.
- Citrus Zest: Include some lime or orange zest in the coconut-panko mixture for an extra layer of brightness.
- Gluten-Free: Easily make this recipe gluten-free by using gluten-free all-purpose flour and gluten-free panko breadcrumbs.
- Herb Infusion: Mix finely chopped fresh cilantro or parsley into the breading for an herbaceous twist.
- Batch Cooking: If making a large quantity, keep fried shrimp warm in a preheated oven at 200°F (95°C) on a wire rack until ready to serve.
Common Mistakes to Avoid
- Wet Shrimp: Not patting the shrimp dry enough will result in a soggy coating that slides off.
- Overcrowding the Pot: Too many shrimp at once will drop the oil temperature, leading to greasy, less crispy results. Fry in small batches.
- Incorrect Oil Temperature: Oil that’s too cool results in greasy shrimp; oil that’s too hot burns the coating before the shrimp cooks through. Use a thermometer.
- Overcooking Shrimp: Shrimp cooks very quickly. Overcooked shrimp becomes rubbery and tough. Fry just until golden brown and opaque.
- Skipping the Panko: While you can use just coconut, panko is crucial for achieving that ultimate crispy exterior.
Storage & Meal Prep Tips
For best results, Coconut Shrimp is best enjoyed immediately after frying. However, if you have leftovers:
- Refrigeration: Store any cooled, leftover shrimp in an airtight container in the refrigerator for up to 2-3 days.
- Reheating: To regain some crispiness, reheat in an air fryer at 350°F (175°C) for 5-7 minutes, or in an oven at 375°F (190°C) for 10-15 minutes, until heated through and crispy. Avoid microwave reheating as it will make them soggy.
- Freezing (Uncooked): You can coat the raw shrimp and freeze them in a single layer on a baking sheet. Once frozen solid, transfer to a freezer-safe bag for up to 1 month. Fry directly from frozen, adding an extra minute or two to the cooking time.
Conclusion
Creating restaurant-quality Coconut Shrimp at home is not only achievable but immensely rewarding. With fresh ingredients, a precise dredging technique, and mindful frying, you can master this delectable appetizer. This easy-to-follow coconut shrimp recipe yields consistently
crispy, succulent, and flavor-packed results that will transport your taste buds to a tropical paradise. Don’t hesitate to whisk up a batch of these golden gems, and don’t forget to share your culinary triumphs with us! What dipping sauce did you create? Share your innovations in the comments below!
FAQs
1. Can I bake Coconut Shrimp instead of frying?
Yes, for a healthier option, you can bake them. Preheat your oven to 400°F (200°C). Place the coated shrimp on a greased baking sheet and bake for 12-15 minutes, flipping halfway, until golden brown and cooked through.
2. What’s the best way to ensure the coating sticks?
The key is to pat the shrimp very dry before dredging and to press the panko-coconut mixture firmly onto the shrimp.
3. My Coconut Shrimp came out greasy. What went wrong?
This usually indicates the oil temperature was too low. Ensure your oil stays between 350-375°F (175-190°C) and don’t overcrowd the pot.
4. Can I use unsweetened coconut?
While sweetened flaked coconut provides that classic tropical flavor, you can use unsweetened for a less sugary version. You might consider adding a pinch of sugar or a splash of orange juice to the egg wash for a subtle sweetness if you go that route.
5. How do I know when the shrimp is cooked?
Shrimp cooks very quickly. It will turn opaque and curl into a C-shape. Overcooked shrimp becomes tough and rubbery, so cook just until it reaches this stage and is golden brown on the outside.