Air Fryer Chicken Breast: Your Guide to Juicy Perfection Every Time
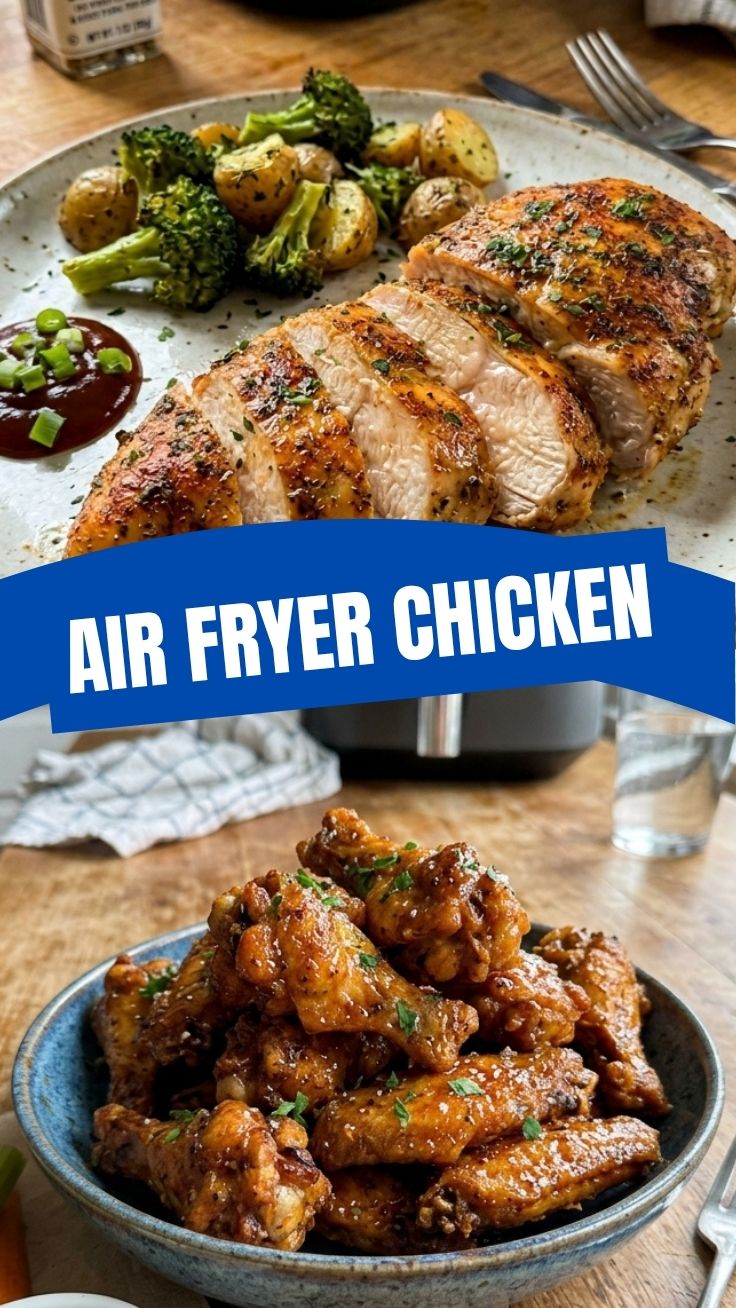
Ever wonder if you can achieve perfectly juicy, flavorful Air Fryer Chicken Breast without drying it out? The answer is a resounding yes! Forget bland, rubbery chicken and embrace a world of tender, succulent poultry that’s incredibly easy to make at home. Preparing your chicken breast in an air fryer isn’t just about convenience; it’s about unlocking maximum flavor, optimal texture, and a healthier cooking method. In this post, we’ll guide you through crafting delicious crispy air fryer chicken that will become a staple in your kitchen.
Ingredients & Kitchen Tools
- Boneless, Skinless Chicken Breasts (2 medium-sized, about 6-8 oz each): The star of our show! Choose fresh, plump breasts for the best results.
- Olive Oil (1 tablespoon): Helps with browning and adheres seasonings. Avocado oil also works well.
- Smoked Paprika (1 teaspoon): Adds a beautiful color and a subtle, savory smokiness.
- Garlic Powder (1 teaspoon): A foundational flavor enhancer.
- Onion Powder (1/2 teaspoon): Complements the garlic for a deeper savory profile.
- Dried Thyme (1/2 teaspoon): Earthy and aromatic, it pairs wonderfully with chicken.
- Salt (1/2 teaspoon, or to taste): Essential for bringing out all the flavors.
- Black Pepper (1/4 teaspoon, or to taste): Adds a hint of spice.
- Air Fryer: The primary cooking appliance. Any model will do!
- Meat Thermometer: Crucial for ensuring the chicken is cooked through to a safe internal temperature (165°F (74°C)).
- Mixing Bowl: For tossing the chicken with seasonings.
- Tongs: For easy handling of the chicken in the air fryer.
- Cutting Board & Knife: For prepping and slicing.
Prep Time & Cooking Schedule
- Prep Time: 5-7 minutes (for seasoning the chicken)
- Cook Time: 15-20 minutes (depending on thickness and air fryer model)
- Resting Time: 5 minutes (critical for juicy results!)
- Total Time: Approximately 25-30 minutes
This schedule allows for a quick weeknight meal without compromising on flavor or quality. The resting period is non-negotiable – it allows the juices to redistribute, preventing dry chicken.
Step-by-Step Instructions
1. Prepare the Chicken: Pat the boneless, skinless chicken breasts dry with paper towels. This helps the seasoning adhere better and promotes a more golden exterior. If your chicken breasts are particularly thick (over 1 inch at the thickest part), you can butterfly them or pound them to an even thickness for more consistent cooking.
2. Season Generously: In a medium bowl, combine the olive oil, smoked paprika, garlic powder, onion powder, dried thyme, salt, and black pepper. Add the chicken breasts to the bowl and toss until they are evenly coated with the seasoning mixture. Ensure every inch of the Air Fryer Chicken Breast is covered.
3. Preheat Your Air Fryer (Optional but Recommended): For best results and to achieve that delightful exterior, preheat your air fryer to 375°F (190°C) for 3-5 minutes. This creates an immediate crispy crust.
4. Arrange in the Air Fryer Basket: Place the seasoned chicken breasts in the air fryer basket in a single layer, ensuring they are not overlapping. Cook in batches if necessary to avoid overcrowding, which can lead to steaming instead of air frying, preventing that desired crispy air fryer chicken.
5. Air Fry to Perfection: Cook for 9-10 minutes, then flip the chicken breasts. Continue cooking for another 6-8 minutes, or until the internal temperature reaches 165°F (74°C) when measured with a meat thermometer. The exact cooking time will vary based on the thickness of your chicken and your air fryer model.
6. Rest and Serve: Once cooked, immediately remove the chicken breasts from the air fryer and place them on a cutting board. Tent loosely with foil and let them rest for at least 5 minutes before slicing or serving. This allows the juices to redistribute throughout the meat, ensuring a tender and moist final product.
Nutritional Benefits & Advantages
Chicken breast is a lean protein powerhouse, offering essential amino acids vital for muscle repair and growth. Air frying significantly reduces the need for large amounts of oil, making this a healthier alternative to deep-frying. It’s an excellent source of niacin, vitamin B6, phosphorus, and selenium, all contributing to energy metabolism, immune function, and overall well-being. This recipe is also naturally gluten-free and can be easily adapted to various dietary needs.
Tips, Variations & Cooking Advice
- Marinade Magic: For an extra flavor boost, marinate your chicken breasts for at least 30 minutes (or up to 4 hours) before air frying. Lemon herb, buffalo, or Greek marinades work wonderfully.
- Spice It Up: Add a pinch of cayenne pepper or red pepper flakes for a kick.
- Cheese Please: In the last 2-3 minutes of cooking, sprinkle a tablespoon of shredded mozzarella or cheddar cheese over the chicken for a delicious melted topping.
- Herbal Infusion: Experiment with fresh herbs like chopped rosemary or parsley added at the end of resting for a vibrant aroma.
- Sauce It: Serve with your favorite dipping sauce – BBQ, honey mustard, or a simple lemon-garlic aioli.
Common Mistakes to Avoid
- Overcrowding the Basket: Never pile chicken breasts. Cook in batches to ensure proper air circulation and even cooking.
- Skipping the Preheating: A preheated air fryer helps create a crisper exterior from the start.
- Not Pounding/Butterflying Thick Breasts: Unevenly thick chicken breasts will cook unevenly, leading to dry spots.
- Forgetting to Rest: This is crucial for juicy chicken. Don’t skip it!
- Eyeballing Doneness: Always use a meat thermometer. Visual cues can be deceiving, and undercooked chicken is a health risk, while overcooked chicken is dry.
Storage & Meal Prep Tips
Leftover Air Fryer Chicken Breast can be stored in an airtight container in the refrigerator for up to 3-4 days. It’s excellent for meal prepping and can be sliced for salads, sandwiches, wraps, or added to pasta dishes. To reheat, you can briefly warm it in the air fryer at 300°F (150°C) for a few minutes until heated through, or microwave it at 50% power to prevent drying out. Freezing cooked chicken breast is also an option; wrap tightly and freeze for up to 2-3 months. Thaw in the refrigerator overnight before reheating.
Conclusion
Mastering the art of cooking Air Fryer Chicken Breast is a game-changer for anyone seeking quick, healthy, and incredibly flavorful meals. With just a few simple steps, you can achieve tender, juicy poultry with that irresistible exterior crust, making for the perfect crispy air fryer chicken every time. We encourage you to try this recipe tonight and experience the magic of air frying! Share your culinary creations with us in the comments below – we love hearing about your kitchen adventures.
FAQs
Q1: Can I use frozen chicken breasts directly from the freezer?
A: It’s best to thaw frozen chicken breasts completely in the refrigerator before air frying for even cooking and optimal texture.
Q2: My chicken came out dry. What went wrong?
A: Common culprits are overcooking (not using a meat thermometer), not resting the chicken, or cutting into it too soon. Ensure your chicken reaches exactly 165°F (74°C) and rests for 5 minutes.
Q3: How do I prevent the chicken from sticking to the air fryer basket?
A: Lightly spray the air fryer basket with cooking oil or use air fryer parchment liners. Ensure your chicken is coated with oil before seasoning.
Q4: Can I add vegetables to cook alongside the chicken?
A: Yes! Cut vegetables like broccoli, bell peppers, or asparagus into similar-sized pieces and toss with a little oil and seasoning. Add them to the air fryer during the last 8-10 minutes of the chicken’s cooking time, ensuring not to overcrowd.
Q5: What if my chicken breasts are much larger or smaller than average?
A: Adjust cooking time accordingly. Smaller breasts will cook faster, larger ones longer. Always rely on a meat thermometer to confirm doneness.