Elevate Your Summer Spread: Crafting the Perfect Deviled Eggs at Home
Ever wondered how to create those unbelievably creamy, perfectly seasoned Deviled Eggs that disappear in a flash at every gathering? This classic appetizer, a staple for any potluck or family meal, offers a delightful blend of rich flavor and satisfying texture. Preparing them at home isn’t just about saving money; it’s about controlling the quality of your ingredients, customizing the taste to your preference, and adding that special homemade touch that elevates them from a simple snack to a cherished culinary memory. Plus, mastering this recipe opens the door to endless variations, making it a versatile addition to your repertoire of Picnic Recipes. Let’s dive into creating the most delectable deviled eggs you’ve ever tasted.
Ingredients & Kitchen Tools
Here’s what you’ll need to whip up a batch of 12 perfect Deviled Eggs:
- 6 large eggs: The foundation of our dish. Choose fresh, organic if possible, for the best flavor.
- 1/4 cup mayonnaise: Binds the yolk mixture. Adjust to your desired creaminess. You can use light mayo or even a blend of mayo and Greek yogurt for a healthier twist.
- 1 tablespoon Dijon mustard: Adds a tangy, slightly spicy kick. Yellow mustard can be substituted for a milder flavor.
- 1 teaspoon white vinegar or pickle juice: Brightens the flavor and adds a touch of acidity.
- 1/4 teaspoon salt: Enhances all the other flavors.
- 1/8 teaspoon black pepper: Provides a subtle warmth.
- Paprika (for garnish): Adds a beautiful color and a hint of smoky flavor. Smoked paprika is excellent here.
- Fresh chives or dill (for garnish, optional): Offers a fresh, herbaceous note.
Kitchen Tools:
- Large saucepan: For boiling the eggs.
- Slotted spoon: To carefully transfer hot eggs.
- Ice bath (large bowl filled with ice and water): Crucial for stopping the cooking process and making eggs easier to peel.
- Small mixing bowl: For the yolk mixture.
- Fork or potato masher: For mashing the yolks.
- Rubber spatula or spoon: For mixing and filling.
- Piping bag with a star tip (optional): For a professional, elegant presentation. A zip-top bag with a corner snipped off works just as well.
- Serving platter: For showcasing your culinary creations.
Prep Time & Cooking Schedule
- Prep time: 15 minutes
- Cook time: 10-12 minutes (for boiling eggs)
- Chilling time: 30 minutes (minimum, for flavors to meld and for easier handling)
Plan to start about an hour before you want to serve, allowing ample time for chilling. The chilling step is essential for the flavors to fully develop and for the egg whites to firm up, making them easier to fill and serve, especially if you’re transporting them as part of your Picnic Recipes spread.
Step-by-Step Instructions
1. Boil the Eggs: Gently place your 6 large eggs into a single layer at the bottom of a large saucepan. Cover with about an inch of cold water. Bring the water to a rolling boil over high heat. Once boiling, immediately turn off the heat, cover the pan, and let the eggs sit in the hot water for 10-12 minutes. This method helps prevent green rings around the yolks.
2. Ice Bath: While the eggs are sitting, prepare an ice bath. Fill a large bowl with ice and water. After 10-12 minutes, use a slotted spoon to carefully transfer the hot eggs directly into the ice bath. Let them cool for at least 5 minutes. This stops the cooking process and makes peeling significantly easier.
3. Peel and Halve: Once the eggs are cool enough to handle, gently crack and peel them under cool running water. The ice bath should make this a breeze! Once peeled, carefully slice each egg in half lengthwise with a sharp knife.
4. Remove Yolks: Gently scoop out the bright yellow yolks into a small mixing bowl. Place the hollowed-out egg white halves onto your serving platter.
5. Mash the Yolks: Using a fork or potato masher, thoroughly mash the egg yolks until they are completely smooth and free of lumps.
6. Create the Filling: To the mashed yolks, add the mayonnaise, Dijon mustard, white vinegar (or pickle juice), salt, and black pepper. Mix well with a rubber spatula or spoon until the mixture is creamy and uniformly combined. Taste and adjust seasonings as needed – you might want a little more mustard or a pinch more salt.
7. Fill the Whites: Now for the fun part! You can spoon the yolk mixture back into the egg white halves for a rustic look. For a more elegant presentation, transfer the mixture to a piping bag fitted with a star tip (or a zip-top bag with a snipped corner) and pipe the filling into each egg white half. Ensure each Deviled Eggs half is generously filled.
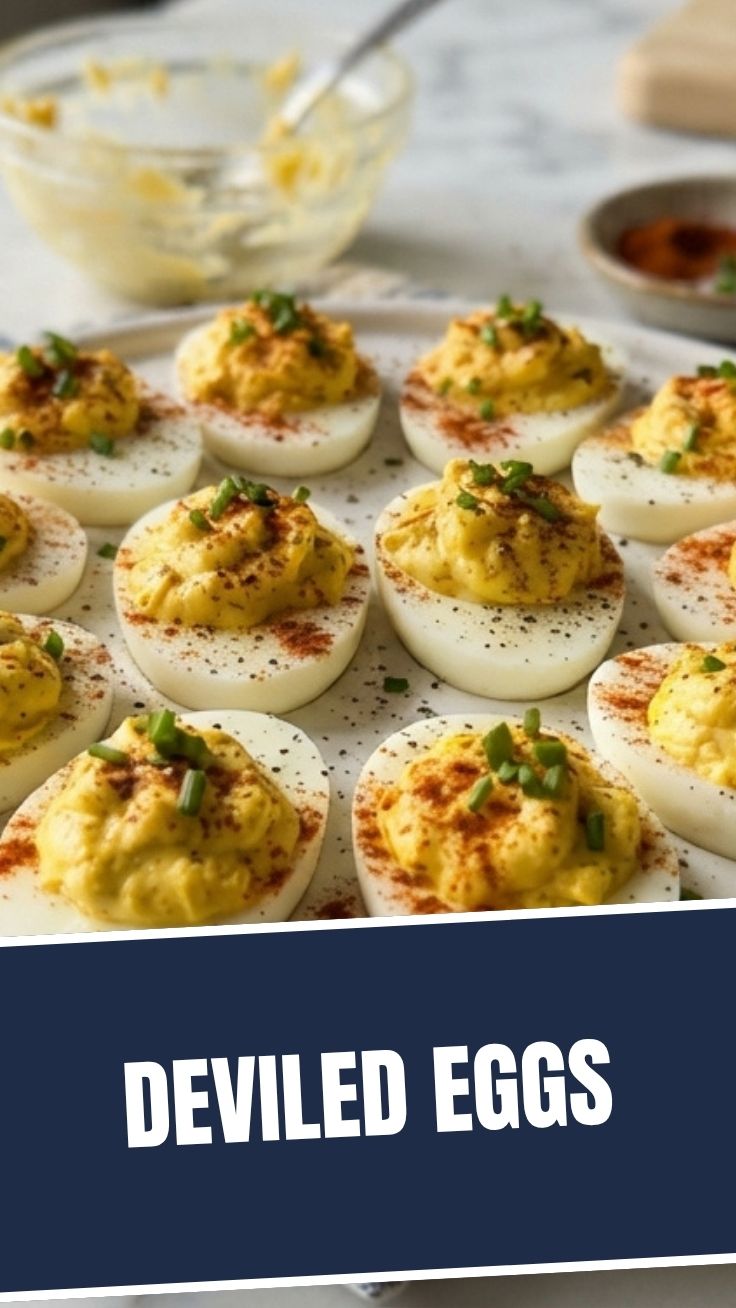
8. Garnish and Chill: Lightly dust each filled egg with paprika. If using, sprinkle with fresh chives or dill. Cover loosely with plastic wrap and refrigerate for at least 30 minutes to allow the flavors to meld and the filling to firm up.
9. Serve: Arrange your beautiful Deviled Eggs on a platter and enjoy! They are the quintessential addition to any spread, perfect alongside your other Picnic Recipes.
Nutritional Benefits & Advantages
Eggs are a powerhouse of nutrition, offering a complete protein source, meaning they contain all nine essential amino acids. They are also rich in vitamins D, B6, B12, and minerals like selenium and choline, which is vital for brain health and metabolism. While mayonnaise adds fat, using a good quality oil-based mayo in moderation or opting for a healthier alternative like Greek yogurt can keep the nutritional profile balanced. These savory bites offer a satisfying snack or appetizer that keeps you feeling full and provides sustained energy.
Tips, Variations & Cooking Advice
- Perfect Peeling: Older eggs (about 7-10 days old) tend to peel much easier than very fresh eggs. Adding a teaspoon of baking soda to the boiling water can also aid in easier peeling.
- Flavor Boosts:
* Spicy: Add a dash of hot sauce, a pinch of cayenne pepper, or finely chopped jalapeños to the yolk mixture.
* Smoky: Use smoked paprika or a tiny bit of liquid smoke.
* Herby: Incorporate fresh herbs like dill, chives, parsley, or tarragon.
* Tangy: Mix in a teaspoon of finely chopped capers or sweet pickle relish.
* Umami: A tiny sprinkle of Worcestershire sauce or a pinch of finely grated Parmesan cheese can add depth.
- Presentation: For a professional look, pipe the filling using a star tip. You can also make a small cut on the bottom of each egg white half to help them sit flat on the platter.
- Healthier Twist: Substitute half of the mayonnaise with plain Greek yogurt or mashed avocado for a creamier, healthier alternative.
Common Mistakes to Avoid
- Overcooking Eggs: This leads to a rubbery texture and the dreaded green ring around the yolk. Follow the boiling and ice bath steps precisely.
- Under-seasoning: Deviled eggs need a good balance of salt, acid, and tang. Always taste and adjust the filling.
- Warm Eggs: Trying to peel or fill warm eggs is difficult and results in a messy presentation. Always cool them thoroughly in an ice bath.
- Skipping the Chill: Chilling is crucial for the flavors to meld and for the filling to set, making them easier to handle and more delicious.
- Messy Presentation: If not using a piping bag, use two spoons to scoop the filling neatly. Wipe any excess filling from the edges of the egg whites for a clean look.
Storage & Meal Prep Tips
Deviled Eggs are best enjoyed within 2-3 days of preparation. Store them in an airtight container in the refrigerator. If stacking, place a piece of parchment paper between layers to prevent sticking. They do not freeze well, as the texture of the egg whites will become rubbery and watery upon thawing. For meal prep, you can boil and peel the eggs up to 3 days in advance and store them in the refrigerator. Prepare the yolk mixture just before serving for the freshest taste and best texture.
Conclusion
Crafting the perfect batch of Deviled Eggs at home is a rewarding experience, transforming simple ingredients into an irresistible appetizer that consistently steals the show. By following these clear, step-by-step instructions and incorporating our expert tips, you’re not just making a dish; you’re creating a memorable culinary moment. Whether for a casual family dinner, a festive gathering, or as part of your delightful Picnic Recipes, these creamy, tangy bites are sure to impress. Don’t hesitate to experiment with different flavor variations to personalize this classic to your taste. Try this recipe today and share your delicious results with us!
FAQs
Q1: Why do my egg yolks have a green ring?
A1: A green ring indicates the eggs were overcooked. The sulfur in the egg whites reacts with iron in the yolk, creating iron sulfide. To prevent this, don’t overcook and immediately transfer to an ice bath after boiling.
Q2: Can I make deviled eggs ahead of time?
A2: Yes, you can boil and peel the eggs up to 3 days in advance. You can also prepare the yolk mixture a day ahead and store it separately in an airtight container. Assemble and fill the egg whites just before serving for the best texture and freshness.
Q3: How do I make my deviled eggs spicier?
A3: To add heat, incorporate a dash of your favorite hot sauce, a pinch of cayenne pepper, or finely diced jalapeños (seeds removed for less heat) into the yolk mixture.
Q4: What’s the best way to transport deviled eggs for a picnic?
A4: Use a specialized deviled egg carrier that holds each egg securely, preventing them from sliding around. If you don’t have one, arrange them snugly in a shallow container and cover them with plastic wrap. Keep them chilled in a cooler with ice packs until serving.
Q5: Can I use Greek yogurt instead of mayonnaise?
A5: Absolutely! Substituting all or part of the mayonnaise with plain Greek yogurt will result in a lighter, tangier filling with fewer calories and less fat. Adjust seasoning as needed, as Greek yogurt adds its own distinct flavor.