The Ultimate Guide to Crafting Irresistible Blondies at Home
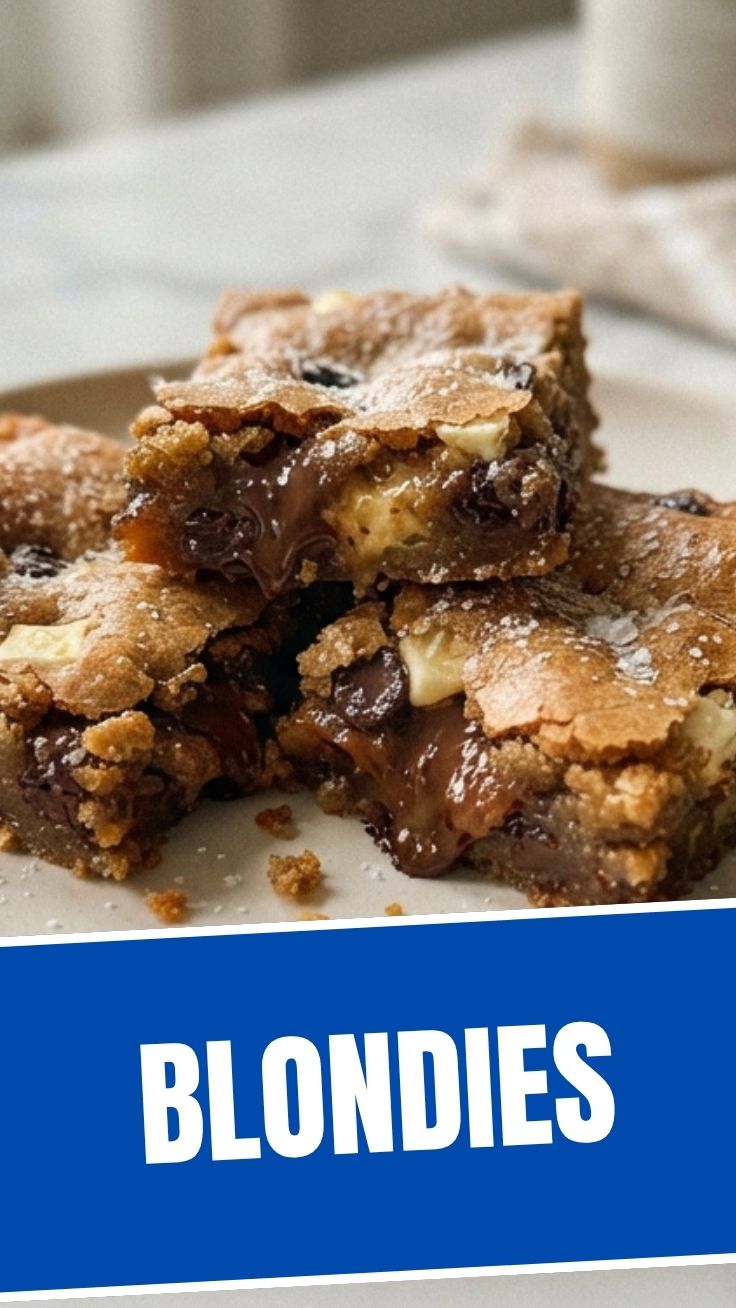
Have you ever craved a deeply satisfying, chewy, and rich treat that’s simpler than brownies but delivers just as much, if not more, delight? Today, we’re diving into the wonderful world of homemade Blondies, a true comfort classic. Forget those bland store-bought bars; learning how to perfect blonde brownies in your own kitchen opens up a universe of customizable flavors and textures. Not only is it incredibly rewarding to see these golden beauties emerge from your oven, but you also control every ingredient, ensuring a healthier, more delicious outcome tailored precisely to your taste. This comprehensive guide will equip you with all the knowledge to bake the ultimate blondie, mastering every step from mixing to cooling to achieve that perfect gooey center and crinkly top.
Ingredients & Kitchen Tools
To embark on your blondie-making adventure, gather these essentials:
- 1 cup (2 sticks) unsalted butter, melted: Provides richness and moisture. If using salted butter, reduce added salt by 1/4 teaspoon.
- 1 ½ cups packed light brown sugar: The key to that signature caramel-like flavor and chewy texture.
- ½ cup granulated sugar: Adds sweetness and contributes to the crackly top.
- 2 large eggs: Binds ingredients and adds structure. Ensure they are at room temperature.
- 2 teaspoons vanilla extract: Enhances all flavors; use good quality for best results.
- 2 cups all-purpose flour: Gives structure to your blondies.
- 1 teaspoon baking powder: Helps with a slight lift.
- ½ teaspoon salt: Balances sweetness and enhances flavor.
- 1 cup chocolate chips (milk, semi-sweet, or white): Or any desired mix-ins like nuts or toffee bits.
- 9×13-inch baking pan: Metal pans bake more evenly than glass.
- Parchment paper: For easy removal and clean-up.
- Large mixing bowls: Two are ideal – one for wet, one for dry.
- Whisk: For dry ingredients.
- Rubber spatula or wooden spoon: For mixing and folding.
Prep Time & Cooking Schedule
- Prep time: 15 minutes
- Cook time: 25-30 minutes
- Cooling time: 1-2 hours (crucial for setting!)
Plan ahead for cooling time! While the smell is irresistible, cutting into warm blondies often results in a crumbly mess. Allowing them to cool completely helps them firm up and develop their perfect chewy texture. This also gives the flavors time to meld beautifully.
Step-by-Step Instructions
1. Preheat and Prep: Preheat your oven to 350°F (175°C). Line a 9×13-inch baking pan with parchment paper, leaving an overhang on the sides for easy lifting. Lightly grease the parchment paper.
2. Melt Butter: In a large microwave-safe bowl or small saucepan, melt the butter. Let it cool slightly.
3. Combine Wet Ingredients: In a large mixing bowl, combine the slightly cooled melted butter with the brown sugar and granulated sugar. Whisk thoroughly until well combined and smooth. Add the eggs one at a time, mixing well after each addition until fully incorporated. Stir in the vanilla extract. This creates the rich, foundational liquid for your Blondies.
4. Combine Dry Ingredients: In a separate medium bowl, whisk together the flour, baking powder, and salt.
5. Combine Wet and Dry: Gradually add the dry ingredients to the wet ingredients, mixing until just combined. Be careful not to overmix! Overmixing can lead to tough, dry blondies.
6. Fold in Mix-ins: Gently fold in your chocolate chips (or other chosen mix-ins) until evenly distributed.
7. Bake: Pour the batter into your prepared baking pan and spread evenly. Bake for 25-30 minutes, or until the edges are golden brown and a toothpick inserted into the center comes out with moist crumbs, not wet batter. The center might still look slightly gooey – this is perfect for that classic chewy texture of blonde brownies.
8. Cool: Transfer the pan to a wire rack and let the blondies cool completely in the pan before lifting them out with the parchment paper and slicing. This step is non-negotiable for perfectly structured bars.
Nutritional Benefits & Advantages
While these Blondies are undeniably a treat, you can enhance their nutritional profile. Using whole wheat flour for a portion of the all-purpose flour adds fiber, and incorporating nuts like walnuts or pecans boosts healthy fats and protein. The natural sugars from brown sugar provide energy, and the satisfaction of a homemade treat helps regulate cravings, leading to more mindful indulgence compared to highly processed alternatives. Plus, the absence of cocoa means they might be a suitable option for those with chocolate sensitivities but who still desire a delightful baked good.
Tips Variations & Cooking Advice
- Brown Butter Blondies: For an elevated nutty flavor, brown your butter before adding it to the sugar. Cook butter in a saucepan over medium heat until it turns amber and smells fragrant.
- Flavor Boosts: Add a pinch of cinnamon or a dash of almond extract with the vanilla for different flavor profiles.
- Mix-in Madness: Experiment with white chocolate chips, butterscotch chips, M&Ms, pretzels (for a sweet and salty kick), or chopped toffee bits.
- Dietary Adaptations:
* Gluten-Free: Substitute the all-purpose flour with a 1:1 gluten-free baking blend that contains xanthan gum.
* Dairy-Free: Use a dairy-free butter substitute and dairy-free chocolate chips.
- Thicker Blondies: For a thicker bar, use an 8×8-inch pan and increase baking time by 5-10 minutes.
Common Mistakes to Avoid
- Overmixing the Batter: This develops the gluten in the flour too much, resulting in dry, tough blondies instead of soft and chewy ones. Mix only until just combined.
- Overbaking: An overbaked blondie is a dry blondie. Pull them from the oven when the edges are set and golden and the center still looks a bit moist. They will continue to set as they cool.
- Cutting While Warm: Impatience is your enemy! Warm blondies are notoriously crumbly and difficult to cut cleanly. Always allow them to cool completely.
- Forgetting Parchment Paper: Without parchment paper, removal becomes a sticky, frustrating endeavor. Always line your pan!
Storage & Meal Prep Tips
Store leftover Blondies tightly covered at room temperature for up to 3-4 days. For longer storage, you can freeze them for up to 2-3 months. Wrap individual bars tightly in plastic wrap, then place them in a freezer-safe bag or airtight container. Thaw at room temperature for an hour or so before serving. These are excellent for meal prep as a pre-portioned sweet treat for lunchboxes or after-dinner cravings.
Conclusion
Mastering the art of homemade Blondies is a truly rewarding kitchen endeavor. By following these detailed steps and tips, you’re now equipped to bake chewy, rich, and utterly delicious bars that will impress everyone. Remember, the key to truly exceptional blonde brownies lies in quality ingredients, gentle mixing, and, most importantly, patience during the cooling phase. So go ahead, preheat your oven, gather your ingredients, and create a batch of these golden gems. Don’t forget to share your creations and tag us with your amazing results!
FAQs
- Q: Can I use dark brown sugar instead of light brown sugar?
* A: Yes, dark brown sugar will give your blondies an even richer, more intense molasses flavor and a slightly chewier texture.
- Q: My blondies are too cakey. What did I do wrong?
* A: This often happens due to overmixing the batter or using too much flour. Ensure you measure flour correctly (spoon and level) and mix until just combined.
- Q: How do I get that crinkly top?
* A: The combination of melted butter, granulated sugar, and proper cooling typically creates that desired crinkly top. Make sure your butter isn’t too hot when adding sugar.
- Q: Can I add nuts to this recipe?
* A: Absolutely! Walnuts, pecans, or even macadamia nuts are fantastic additions. Fold them in along with the chocolate chips.
- Q: How long can I store the raw blondie batter?
* A: It’s best to bake the batter immediately for optimal texture. However, you can store it in an airtight container in the refrigerator for up to 24 hours, letting it come to room temperature before baking.