Unlocking the Secret to the Perfect Homemade Apple Pie: Your Guide to Culinary Bliss
Ever wondered what makes a truly unforgettable dessert? Is it the flaky, golden crust, the perfectly spiced, tender apples, or the lingering warmth that fills your home? Today, we’re diving deep into the art of crafting a homemade Apple Pie that will not only impress your guests but also fill your kitchen with an aroma of pure bliss. Preparing this iconic American classic from scratch isn’t just about baking; it’s about creating memories, sharing love, and mastering a culinary skill that will serve you for years to come. Forget store-bought imitations; the satisfaction of pulling a golden-brown, bubbling pie from your oven is unparalleled. This comprehensive guide will walk you through every step, ensuring your dessert recipes collection is elevated with a show-stopping creation.
Ingredients & Kitchen Tools
To embark on your Apple Pie journey, gather these essential components:
For the Crust (Double Crust Recipe):
- 2 ½ cups all-purpose flour: The foundational building block for a tender, flaky crust.
- 1 teaspoon salt: Enhances the flavor of the crust.
- 1 cup (2 sticks) unsalted butter, very cold and cut into ½-inch cubes: Crucial for flakiness; cold butter creates steam pockets during baking.
- ½ cup ice water: Binds the dough without overworking the gluten.
For the Filling:
- 6-8 medium baking apples (e.g., Granny Smith, Honeycrisp, Fuji), peeled, cored, and sliced ¼-inch thick: A blend of tart and sweet apples offers the best flavor and texture.
- ¾ cup granulated sugar: Sweetens the apples to perfection.
- ¼ cup packed light brown sugar: Adds a deeper, caramel-like sweetness.
- 2 tablespoons all-purpose flour: Thickens the filling, preventing a watery pie.
- 1 teaspoon ground cinnamon: The quintessential spice for apple pie.
- ¼ teaspoon ground nutmeg: Complements the cinnamon with warm, earthy notes.
- ⅛ teaspoon ground cloves (optional): Adds a subtle, aromatic depth.
- 1 tablespoon lemon juice: Brightens the flavor and prevents apples from browning.
- 2 tablespoons unsalted butter, cut into small pieces: Dotting the top of the filling adds richness.
Kitchen Tools:
- Large mixing bowls: For combining ingredients.
- Pastry blender or food processor: For cutting butter into flour (a food processor is faster).
- Rolling pin: Essential for rolling out the pie crust.
- 9-inch pie plate: The vessel for your magnificent pie.
- Parchment paper: Prevents sticking and aids in transfer.
- Plastic wrap: For chilling the dough.
- Wire rack: For cooling the baked pie.
- Granny Smith, Honeycrisp, Fuji apples: Specific apple varieties known for baking well.
Prep Time & Cooking Schedule
- Prep Time: 45 minutes (includes dough preparation and apple peeling/slicing)
- Chill Time (Dough): 1 hour (minimum)
- Cook Time: 50-60 minutes
- Resting Time (After Baking): 2-3 hours (crucial for the filling to set)
This schedule allows ample time for chilling the dough, which is vital for a flaky crust, and for the pie to cool and set properly. Plan to start your pie a few hours before you intend to serve it, allowing for the essential resting period.
Step-by-Step Instructions
1. Prepare the Pie Crust (Day Before or At Least 1 Hour Prior): In a large bowl, whisk together flour and salt. Cut in the very cold butter using a pastry blender or your fingertips until the mixture resembles coarse meal with some pea-sized butter chunks. Gradually add ice water, 1 tablespoon at a time, mixing until just combined. Do not overmix. Divide the dough into two equal discs, flatten slightly, wrap tightly in plastic wrap, and refrigerate for at least 1 hour, or preferably overnight. This chilling process is fundamental for creating a truly excellent Apple Pie.
2. Prepare the Apple Filling: In a large bowl, combine the peeled, cored, and sliced apples with granulated sugar, brown sugar, flour, cinnamon, nutmeg, optional cloves, and lemon juice. Toss gently until the apples are evenly coated. Set aside while you roll out the crust.
3. Assemble the Pie: On a lightly floured surface, roll out one disc of dough into a 12-inch circle. Carefully transfer it to your 9-inch pie plate. Trim the edges, leaving about a ½-inch overhang. Pour the apple filling into the crust, mounding it slightly in the center. Dot the top of the filling with the small pieces of butter.
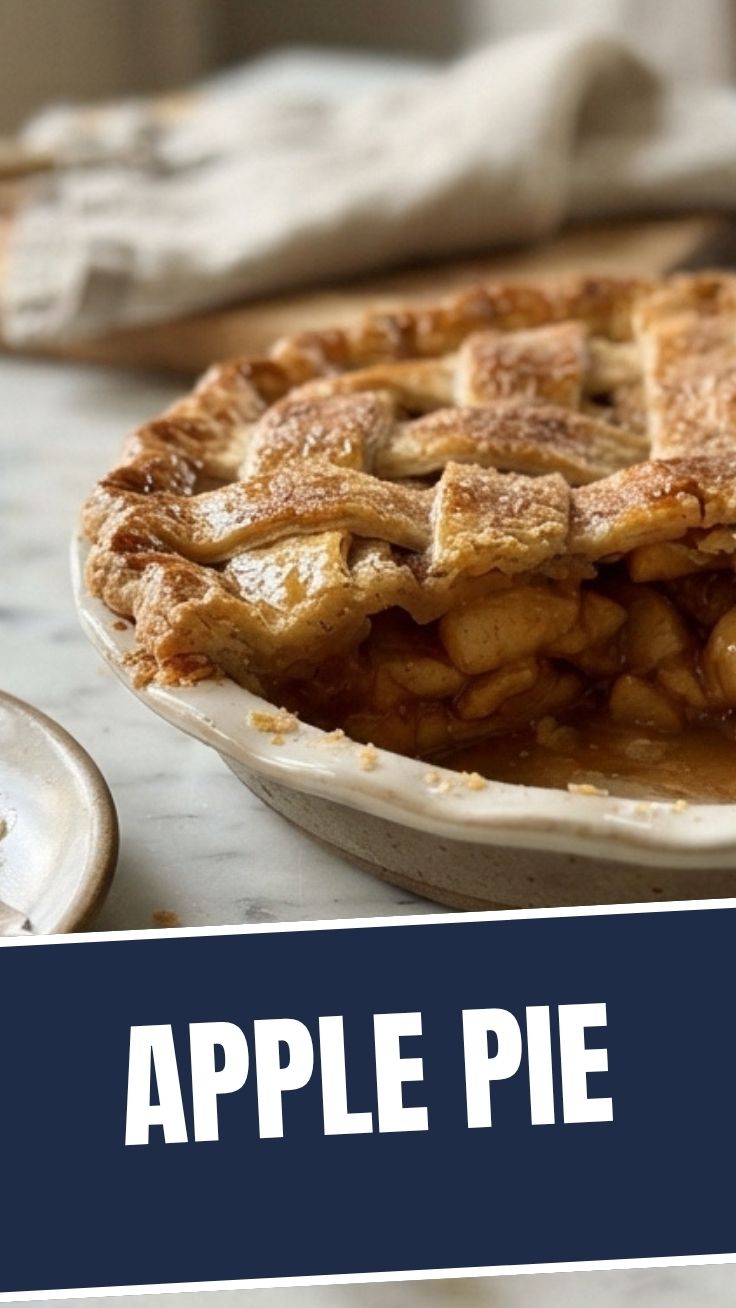
4. Add the Top Crust: Roll out the second disc of dough. You can either place it directly over the filling or create a lattice top for a decorative touch. If using a full top crust, cut a few slits in the center to allow steam to escape.
5. Seal and Crimp: Trim the top crust to match the bottom overhang. Fold the edges of both crusts under, then crimp them together using your fingers or a fork to create a sealed edge.
6. Bake: Preheat your oven to 425°F (220°C). Place the pie on a baking sheet (to catch any drips). Bake for 15 minutes at 425°F, then reduce the oven temperature to 375°F (190°C) and continue baking for another 35-45 minutes, or until the crust is golden brown and the filling is bubbling. If the crust starts to brown too quickly, loosely cover the edges with foil. This careful temperature control ensures perfectly cooked apples and a golden crust, making this one of the most satisfying dessert recipes.
7. Cool: Transfer the baked pie to a wire rack and let it cool completely for at least 2-3 hours before slicing and serving. This allows the filling to set properly.
Nutritional Benefits & Advantages
Beyond its delightful taste, a homemade Apple Pie offers some surprising benefits. Apples are a great source of dietary fiber, which aids digestion and can contribute to feelings of fullness. They also contain antioxidants like quercetin, which may offer various health protections. By making it yourself, you control the amount of sugar and fat, allowing for a potentially healthier dessert option compared to many pre-made varieties. Using fresh, seasonal apples also ensures you’re getting the best possible nutrient content.
Tips Variations & Cooking Advice
- Apple Blend: Don’t be afraid to experiment with different apple combinations. Tart Granny Smiths are excellent for structure, while Honeycrisp or Fuji add sweetness and a lovely texture.
- Spices: Enhance your pie with a touch of cardamom or ginger for an extra layer of warmth.
- Crust Glaze: For a shiny, golden crust, brush the top with an egg wash (1 egg yolk whisked with 1 tablespoon water) and sprinkle with a little coarse sugar before baking.
- Gluten-Free: Substitute the all-purpose flour in the crust with a good quality gluten-free all-purpose flour blend (ensure it contains xanthan gum).
- Dairy-Free: Use a high-quality plant-based butter for the crust and filling.
Common Mistakes to Avoid
- Overworking the Dough: This leads to a tough, inelastic crust. Mix just until combined.
- Warm Butter: If your butter isn’t very cold, your crust won’t be flaky.
- Not Chilling the Dough: Skipping this step results in a crust that shrinks and is difficult to handle.
- Not Cooling the Pie: Cutting into a warm pie can cause the filling to spill out and warp the slices. Patience is key!
- Too Much Moisture: Ensure your apples are not overly wet after washing; excess moisture can lead to a soggy bottom.
Storage & Meal Prep Tips
Leftover Apple Pie can be stored at room temperature, covered loosely with foil or plastic wrap, for up to 2 days. For longer storage, refrigerate for up to 5 days. To freeze, wrap individual slices or the whole pie tightly in plastic wrap and then in foil. It can be frozen for up to 3 months. Thaw frozen pie overnight in the refrigerator and reheat gently in the oven at 300°F (150°C) for 15-20 minutes to crisp up the crust. Preparing the pie dough in advance and freezing it is also a great meal prep strategy, allowing for a quicker bake day.
Conclusion
Crafting a homemade Apple Pie is a rewarding experience that yields a truly special dessert. From the perfectly flaky crust to the sweet, spiced apple filling, every bite is a testament to the joy of home baking. By following these detailed steps and incorporating our expert tips, you’re well on your way to mastering this timeless classic. We encourage you to try this recipe, personalize it, and share your delightful creations! Explore more incredible dessert recipes on our blog for endless culinary inspiration.
FAQs
Q1: What are the best apples for baking a pie?
A1: A mix of apples is ideal. Granny Smiths provide tartness and hold their shape well, while Honeycrisp, Fuji, or Braeburn add sweetness and a good texture.
Q2: How do I prevent a soggy bottom crust?
A2: Ensure your pie crust is chilled thoroughly, consider blind baking the bottom crust for 10-15 minutes before adding the filling, and avoid overfilling with juice by letting the apple mixture sit for a few minutes and draining excess liquid if necessary.
Q3: Can I make the pie dough ahead of time?
A3: Absolutely! You can refrigerate the pie dough for up to 2-3 days or freeze it for up to 3 months. Thaw in the refrigerator overnight before use.
Q4: How do I know when the Apple Pie is fully cooked?
A4: The crust should be deeply golden brown, and the filling should be bubbling through the vents. You can also insert a thin knife into a vent; if the apples are tender, it’s done.
Q5: What’s the best way to reheat leftover pie?
A5: Reheat slices in a preheated oven at 300°F (150°C) for 15-20 minutes to restore crispness to the crust. You can also microwave for quicker heating, but the crust won’t be as crisp.