Mastering the Art of the Perfect Roast Turkey: A Culinary Journey
Ever wondered how to achieve that golden-brown, succulent Roast Turkey that graces magazine covers and holiday tables? The secret isn’t as complex as you might think. Preparing this centerpiece dish at home is not just about saving money; it’s about infusing love and personalized flavor into every bite, creating unforgettable memories for your loved ones. This guide will demystify the process, ensuring your holiday feast or any special occasion features an undeniably delicious and perfectly cooked bird. We’ll delve into everything from brining to carving, making the journey enjoyable and the outcome truly spectacular. Forget store-bought compromises; it’s time to elevate your culinary game and impress with your very own, expertly prepared Thanksgiving Turkey Recipes.
Ingredients & Kitchen Tools
Crafting the perfect turkey begins with the right ingredients and equipment.
Ingredients:
- 1 (12-14 pound) whole turkey: Fresh or thawed. Adjust size based on guest count.
- 1/2 cup unsalted butter: Softened, for basting and flavor.
- 1 large onion: Quartered, for aromatic stuffing.
- 4 celery stalks: Roughly chopped, adds moisture and subtle flavor.
- 2 carrots: Roughly chopped, for aromatic base.
- 4 sprigs fresh rosemary: Fragrant herb, complements poultry beautifully.
- 6 sprigs fresh thyme: Earthy notes enhance turkey’s rich flavor.
- 1 lemon: Halved, for acidity and brightness inside the cavity.
- 2 cups chicken or vegetable broth: For basting and pan drippings.
- Salt and freshly ground black pepper: To taste, essential seasoning.
- Optional Brine: (For extra moisture and flavor) 1 cup kosher salt, 1/2 cup brown sugar, 1 gallon vegetable broth, 1 gallon cold water, bay leaves, peppercorns, orange slices.
Kitchen Tools:
- Roasting pan with a rack: Essential for even cooking and air circulation.
- Meat thermometer: Crucial for ensuring the turkey is cooked to a safe internal temperature (165°F).
- Baster: For applying pan drippings and keeping the bird moist.
- Twine (butcher’s twine): To tie legs together for even cooking and presentation.
- Sharp carving knife and fork: For effortless carving.
- Large cutting board: With a juice groove, for carving.
- Aluminum foil: For tenting during resting and if parts brown too quickly.
Prep Time & Cooking Schedule
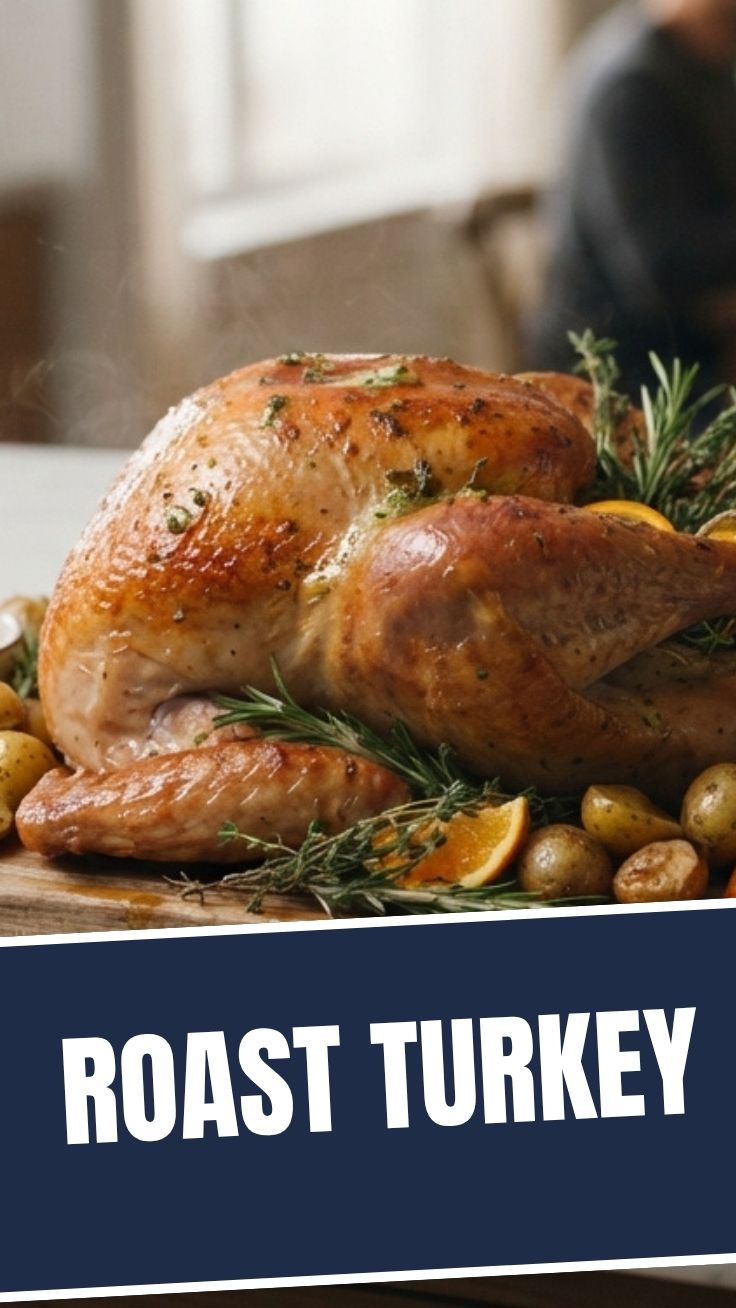
Proper planning is key to a stress-free turkey experience.
- Prep Time: 30-45 minutes (if brining, add 12-24 hours)
- Brining Time (Optional): 12-24 hours
- Cooking Time: Approximately 3-4 hours for a 12-14 pound turkey (roughly 13-15 minutes per pound at 325°F).
- Resting Time: 20-30 minutes
Planning context: If you’re brining, start the day before. On the cooking day, factor in at least an hour for the turkey to come to room temperature after brining/refrigeration, which promotes more even cooking. Always use a meat thermometer to confirm doneness, as oven temperatures can vary. The resting time is non-negotiable; it redistributes juices, resulting in a more tender and flavorful bird.
Step-by-Step Instructions
Follow these steps for a glorious Roast Turkey that will be the star of your meal.
1. Thaw and Brine (Optional but Recommended): If frozen, thaw your turkey in the refrigerator for several days (allow 24 hours per 4-5 pounds). For brining, submerge the turkey in the prepared brine solution for 12-24 hours in the refrigerator. After brining, rinse thoroughly inside and out, then pat dry with paper towels. A dry skin is crucial for crispiness.
2. Preheat and Prep: Preheat your oven to 425°F (220°C). Remove the giblets and neck from the turkey cavity. Pat the turkey extremely dry with paper towels; this is a critical step for crispy skin.
3. Aromatic Stuffing: Place the quartered onion, celery, carrots, lemon halves, rosemary, and thyme into the turkey cavity. Do not overstuff, as this can impede even cooking.
4. Seasoning and Butter: In a small bowl, mix the softened butter with salt and pepper. Gently loosen the skin over the breast meat with your fingers and spread about half of the butter mixture directly onto the breast meat. Rub the remaining butter mixture all over the outside of the turkey.
5. Trussing: Tie the turkey legs together loosely with twine. Tuck the wing tips under the body to prevent them from burning.
6. Roasting: Place the turkey breast-side up on a rack in a shallow roasting pan. Pour 2 cups of chicken or vegetable broth into the bottom of the pan.
7. Initial High Heat Roasting: Roast at 425°F for 30 minutes to get a good initial browning.
8. Lower Temperature and Continue Roasting: Reduce the oven temperature to 325°F (160°C). Continue roasting, basting every 30-45 minutes with the pan juices. If the turkey skin begins to brown too quickly, tent it loosely with aluminum foil.
9. Check for Doneness: The turkey is done when a meat thermometer inserted into the thickest part of the thigh (without touching bone) registers 165°F (74°C). The juices should run clear. This process is key for delicious Thanksgiving Turkey Recipes.
10. Resting: Carefully transfer the turkey to a carving board or platter. Tent it loosely with aluminum foil and let it rest for a minimum of 20-30 minutes before carving. This resting period is crucial for the juices to redistribute, ensuring a tender and moist bird.
Nutritional Benefits & Advantages
Turkey is a powerhouse of nutrition, especially when prepared thoughtfully. It’s an excellent source of lean protein, essential for muscle building and repair. It’s also rich in B vitamins (B3, B6, B12), which play vital roles in energy metabolism and nervous system function. Furthermore, turkey provides selenium, an antioxidant that supports thyroid health, and zinc, crucial for immune function. By roasting it with fresh herbs and vegetables, you add extra vitamins and fiber without excessive fats, making it a healthy and satisfying centerpiece for any meal.
Tips, Variations & Cooking Advice
- Flavor Variations: Experiment with different aromatics in the cavity. Consider oranges, apples, bay leaves, or even garlic cloves for varied flavor profiles.
- Herb Butter: Instead of just salt and pepper, mix finely chopped fresh herbs like sage, thyme, and rosemary into the softened butter for an extra layer of flavor.
- Brining Alternatives: If short on time, a dry brine (rubbing salt and seasonings onto the skin and refrigerating for 1-3 days) can also yield incredibly juicy results.
- Smoking: For unique flavor, consider smoking your turkey before or after a shorter stint in the oven.
- Spatchcocking: For faster, more even cooking and crispier skin, spatchcock (remove the backbone and flatten) your turkey. This method significantly reduces cooking time.
- Gravy from Drippings: Don’t discard those precious pan drippings! Deglaze the pan with a little wine or broth, strain, and thicken with a roux for an incomparable homemade gravy.
Common Mistakes to Avoid
- Not Thawing Properly: A partially frozen turkey will cook unevenly, leading to dry spots and undercooked areas.
- Forgetting to Dry the Skin: Moisture on the skin prevents it from getting crispy. Pat, pat, pat dry!
- Overcooking: The number one turkey killer! Use a reliable meat thermometer and pull the turkey when it reaches 165°F in the thigh. Carryover cooking will slightly increase the temperature during resting.
- Not Resting: Carving too soon allows all the wonderful juices to run out, resulting in a dry turkey. Patience is a virtue here.
- Over-stuffing: Packing the cavity too tightly not only slows cooking but can also be a food safety risk if the stuffing doesn’t reach a safe temperature.
- Not Basting Regularly: While not strictly necessary for moisture if brined, basting helps develop a beautiful, even brown crust.
Storage & Meal Prep Tips
After carving, allow any leftover turkey to cool completely before storing.
- Refrigeration: Store carved turkey meat in airtight containers in the refrigerator for 3-4 days.
- Freezing: For longer storage, freeze cooked turkey in airtight freezer bags or containers for up to 3 months. Removing as much air as possible helps prevent freezer burn.
- Reheating: To maintain moisture, reheat turkey slowly in a microwave with a splash of broth, or in the oven covered with foil at a low temperature (around 250-275°F) until just warmed through. Be careful not to dry it out!
Conclusion
Creating a magnificent Roast Turkey is a deeply rewarding culinary experience. By following these detailed steps and embracing a few key techniques, you can transform a humble bird into a show-stopping centerpiece that’s both juicy and flavorful. Remember the importance of temperature control, the magic of resting, and the personal touch you bring to the kitchen. We hope this guide inspires you to confidently tackle your next turkey feast and impress everyone at the table with your expertise in crafting memorable Thanksgiving Turkey Recipes. Give it a try, share your results, and savor the delicious moments!
FAQs
Q1: Do I really need to brine the turkey?
A1: While optional, brining significantly enhances moisture and flavor, making it highly recommended, especially for first-time roasters. It acts as a safety net against dry turkey.
Q2: What’s the best way to tell if my turkey is done without a thermometer?
A2: A meat thermometer is the most reliable method. If you don’t have one, pierce the thickest part of the thigh with a fork; the juices should run clear. However, this is less accurate than a thermometer.
Q3: My turkey skin isn’t getting crispy, what am I doing wrong?
A3: Ensure the turkey is patted thoroughly dry before roasting. The initial high heat blast helps, as does rubbing butter or oil on the skin. Avoid basting too frequently towards the end, as this can reintroduce moisture.
Q4: Can I stuff the turkey cavity with actual bread stuffing?
A4: While traditional, it’s generally not recommended for food safety, as the stuffing needs to reach 165°F to be safe, which can overcook the turkey. It’s safer and often tastier to bake your stuffing separately.
Q5: How do I prevent the breast meat from drying out while the dark meat cooks?
A5: Brining helps immensely. You can also start roasting the turkey breast-side down for the first hour before flipping it, or tent the breast with foil if it’s browning too quickly.