Decadent Delights: Mastering the Art of Homemade Brownies
Ever wondered if you could recreate that perfectly fudgy, deeply chocolatey Brownies experience right in your own kitchen? The answer is a resounding yes! There’s an unparalleled satisfaction that comes from baking your own treats, and few things rival the comforting indulgence of homemade chocolate brownies. Beyond the incredible aroma that will fill your home, preparing these delightful squares from scratch gives you complete control over the ingredients, allowing you to tailor them to your exact preferences and dietary needs. Say goodbye to unknown additives and hello to wholesome, delicious goodness. Today, we’re diving deep into crafting the ultimate batch of brownies – a recipe guaranteed to become a household favorite.
Ingredients & Kitchen Tools
Gather your culinary arsenal! Here’s what you’ll need for this fudgy adventure:
- Unsalted Butter (1 cup / 226g): Essential for that rich, tender texture. Unsalted variety allows you to control the salt content precisely.
- Granulated Sugar (2 cups / 400g): Provides sweetness and contributes to the crisp top crust.
- Large Eggs (4): Act as a binder and add moisture, contributing to the fudginess. Make sure they’re at room temperature for better emulsion.
- Vanilla Extract (2 teaspoons): Enhances the chocolate flavor. Use pure vanilla for the best results.
- All-Purpose Flour (1 cup / 125g): The structural base. Avoid overmixing to prevent tough brownies.
- Unsweetened Cocoa Powder (¾ cup / 75g): The star of the show! Use good quality cocoa for a deeper chocolate flavor. Dutch-processed is great for a darker color and milder taste.
- Salt (½ teaspoon): Balances sweetness and amplifies chocolate notes.
- Baking Powder (¼ teaspoon): Provides a slight lift, preventing overly dense brownies.
- Chocolate Chips or Chunks (1 cup / 170g): Optional, but highly recommended for extra pockets of melted chocolate. Use semi-sweet or dark chocolate.
Kitchen Tools:
- 9×13 inch Baking Pan: Essential for achieving the correct thickness and baking time.
- Parchment Paper: Lines the pan for easy removal and cleanup.
- Large Mixing Bowls (2): One for wet ingredients, one for dry.
- Whisk: For combining dry ingredients.
- Rubber Spatula: For folding ingredients and scraping down bowls.
- Measuring Cups and Spoons: For accurate ingredient measurement.
- Double Boiler or Microwave-Safe Bowl: For melting butter and chocolate (if using unsweetened chocolate).
Prep Time & Cooking Schedule
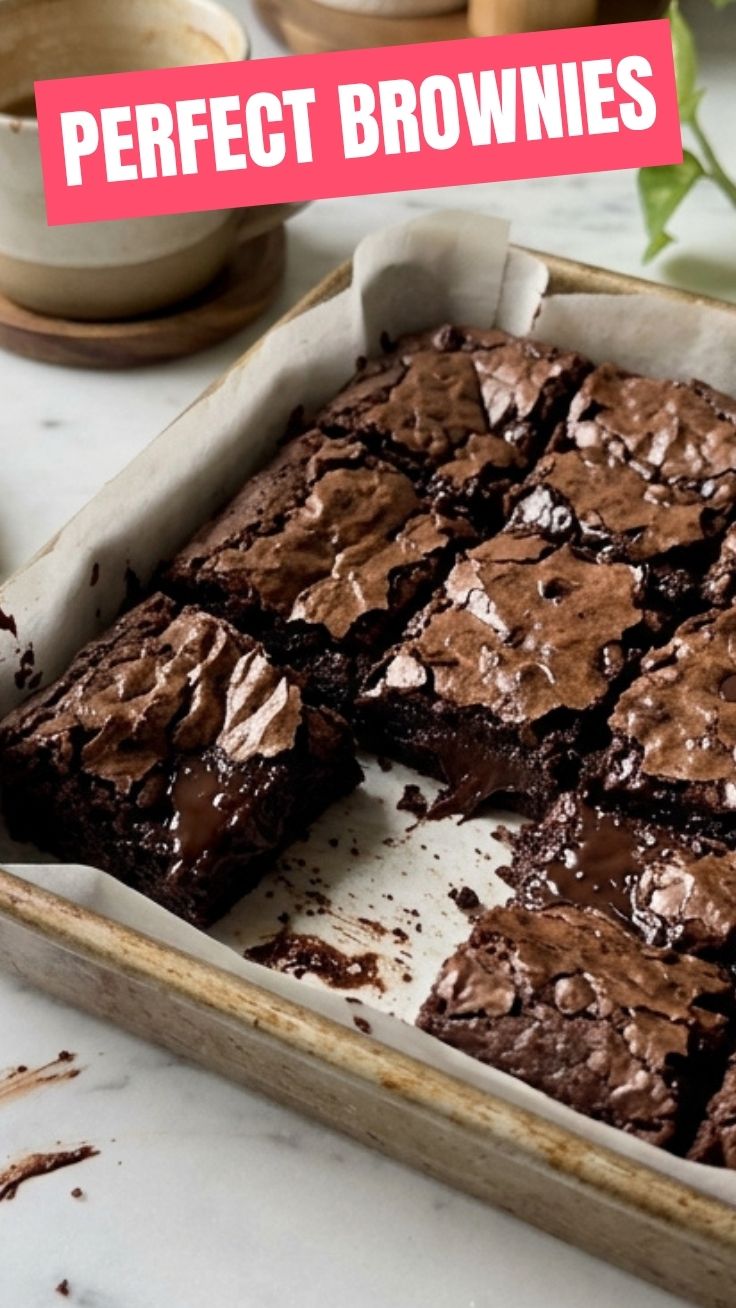
- Prep Time: 15 minutes
- Cook Time: 25-30 minutes
- Cooling Time: 30 minutes (minimum, for neat slicing)
Plan to begin your baking adventure allowing at least an hour for the entire process, including crucial cooling time. Rushing the cooling process can result in crumbly, messy squares.
Step-by-Step Instructions
1. Preheat & Prepare: Preheat your oven to 350°F (175°C). Grease and flour a 9×13 inch baking pan, then line it with parchment paper, leaving an overhang on the sides for easy lifting.
2. Melt Butter: In a large, microwave-safe bowl or using a double boiler, melt the unsalted butter until fully liquid.
3. Combine Wet Ingredients: Add granulated sugar to the melted butter and whisk until well combined. Stir in the eggs one at a time, incorporating each fully before adding the next. Then, stir in the vanilla extract. The mixture should be glossy.
4. Sift Dry Ingredients: In a separate medium bowl, whisk together the all-purpose flour, unsweetened cocoa powder, salt, and baking powder. Sifting ensures no lumps and a lighter texture.
5. Combine Wet and Dry: Gradually add the dry ingredients to the wet ingredients, mixing with a rubber spatula until just combined. Be careful not to overmix; a few streaks of flour are acceptable. Overmixing develops gluten, leading to tougher brownies. Fold in the optional chocolate chips or chunks now. This careful blending is key to great Brownies.
6. Bake: Pour the batter evenly into your prepared pan. Bake for 25-30 minutes, or until a toothpick inserted into the center comes out with moist crumbs, but no wet batter. For truly fudgy chocolate brownies, err on the side of slightly underbaking.
7. Cool & Serve: Let the brownies cool completely in the pan on a wire rack before lifting them out using the parchment paper overhang. This allows them to set properly, making for clean cuts.
Nutritional Benefits & Advantages
Beyond their undeniable deliciousness, homemade brownies, when made with quality ingredients, offer some surprising advantages. Dark cocoa powder, a primary ingredient, is rich in antioxidants and flavonoids, which are linked to improved heart health and reduced inflammation. Eggs provide a good source of protein and essential vitamins, while butter, in moderation, offers fat-soluble vitamins. Controlling the sugar content yourself also allows for a healthier indulgence compared to many store-bought options.
Tips Variations & Cooking Advice
- Espresso Powder: Add 1-2 teaspoons of instant espresso powder to the batter to deepen and intensify the chocolate flavor without making the brownies taste like coffee.
- Nuts: Fold in ½ – 1 cup of chopped walnuts, pecans, or almonds for added crunch and flavor.
- Sea Salt Flakes: Sprinkle a touch of flaky sea salt on top of the brownies just before baking for a delightful sweet and salty contrast.
- Gluten-Free: Substitute the all-purpose flour with a 1:1 gluten-free baking blend.
- Dairy-Free: Use a good quality dairy-free butter substitute and ensure your chocolate chips are dairy-free.
- Brownie Edges vs. Center: For chewier edges, use a metal pan. For fudgier centers, stick with the parchment-lined setup. Experiment to find your perfect preference!
Common Mistakes to Avoid
Overmixing the Batter: This is the most common culprit for tough, cakey brownies. Mix until just* combined.
- Overbaking: Leads to dry, crumbly brownies instead of fudgy ones. Always underbake slightly for the best texture.
- Not Cooling Properly: Cutting hot brownies results in a messy, crumbly heap. Patience is key!
- Using Low-Quality Cocoa: The quality of your cocoa significantly impacts the flavor. Invest in good cocoa powder.
- Ignoring Room Temperature Eggs: Room temperature eggs emulsify better with the butter and sugar, leading to a smoother batter and better texture.
Storage & Meal Prep Tips
Once completely cooled, store your brownies in an airtight container at room temperature for up to 3-4 days. For longer storage, wrap individual brownies tightly in plastic wrap and then aluminum foil, and freeze for up to 3 months. Thaw frozen brownies at room temperature for a few hours or gently warm them in the microwave for a few seconds. They make excellent treats for lunchboxes or a quick dessert.
Conclusion
There you have it – your definitive guide to baking extraordinary homemade Brownies. From the careful selection of ingredients to the precise timing in the oven, every step contributes to that perfect fudgy texture and rich flavor. Now that you’re armed with these insights, it’s time to preheat your oven and create your own batch of irresistible chocolate brownies. Don’t be shy – share your baking triumphs and any delightful variations you discover in the comments below! Happy baking!
FAQs
Q1: My brownies are too cakey, what went wrong?
A1: Most likely, you overmixed the batter or overbaked them. Remember to mix until just combined and remove them from the oven when a toothpick still has moist crumbs attached.
Q2: Can I substitute oil for butter?
A2: While you can, it will change the texture. Butter provides a richer flavor and contributes to the fudginess that oil simply can’t replicate.
Q3: How do I get that shiny, crackly top crust?
A3: Using slightly more sugar and ensuring the butter and sugar are well combined at the beginning helps. Also, baking at the correct temperature is crucial.
Q4: Can I use different types of chocolate?
A4: Absolutely! Feel free to experiment with milk chocolate chips for a sweeter brownie, or dark chocolate for a more intense flavor profile. White chocolate chips are also a popular addition for extra sweetness.