Ditch the Delivery! Crafting the Perfect Homemade Sesame Chicken Experience
Ever wonder if you can achieve that irresistible, sticky-sweet, and savory flavor of your favorite Chinese Takeout dish right in your own kitchen? The answer is a resounding YES! This blog post is your ultimate guide to mastering homemade Sesame Chicken. Forget bland, watery imitations; we’re talking about a dish that will rival, if not surpass, anything you’d get from a restaurant, all while giving you complete control over the ingredients and quality. Preparing this classic at home means you can tailor it to your exact preferences, ensuring a healthier, fresher, and undeniably more satisfying meal for you and your family. Let’s unlock the secrets to culinary success and transform your kitchen into a delicious Asian-inspired haven!
Ingredients & Kitchen Tools
Crafting this delightful Sesame Chicken requires a blend of pantry staples and a few specialized ingredients, easily found at most grocery stores.
For the Chicken:
- 1 ½ lbs Boneless, Skinless Chicken Thighs or Breasts: Cut into 1-inch pieces. Thighs offer more flavor and tend to stay juicier.
- ½ cup Cornstarch: For a crispy coating.
- ¼ teaspoon Salt: Enhances flavor.
- ⅛ teaspoon Black Pepper: Adds a hint of spice.
- 2 tablespoons Vegetable Oil (or other neutral oil): For frying.
For the Sesame Sauce:
- ¼ cup Soy Sauce (low sodium preferred): The umami base.
- ¼ cup Chicken Broth: Thins the sauce and adds depth.
- 2 tablespoons Rice Vinegar: Adds a tangy brightness.
- 2 tablespoons Honey or Brown Sugar: For sweetness and caramelization.
- 1 tablespoon Toasted Sesame Oil: Non-negotiable for that signature sesame aroma.
- 1 tablespoon Mirin (sweet cooking wine): Adds a subtle sweetness and glaze (optional, but recommended).
- 1 clove Garlic, minced: Aromatic foundation.
- ½ inch Fresh Ginger, grated: Adds a zesty kick.
- 1 teaspoon Cornstarch (mixed with 1 tablespoon cold water): For thickening the sauce into a glossy glaze.
To Garnish:
- 1 tablespoon Toasted Sesame Seeds: For texture and visual appeal.
- 2 tablespoons Green Onions, sliced: Adds freshness and a pop of color.
Kitchen Tools:
- Large Skillet or Wok: Ideal for frying and tossing.
- Mixing Bowls (2-3): For coating chicken and whisking sauce.
- Whisk: For smooth sauce.
- Measuring Cups and Spoons: For accurate ingredient portions.
- Cutting Board and Sharp Knife: For preparing chicken and aromatics.
- Tongs or Slotted Spoon: For handling chicken.
Prep Time & Cooking Schedule
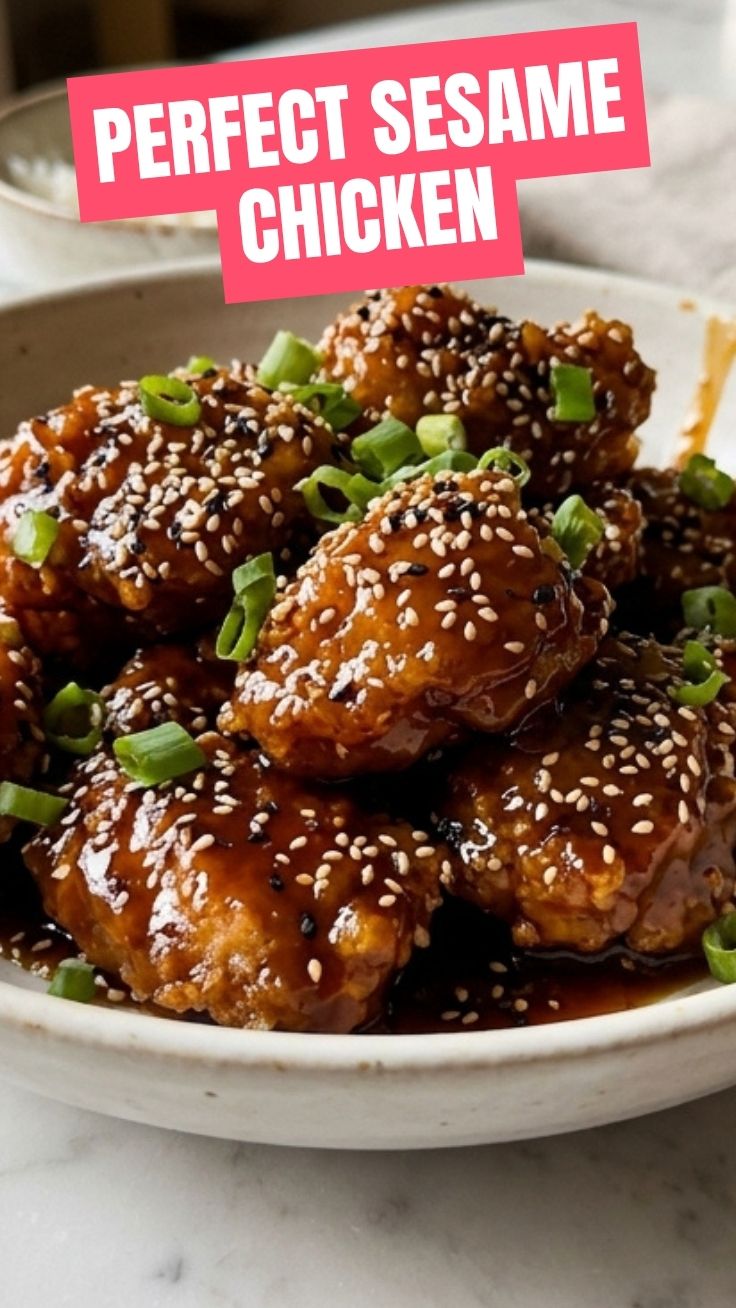
This recipe is designed for efficiency, making it perfect for a weeknight dinner!
- Prep Time: 15 minutes (Includes cutting chicken, mincing garlic, grating ginger, and mixing sauce ingredients).
- Cook Time: 20-25 minutes (Frying chicken in batches, then simmering the sauce and combining).
- Resting Time: None required, serve immediately!
Planning Tip: To streamline your cooking, you can prepare the sauce ahead of time and store it in an airtight container in the refrigerator for up to 3 days. This significantly reduces your active cook time on the day you plan to serve.
Step-by-Step Instructions
Let’s break down the process of creating your truly unforgettable Sesame Chicken. For that authentic Chinese Takeout experience, make sure to read through all steps before you begin.
1. Prepare the Chicken: In a medium bowl, toss the chicken pieces with ½ cup cornstarch, salt, and pepper until evenly coated. This provides that satisfyingly crispy exterior.
2. Make the Sesame Sauce: In another bowl, whisk together soy sauce, chicken broth, rice vinegar, honey/brown sugar, toasted sesame oil, mirin (if using), minced garlic, and grated ginger. Set aside. In a small separate bowl, dissolve 1 teaspoon cornstarch in 1 tablespoon cold water; this is your slurry.
3. Fry the Chicken: Heat the vegetable oil in a large skillet or wok over medium-high heat. Once shimmering, add the chicken in a single layer, being careful not to overcrowd the pan. Cook in batches if necessary, about 3-4 minutes per side, until golden brown and cooked through. Remove the chicken to a plate lined with paper towels to drain excess oil.
4. Simmer the Sauce: Carefully pour any excess oil from the skillet, leaving about a tablespoon. Return the skillet to medium heat. Pour in the prepared sesame sauce mixture. Bring to a simmer, then slowly whisk in the cornstarch slurry. Cook, stirring constantly, until the sauce thickens and becomes glossy, about 1-2 minutes.
5. Combine and Garnish: Add the crispy chicken back into the skillet with the thickened sauce. Toss gently to coat all the chicken pieces evenly. Remove from heat. Serve immediately, garnished generously with toasted sesame seeds and sliced green onions.
Nutritional Benefits & Advantages
Beyond its incredible taste, homemade Sesame Chicken offers several nutritional advantages. Chicken, especially lean breast meat, is an excellent source of protein, essential for muscle repair and growth. Sesame seeds provide heart-healthy fats, fiber, and important minerals like magnesium and calcium. By controlling the oil used for frying and opting for low-sodium soy sauce, you can significantly reduce the calorie and sodium content compared to many restaurant versions. Plus, fresh garlic and ginger aren’t just flavor powerhouses; they offer antioxidant and anti-inflammatory properties.
Tips, Variations & Cooking Advice
- Crispier Chicken: For extra crunch, you can double-fry the chicken. After the first fry, remove and let it rest for 5 minutes, then return to the hot oil for another 1-2 minutes until extra golden and crisp.
- Gluten-Free: Use tamari instead of soy sauce and ensure all other ingredients (like mirin) are certified gluten-free.
- Spicy Kick: Add a pinch of red pepper flakes to the sauce for a subtle heat, or a dash of Sriracha for a more pronounced spice.
- Vegetarian Option: Substitute chicken with extra-firm tofu, pressed and cubed, then coated in cornstarch and fried until crispy.
- Serving Suggestions: Serve over a bed of steamed jasmine rice, brown rice, or quinoa. Pair with steamed broccoli, stir-fried vegetables, or a simple side salad for a complete meal.
Common Mistakes to Avoid
1. Overcrowding the Pan: This lowers the oil temperature and steams the chicken instead of frying it, resulting in soggy, rather than crispy, pieces. Fry in batches if needed.
2. Overcooking the Chicken: Chicken can dry out quickly. Кук to a golden brown and ensure it’s cooked through, but don’t leave it in the pan for too long.
3. Skipping the Cornstarch Slurry: The slurry is crucial for thickening the sauce to that signature glossy, clingy consistency. Don’t add dry cornstarch directly to hot sauce, as it will clump.
4. Not Using Toasted Sesame Oil: Regular sesame oil won’t give you the same depth of flavor. Toasted sesame oil is a finishing oil and provides that distinct, nutty aroma.
Storage & Meal Prep Tips
Homemade Sesame Chicken is fantastic for meal prep!
- Refrigeration: Store cooled leftovers in
an airtight container in the refrigerator for up to 3-4 days. The sauce may thicken slightly upon cooling.
- Freezing: While edible, freezing can alter the texture of the crispy chicken. If you plan to freeze, it’s best to freeze the chicken and sauce separately. Freeze cooked chicken pieces in an airtight container for up to 2-3 months. Freeze the sauce in a separate container. Thaw overnight in the refrigerator.
- Reheating: For best results, reheat the chicken in a skillet over medium heat or in an air fryer to help restore some crispiness. Reheat the sauce gently in a saucepan, adding a splash of water or broth if it’s too thick. Combine just before serving.
Conclusion
There you have it – a comprehensive guide to making the most delicious homemade Sesame Chicken you’ve ever tasted! Ditch the drive-thru and savor the satisfaction of creating this classic Chinese Takeout dish right in your own kitchen. We’ve covered everything from crispy chicken techniques to achieving that perfectly balanced, glossy sauce. We encourage you to try this recipe, experiment with the suggested variations, and share your culinary successes with us! Your taste buds (and your wallet) will thank you.
FAQs
Q1: Can I use chicken breast instead of thighs?
A1: Absolutely! Chicken breast works perfectly well. Just be mindful as it tends to cook faster and can dry out if overcooked, so adjust your cooking times accordingly.
Q2: My sesame sauce isn’t thickening. What went wrong?
A2: Ensure you’ve made a cornstarch slurry (cornstarch dissolved in cold water) and slowly whisked it into the simmering sauce. If it’s still too thin, you can make a small additional slurry (½ tsp cornstarch to 1 tbsp cold water) and add it gradually until the desired thickness is reached.
Q3: How do I get my chicken extra crispy like restaurant style?
A3: The key is not to overcrowd the pan and to fry in sufficiently hot oil. For an ultimate crisp, consider double frying: cook until lightly golden, remove, let rest for 5 minutes, then return to hot oil for another minute or two until deeply golden and extra crunchy.
Q4: Can I prepare the sauce in advance?
A4: Yes! The sauce can be whisked together and stored in an airtight container in the refrigerator for up to 3-4 days. This makes meal prep a breeze.
Q5: What if I don’t have Mirin?
A5: Mirin adds a subtle sweetness and depth, but it’s not essential. You can omit it, or substitute with a tiny splash of dry sherry or white wine, or an extra pinch of sugar, balancing the sweetness to your preference.