Master the Art of Homemade Teriyaki Chicken: A Flavorful Journey Awaits!
Ever wondered how to recreate that irresistibly glossy, sweet-and-savory Teriyaki Chicken you crave from your favorite restaurant, right in your own kitchen? The good news is, it’s not only possible but incredibly rewarding! Crafting this classic at home allows you to control the quality of ingredients, adjust flavors to your preference, and avoid unnecessary additives. This comprehensive guide will walk you through everything you need to master this beloved dish, bringing the authentic taste of Japanese recipes to your dinner table with ease. Get ready to impress your taste buds and your family with a truly delightful meal!
Ingredients & Kitchen Tools
To embark on your culinary journey to perfect homemade Teriyaki Chicken, gather these essentials:
- 1 ½ lbs Boneless, Skinless Chicken Thighs or Breasts: Thighs offer more flavor and moisture; breasts are leaner. Cut into 1-inch pieces.
- For the Teriyaki Sauce:
* ½ cup Soy Sauce (low sodium preferred): The umami base.
* ½ cup Mirin: Japanese sweet rice wine, essential for authentic flavor and glaze.
* ¼ cup Sake: Japanese rice wine, adds complexity and subtly tenderizes. (Optional: Substitute with more mirin or chicken broth).
* ¼ cup Brown Sugar (packed): Balances the savory notes and creates a rich glaze. Adjust to sweetness preference.
* 2 cloves Garlic, minced: Aromatic foundation.
* 1-inch Ginger, freshly grated: Adds a pungent, zesty kick.
* 1 tbsp Cornstarch (or arrowroot powder): For thickening the sauce to that perfect consistency.
* 2 tbsp Water: To create a cornstarch slurry.
- 1 tbsp Sesame Oil: For stir-frying the chicken and adding a nutty aroma.
- Garnish Options: Toasted sesame seeds, sliced green onions, red pepper flakes.
Kitchen Tools:
- Large Skillet or Wok: For searing the chicken and simmering the sauce.
- Whisk: For combining sauce ingredients smoothly.
- Measuring Cups and Spoons: For precise ingredient amounts.
- Cutting Board and Sharp Knife: For preparing chicken and aromatics.
- Small Bowl: For mixing the cornstarch slurry.
Prep Time & Cooking Schedule
- Prep Time: 15 minutes (Includes chopping chicken, mincing garlic, grating ginger, and mixing sauce).
- Cook Time: 20-25 minutes (Searing chicken, simmering sauce, and reducing).
- Resting Time: 5 minutes (Allows the chicken to reabsorb juices and the sauce to thicken slightly).
This recipe is designed for a relatively quick weeknight meal. The prep can even be done in advance; for example, you can pre-chop the chicken and whisk together the sauce ingredients (minus the cornstarch slurry) a day ahead.
Step-by-Step Instructions
1. Prepare the Chicken: Pat your chicken pieces dry with paper towels. This ensures a good sear. Season lightly with salt and pepper.
2. Whisk the Teriyaki Sauce: In a medium bowl, combine soy sauce, mirin, sake (if using), brown sugar, minced garlic, and grated ginger. Whisk until the sugar is dissolved. In a small separate bowl, create a cornstarch slurry by whisking cornstarch and water together until smooth.
3. Sear the Chicken: Heat sesame oil in a large skillet or wok over medium-high heat. Add the chicken pieces in a single layer, avoiding overcrowding the pan. Cook for 3-4 minutes per side until nicely browned and almost cooked through. Remove the chicken from the pan and set aside.
4. Simmer the Sauce: Pour the prepared teriyaki sauce mixture into the same skillet. Bring it to a gentle simmer, scraping up any browned bits from the bottom of the pan – these add tremendous flavor. Cook for 2-3 minutes, allowing the alcohol to cook off slightly.
5. Thicken the Sauce: Reduce the heat to medium-low. Slowly whisk in the cornstarch slurry. Continue to whisk constantly for 1-2 minutes until the sauce thickens to a glossy, syrupy consistency. It should coat the back of a spoon. If it gets too thick, add a tablespoon of water or chicken broth.
6. Combine and Glaze: Return the seared Teriyaki Chicken to the skillet with the thickened sauce. Toss to coat every piece evenly. Cook for another 2-3 minutes, allowing the chicken to finish cooking through and absorb the delicious glaze. This step ensures every bite is infused with the rich flavors characteristic of many Japanese recipes.
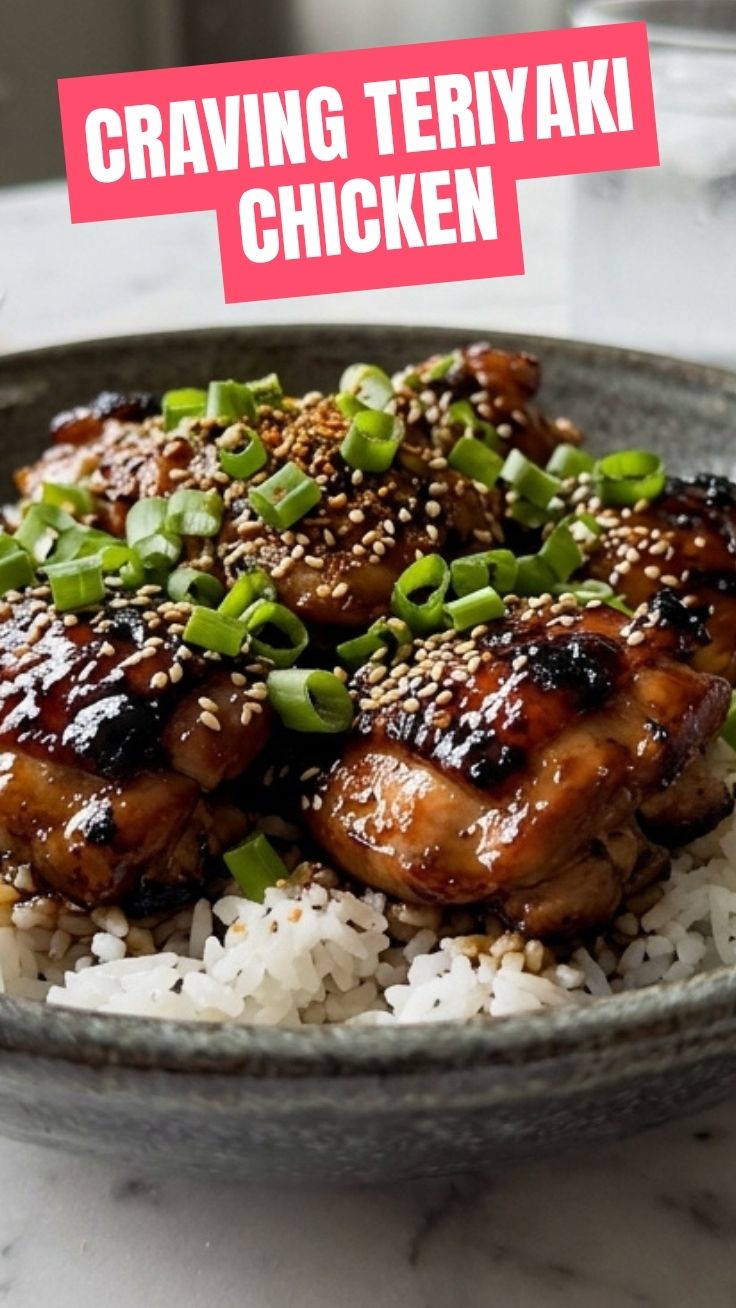
7. Serve & Garnish: Remove from heat. Let it rest for 5 minutes. Serve immediately over steamed rice, with a side of blanched broccoli or stir-fried vegetables. Garnish with toasted sesame seeds and sliced green onions for an extra flourish.
Nutritional Benefits & Advantages
Homemade Teriyaki Chicken, when prepared with mindful ingredients, offers several nutritional benefits. Chicken breast is an excellent source of lean protein, essential for muscle repair and growth. Chicken thighs, while higher in fat, still provide quality protein and are rich in iron and zinc. Using low-sodium soy sauce significantly reduces sodium intake compared to many store-bought versions. Fresh ginger and garlic provide antioxidants and anti-inflammatory compounds. By making it yourself, you avoid the high fructose corn syrup and artificial ingredients often found in commercial teriyaki sauces, giving you a healthier, more transparent meal.
Tips, Variations & Cooking Advice
- Spice It Up: Add a pinch of red pepper flakes to the sauce for a subtle kick.
- Vegetarian Option: Substitute chicken with firm tofu or tempeh, pressing out excess water before searing.
- Gluten-Free: Use tamari instead of soy sauce and ensure your mirin and sake are gluten-free (some brands contain wheat).
- Sweeter/Less Sweet: Adjust the amount of brown sugar to your preference.
- Alternative Cooking Methods: This chicken can also be grilled or baked. If grilling, marinate the chicken in the sauce (hold back the cornstarch slurry) for at least 30 minutes, then grill until cooked. Thicken the remaining marinade on the stovetop and drizzle over the grilled chicken.
- Crispy Skin: If using skin-on chicken thighs, sear them skin-side down first until crispy before proceeding.
Common Mistakes to Avoid
- Overcrowding the Pan: This leads to steaming rather than searing, resulting in pale, less flavorful chicken. Cook in batches if necessary.
- Overcooking the Chicken: Teriyaki glaze can hide dry chicken. Cook until just done (internal temperature of 165°F/74°C).
- Adding Cornstarch Directly to Hot Sauce: This will clump. Always make a slurry with cold water first.
- Not Simmering the Sauce Long Enough: The flavors need time to meld, and the alcohol needs to cook off.
- Skipping the Mirin and Sake: While substitutions exist, these ingredients are key to the authentic Japanese flavor profile.
Storage & Meal Prep Tips
Leftover Teriyaki Chicken, paired with rice and vegetables, makes excellent meal prep. Store cooled leftovers in airtight containers in the refrigerator for up to 3-4 days. For freezing, store in freezer-safe bags or containers for up to 2-3 months. Thaw overnight in the refrigerator. Reheat gently in a microwave or on the stovetop over low heat, adding a splash of water or broth if the sauce has thickened too much.
Conclusion
Mastering homemade Teriyaki Chicken is a culinary triumph that brings delicious, restaurant-quality flavor right to your dining room. This recipe not only delivers an incredibly satisfying meal but also opens the door to exploring the rich and diverse world of Japanese recipes, empowering you to create wholesome, flavorful dishes with confidence. We encourage you to try this recipe, adjust it to your taste, and share your delightful creations. What’s your favorite way to enjoy this classic dish? Let us know in the comments below!
FAQs
Q1: Can I make the teriyaki sauce ahead of time?
A1: Yes, you can prepare the teriyaki sauce (without the cornstarch slurry) up to 3-4 days in advance and store it in an airtight container in the refrigerator. Add the slurry when you’re ready to thicken and cook.
Q2: What if I don’t have mirin or sake?
A2: While they contribute significant authentic flavor, you can substitute mirin with a dry sherry or sweet marsala wine with a pinch of sugar. For sake, a dry white wine or chicken broth can be used, though the depth of flavor will be slightly different.
Q3: How can I make my chicken extra crispy?
A3: Ensure your chicken pieces are patted very dry before searing, use a hot skillet with enough oil, and avoid overcrowding the pan. For skin-on thighs, sear skin-side down until very crispy.
Q4: My sauce isn’t thickening. What should I do?
A4: Ensure your cornstarch slurry is lump-free and you’ve brought the sauce to a gentle simmer after adding it. If it’s still too thin, mix another small slurry (1 tsp cornstarch with 1 tbsp cold water) and whisk it into the simmering sauce gradually until desired thickness is reached.