Master the Art of Perfect Roast Chicken: Your Ultimate Guide to a Flavorful Feast
Have you ever craved that quintessential, crispy-skinned, juicy-on-the-inside Roast Chicken that graces magazine covers and fills your home with an irresistible aroma? Preparing a truly exceptional Roast Chicken at home isn’t just about cooking; it’s about crafting a memorable culinary experience, a centerpiece that brings people together. Beyond its comforting appeal, mastering this dish opens up a world of versatile Chicken Recipes, allowing you to elevate your weeknight meals and impress your dinner guests with ease. This comprehensive guide will walk you through every step, from selecting the finest poultry to achieving that coveted golden-brown perfection, ensuring your next roasted bird is nothing short of spectacular. Get ready to transform your kitchen into a haven of delicious possibilities, making perfect Chicken Recipes a regular feature in your culinary repertoire.
Ingredients & Kitchen Tools
To embark on your journey to the perfect Roast Chicken, gather these essential items:
- Whole Chicken (3-4 lbs): Heritage or organic free-range for best flavor and texture. Ensure it’s thawed and patted dry.
- Garlic (1 whole head): Smashed cloves for aromatic depth.
- Lemons (2): One sliced, one quartered for acidity and freshness.
- Fresh Rosemary (3-4 sprigs): Robust, piney notes.
- Fresh Thyme (4-5 sprigs): Earthy and slightly peppery.
- Butter (4 tbsp, unsalted, softened): For crispy skin and rich flavor.
- Olive Oil (2 tbsp): To assist with browning and moisture.
- Kosher Salt (1.5 tbsp): Essential for seasoning inside and out.
- Black Pepper (1 tsp, freshly ground): For a piquant kick.
- Onion (1 large): Roughly chopped, for the roasting pan to elevate the chicken.
- Carrots (2-3): Roughly chopped, for the roasting pan, adds flavor to drippings.
- Celery Stalks (2): Roughly chopped, for the roasting pan, contributes aromatic notes.
- Roasting Pan with Rack: Allows air circulation for even cooking.
- Butcher’s Twine: For trussing, ensuring even cooking and a compact shape.
- Meat Thermometer: Crucial for verifying internal temperature and doneness.
- Sharp Chef’s Knife: For preparing ingredients and carving.
- Cutting Board: A stable surface for all your prep.
Prep Time & Cooking Schedule
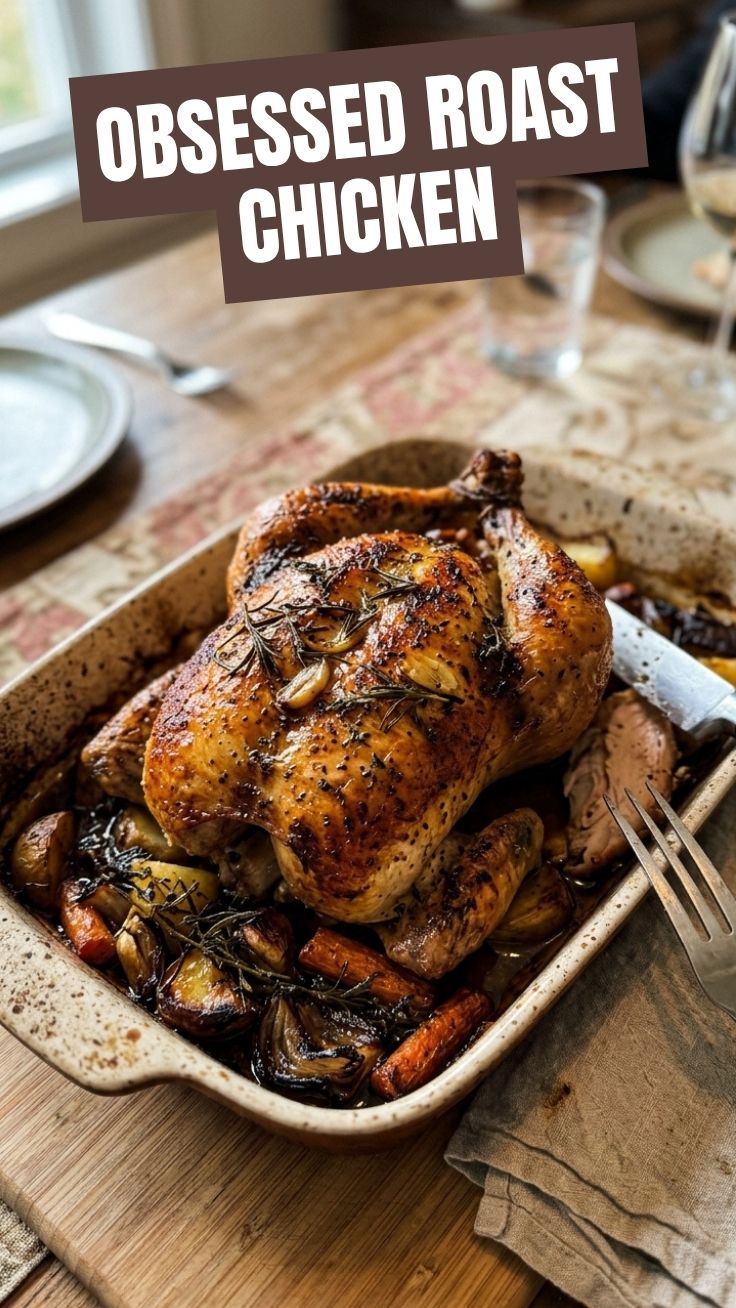
Planning is key for a stress-free roasting experience.
- Prep Time: 20-30 minutes (includes trussing and seasoning)
- Marinating Time (Optional): 2-4 hours, or overnight in the refrigerator for deeper flavor penetration. This step significantly impacts tender results.
- Cook Time: 60-90 minutes, depending on chicken size.
- Resting Time: 15-20 minutes, absolutely crucial for juicy, tender meat.
Proper planning ensures your chicken is perfectly cooked and ready to serve at its prime.
Step-by-Step Instructions
1. Preheat & Prep: Preheat your oven to 425°F (220°C). Remove the giblets and neck from the chicken cavity and pat the chicken very dry with paper towels. This is critical for crispy skin on your Roast Chicken.
2. Seasoning & Aromatics: In a small bowl, mix softened butter, minced garlic, half of the fresh rosemary and thyme leaves, salt, and pepper. Gently separate the skin from the breast meat with your fingers and rub about half of the butter mixture directly onto the meat under the skin. Spread the remaining butter mixture all over the outside of the chicken.
3. Stuff & Truss: Stuff the chicken cavity with the remaining garlic cloves, lemon halves, and herb sprigs. Truss the chicken using butcher’s twine to bind the legs together and tuck the wings under the body. This promotes even cooking and a more aesthetically pleasing presentation, making it one of the most delightful Chicken Recipes you’ll ever make.
4. Roast: Place the chopped onions, carrots, and celery in the bottom of a roasting pan. Drizzle with olive oil and season with a pinch of salt and pepper. Place the chicken on a roasting rack directly on top of the vegetables.
5. Cook & Baste: Roast for 20 minutes at 425°F (220°C). Reduce the oven temperature to 375°F (190°C) and continue roasting for another 40-70 minutes, or until an internal temperature of 165°F (74°C) is reached in the thickest part of the thigh, without touching the bone. Baste occasionally with pan drippings for extra moisture and flavor.
6. Rest: Once cooked, remove the chicken from the oven, transfer it to a cutting board, tent loosely with foil, and let it rest for 15-20 minutes before carving. This resting period allows the juices to redistribute, ensuring a tender and moist bird.
Nutritional Benefits & Advantages
A perfectly cooked Roast Chicken offers more than just incredible flavor; it’s a powerhouse of nutrition. Chicken is an excellent source of lean protein, essential for muscle repair and growth. It also provides vital B vitamins, which aid in energy metabolism, and essential minerals like selenium, crucial for thyroid function and immune health. Roasting with fresh herbs like rosemary and thyme, and aromatic vegetables, infuses the meat with natural antioxidants without the need for excessive fats. This makes it a wholesome option that supports a balanced diet, providing sustained energy and satiety.
Tips Variations & Cooking Advice
- Spatchcocking: For a faster, more even cook, consider spatchcocking your chicken (removing the backbone and flattening it).
- Flavor Boosts: Experiment with different herb blends (e.g., sage, oregano) or spice rubs (paprika, cumin). A dry brine (salt, sugar, herbs) applied overnight can also yield incredibly juicy results.
- Vegetable Medley: Add root vegetables like potatoes or sweet potatoes to the roasting pan for a complete meal.
- Gravy: Don’t discard those flavorful pan drippings! Deglaze the pan with white wine or chicken broth, thicken with a roux, and create a delicious homemade gravy.
- Dietary Adaptations: This recipe is naturally gluten-free. For a dairy-free version, substitute butter with olive oil or a plant-based butter alternative.
Common Mistakes to Avoid
- Not Patting Dry: A wet chicken skin will steam instead of crisp, resulting in rubbery skin. Always pat it thoroughly dry.
- Overcrowding the Pan: Too many vegetables or too large of a chicken in a small pan will lead to steaming instead of roasting, hindering browning.
- Not Trussing: Untrussed chickens cook unevenly, with breast meat often drying out before the thighs are done.
- Skipping the Rest: Cutting into the chicken immediately after roasting causes all the juices to escape, leading to dry meat.
- Guessing Doneness: Always use a meat thermometer. Visual cues can be deceiving, and undercooked chicken is a health risk, while overcooked chicken is dry.
Storage & Meal Prep Tips
Leftover Roast Chicken is a culinary gift! Once cooled, carve any remaining meat from the bones. Store in airtight containers in the refrigerator for up to 3-4 days. For longer storage, freeze carved chicken in freezer-safe bags or containers for up to 3 months. To reheat, gently warm in the oven at a low temperature (300°F/150°C) with a splash of broth to prevent drying, or microwave in short bursts. Leftover chicken is fantastic for sandwiches, salads, stir-fries, or in a hearty soup, making it a versatile component in your meal prep strategy for a variety of Chicken Recipes.
Conclusion
Mastering the art of Roast Chicken is a culinary milestone that equips you with the skills to create truly memorable meals. From achieving that coveted crispy skin to ensuring the juiciest interior, this guide has provided you with all the insights and techniques needed. We encourage you to try this recipe, experiment with the suggested variations, and confidently explore the vast world of delicious Chicken Recipes that extend from this foundational skill. Share your roasting triumphs in the comments below, or tell us your favorite ways to use leftover roast chicken! Happy roasting!
FAQs
Q1: How do I get truly crispy skin?
A1: Patting the chicken very dry, rubbing butter or oil generously over the skin, and roasting at a high initial temperature are key. Ensuring there’s good air circulation around the chicken (using a rack) also helps.
Q2: Can I use frozen chicken?
A2: Yes, but ensure it’s completely thawed before preparation. Thawing usually takes 1-2 days in the refrigerator for a 3-4 lb bird. Never roast a partially frozen chicken as it will cook unevenly.
Q3: What can I do with the pan drippings?
A3: The pan drippings are liquid gold! Deglaze the pan with chicken broth or white wine, scrape up the browned bits, and then thicken with a cornstarch slurry or flour roux to make an incredibly flavorful gravy.
Q4: My chicken dried out. What went wrong?
A4: Most likely, it was overcooked or not rested properly. Always use a meat thermometer and take the chicken out as soon as it reaches 165°F (74°C) in the thickest part of the thigh. Resting allows the juices to redistribute back into the meat.
Q5: Can I season the chicken ahead of time?
A5: Absolutely! Seasoning the chicken 12-24 hours in advance (a “dry brine” with salt and pepper) can dramatically improve both flavor and moisture retention. Just keep it uncovered in the refrigerator for some of that time to allow the skin to dry out for extra crispness.