Master the Art of Perfectly Grilled Corn on the Cob: Your Ultimate Summer Sidekick
Ever wondered how to achieve that smoky, sweet, and utterly addictive char on your corn, transporting you straight to a backyard BBQ paradise? Look no further! Mastering Grilled Corn on the Cob at home isn’t just about cooking; it’s about crafting an experience. And let’s be honest, nothing screams summer quite like it. This guide will walk you through everything you need to know, from selecting the freshest ears to achieving that perfect caramelization, making it the star alongside your favorite grilled corn recipes. Forget bland, boiled kernels – we’re elevating your corn game to an art form, promising a dish that’s both simple to prepare and incredibly rewarding to eat.
Ingredients & Kitchen Tools
Gathering your provisions and tools is the first step to successful grilling. Here’s what you’ll need:
- Fresh Corn on the Cob (4-6 ears): Look for bright green husks and plump, juicy kernels. Avoid dry or shriveled husks.
- Unsalted Butter (1/4 cup, softened): For richness and flavor. You can substitute with olive oil or a dairy-free butter alternative.
- Salt (to taste): Kosher or sea salt works best for sprinkling.
- Black Pepper (to taste): Freshly ground adds a better aroma.
- Optional Flavorings:
* Garlic Powder (1/2 tsp): For an aromatic kick.
* Smoked Paprika (1/2 tsp): Adds depth and a subtle smoky note.
* Chili Powder (1/4 tsp): For a touch of warmth and spice.
* Fresh Cilantro (2 tbsp, chopped): For a vibrant, herbaceous finish.
* Cotija Cheese (1/4 cup, crumbled): For a salty, tangy, and creamy texture (Mexican Street Corn style).
* Lime Wedges: A squeeze of fresh lime brightens all the flavors.
- Grill (Charcoal, Gas, or Indoor Electric): Essential for that smoky char.
- Tongs: For safely flipping the corn on the hot grill.
- Small Bowl: For mixing butter and seasonings.
- Basting Brush (optional): For evenly spreading flavored butter.
- Shucking Fork (optional): A handy tool for holding the corn while eating.
Prep Time & Cooking Schedule
| Task | Time | Notes |
| :————— | :———- | :———————————————————————————————————————————————————————————— |
| Prep Time | 10 minutes | Shucking corn, mixing butter. |
| Cook Time | 10-15 minutes | Varies depending on grill temperature and desired char. |
| Total Time | 20-25 minutes | Quick and efficient, perfect for spontaneous grilling sessions. |
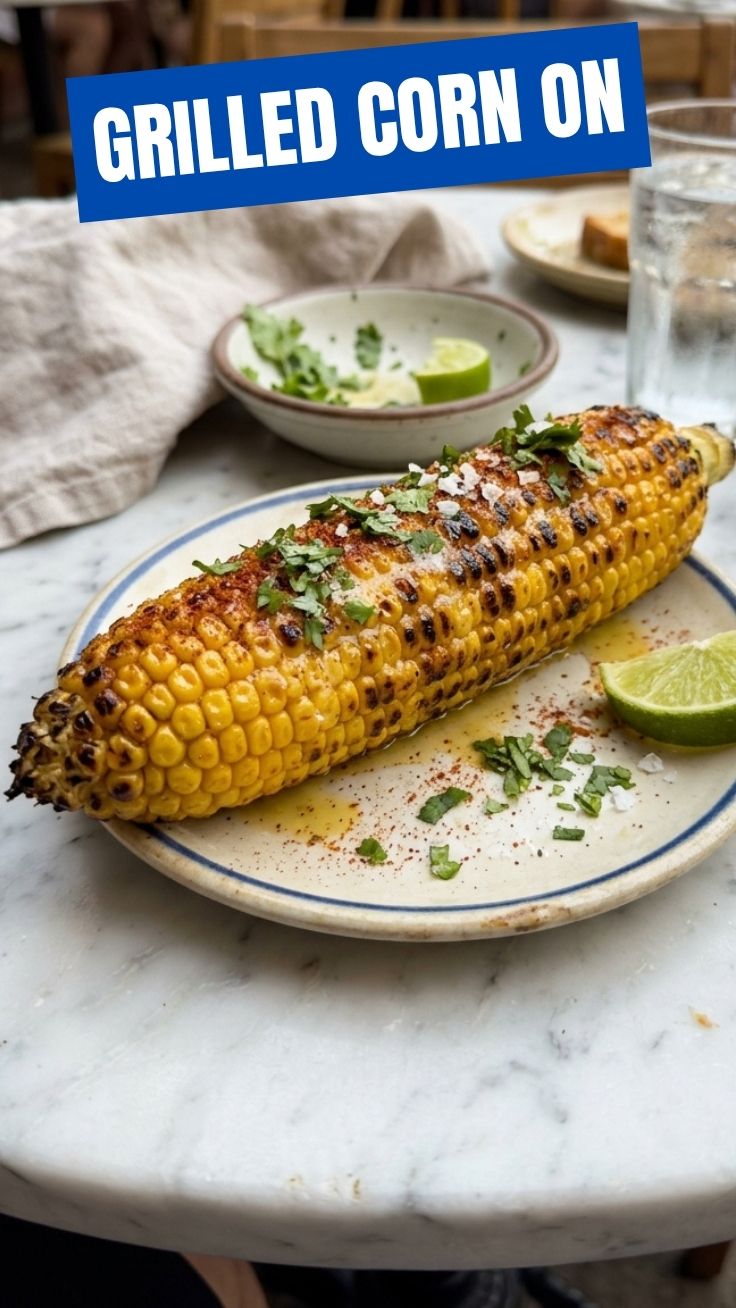
This recipe is designed for maximum flavor with minimal fuss, making it an excellent last-minute addition to any meal.
Step-by-Step Instructions
1. Prepare the Grill: Preheat your grill to medium-high heat (375-400°F / 190-200°C). Clean the grates thoroughly to prevent sticking.
2. Shuck the Corn: Remove the husks and silks from each ear of corn. If you prefer a more subtle char and steamed interior, you can grill with the husks on, then peel them back to char the kernels.
3. Flavor the Butter (Optional but Recommended): In a small bowl, combine the softened butter with salt, black pepper, garlic powder, smoked paprika, and chili powder (if using). Mix well until thoroughly combined.
4. Before Grilling the Grilled Corn on the Cob: Lightly brush each ear of corn with a thin layer of the seasoned butter. This helps with caramelization and prevents sticking.
5. Grill the Corn: Place the buttered corn directly on the hot grill grates. Grill for 10-15 minutes, turning every 2-3 minutes, until the kernels are tender and show beautiful char marks on all sides. The natural sugars in the corn will caramelize, creating a slightly smoky sweetness. This technique works perfectly alongside other grilled corn recipes for a comprehensive BBQ spread.
6. Serve Immediately: Remove the corn from the grill. If desired, give it another brush of seasoned butter. Garnish with chopped cilantro, crumbled Cotija cheese, and a squeeze of fresh lime juice for an elevated experience.
Nutritional Benefits & Advantages
Corn on the cob is not only delicious but also offers several health benefits. It’s a good source of fiber, which aids digestion and promotes satiety. It contains essential vitamins and minerals, including vitamin C, B vitamins (folate, B6, thiamine), and potassium. Additionally, corn is rich in antioxidants like lutein and zeaxanthin, which are beneficial for eye health. Grilling, as a cooking method, often requires less added fat than frying, making it a healthier option for preparing vegetables.
Tips, Variations, & Cooking Advice
- Soaking the Corn (Husks On): If grilling with husks on, soak the corn in cold water for 15-30 minutes before grilling. This prevents the husks from burning and helps steam the corn for a tender interior.
- Mexican Street Corn (Elote): After grilling, slather with a mixture of mayonnaise, sour cream, chili powder, and lime juice. Finish with crumbled Cotija cheese and a sprinkle of cilantro.
- Spicy Kick: Add a pinch of cayenne pepper or a dash of hot sauce to your seasoned butter.
- Herb Butter: Experiment with fresh herbs like chives, parsley, or basil mixed into the butter.
- Grill Basket: If you’re worried about corn falling through the grates or want to grill multiple ears easily, a grill basket can be a great investment.
- High Heat Sear: For an extra smoky flavor, finish the corn with a quick sear directly over high heat for a minute or two on each side after it’s mostly cooked.
Common Mistakes to Avoid
- Overcooking: Overcooked corn becomes tough and loses its sweet, juicy flavor. Keep an eye on the clock and the tenderness of the kernels.
- Low Heat: Grilling on too low heat will steam the corn rather than giving it that desirable char. Ensure your grill is adequately preheated.
- Not Cleaning the Grates: Dirty grates can cause the corn to stick, making it difficult to turn and potentially tearing off kernels.
- Ignoring the Corn: Don’t walk away from the grill! Corn cooks relatively quickly and requires frequent turning to ensure even charring.
Storage & Meal Prep Tips
Leftover grilled corn can be stored in an airtight container in the refrigerator for up to 3-4 days. To reheat, you can grill it again for a few minutes, microwave it, or even slice the kernels off the cob and sauté them in a pan with a little butter. Cooked corn kernels freeze well for up to 3 months; simply slice them off the cob and store in a freezer-safe bag. This makes it an excellent component for future salads, salsas, or stir-fries.
Conclusion
There you have it – the definitive guide to creating the most delectable Grilled Corn on the Cob. It is a deceptively simple dish that, with a little attention to detail, can become a truly spectacular culinary centerpiece. Whether you’re aiming for a classic buttery sweetness or an adventurous, spiced rendition, the techniques shared here will guarantee a perfect outcome every time. So fire up your grills, embrace the summer vibes, and enjoy this quintessential side dish alongside your favorite grilled corn recipes. We encourage you to try this recipe, share your grilling triumphs in the comments below, and let us know your favorite variations!
FAQs
Q1: Can I grill frozen corn on the cob?
A1: While fresh is best, you can grill frozen corn. Thaw it completely first, then pat it dry before proceeding with the recipe to ensure a good char.
Q2: How do I know when the corn is done?
A2: The kernels should be tender when pierced with a fork and slightly translucent. You’ll also see nice char marks on the exterior.
Q3: What if I don’t have a grill?
A3: You can achieve a similar effect using a cast iron grill pan on your stovetop over medium-high heat. You won’t get the smoky flavor, but you can still get excellent char marks.
Q4: Can I pre-mix the flavored butter ahead of time?
A4: Absolutely! You can prepare the seasoned butter days in advance and store it in an airtight container in the refrigerator. Just bring it to room temperature before using.
Q5: How can I prevent the corn from drying out on the grill?
A5: Basting the corn with butter or oil throughout the cooking process helps keep it moist. Grilling with the husks on (after soaking) can also prevent drying.