The Secret to Perfectly Chewy, Flavorful Homemade Halloween Sugar Cookies
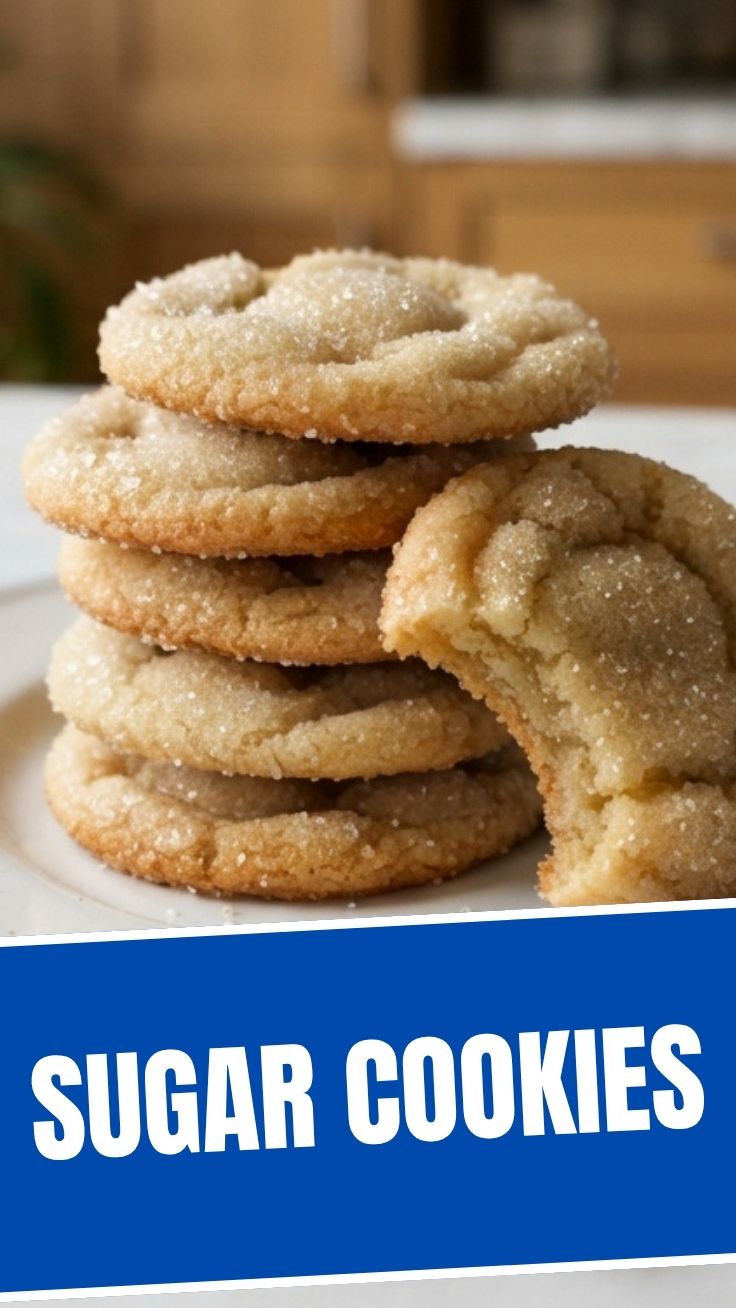
Are you ready to transform your kitchen into a sweet-smelling wonderland, filled with the delightful aroma of freshly baked treats? Imagine the joy of crafting your very own batch of Sugar Cookies, each one a canvas for your creativity, perfect for any occasion. Forget those store-bought, often bland alternatives; preparing these at home offers unparalleled freshness, customizable flavors, and the immense satisfaction of a homemade masterpiece. And when it comes to celebrating the spookiest season, there’s nothing quite like a plate of festive Halloween Sugar Cookies. But what if you could unlock the secrets to not just good, but truly incredible sugary confections? This comprehensive guide will walk you through every step, ensuring your festive cookies, be they for Halloween or even delightful Christmas sugar cookies, are the star of the show.
Ingredients & Kitchen Tools
Here’s everything you’ll need to create your culinary magic:
- Unsalted Butter (2 sticks/1 cup): Softened to room temperature for smooth creaming.
- Granulated Sugar (1 ½ cups): Provides sweetness and helps with browning.
- Large Eggs (2): Room temperature for better emulsification and a lighter crumb.
- Vanilla Extract (2 teaspoons): Essential for a classic, aromatic flavor. You can also experiment with almond or lemon extract for variations.
- All-Purpose Flour (3 cups): Measured by scooping and leveling for accuracy; too much flour can make cookies tough.
- Baking Powder (1 teaspoon): A leavening agent that gives cookies a slight rise.
- Salt (½ teaspoon): Balances sweetness and enhances other flavors.
- Optional: Powdered Sugar (2 cups): For a simple glaze or icing.
- Optional: Milk (2-3 tablespoons): To adjust consistency of the icing.
- Optional: Food Coloring: For vibrant cookie decorations.
Kitchen Tools:
- Large mixing bowls: For combining ingredients.
- Electric mixer (stand or hand-held): Makes creaming butter and sugar much easier.
- Measuring cups and spoons: For precise ingredient measurements.
- Rubber spatula: For scraping down bowls and folding ingredients.
- Rolling pin: For rolling out the dough evenly.
- Cookie cutters ( assorted shapes): Essential for creating festive designs.
- Baking sheets: Preferably light-colored to prevent over-browning.
- Parchment paper or silicone baking mats: Prevents sticking and ensures even baking.
- Wire cooling rack: For cooling cookies completely.
- Optional: Piping bags and tips: For intricate icing designs.
Prep Time & Cooking Schedule
- Prep Time: 20-25 minutes
- Chill Time: 1-2 hours (or overnight)
- Cook Time: 8-12 minutes per batch
- Cooling Time: 15-20 minutes
Schedule Context: The chilling time is crucial for preventing the cookies from spreading too much in the oven, ensuring they maintain their cut-out shapes. Plan ahead, as you can prepare the dough a day or two in advance. This makes them perfect for holiday baking sessions or even as a relaxing weekend activity.
Step-by-Step Instructions
1. Cream Butter and Sugar: In a large mixing bowl, using an electric mixer, cream together the softened butter and granulated sugar on medium speed until light and fluffy (about 3-5 minutes). This incorporates air, contributing to a tender cookie.
2. Add Wet Ingredients: Beat in the eggs one at a time, ensuring each is fully incorporated before adding the next. Stir in the vanilla extract. Scrape down the sides of the bowl to ensure everything is well combined.
3. Combine Dry Ingredients: In a separate medium bowl, whisk together the flour, baking powder, and salt.
4. Gradually Add Dry to Wet: With the mixer on low speed, gradually add the dry ingredients to the wet ingredients, mixing until just combined. Be careful not to overmix, as this can develop the gluten and lead to tough cookies. The dough should come together in a cohesive ball.
5. Chill the Dough: Divide the dough into two equal portions. Flatten each portion into a disque, wrap tightly in plastic wrap, and refrigerate for at least 1-2 hours (or up to 2 days). This chilling step is paramount for achieving perfectly shaped cookies and preventing spreading. It’s what differentiates a good Halloween Sugar Cookies from a phenomenal one.
6. Preheat Oven & Prepare Baking Sheets: Preheat your oven to 375°F (190°C). Line baking sheets with parchment paper or silicone mats.
7. Roll and Cut: On a lightly floured surface, roll out one portion of chilled dough to about ¼-inch thickness. Use your favorite cookie cutters to cut out shapes. Reroll scraps as needed, but try not to overwork the dough.
8. Bake: Carefully transfer cut-out cookies to the prepared baking sheets, leaving about 1 inch between them. Bake for 8-12 minutes, or until the edges are lightly golden. Baking time will vary based on cookie size and oven calibration.
9. Cool: Let the cookies cool on the baking sheets for 5 minutes before transferring them to a wire rack to cool completely.
10. Decorate (Optional): Once completely cooled, decorate with your preferred icing, sprinkles, or food coloring. This is where you can truly let your imagination run wild, transforming these simple treats into gorgeous Christmas sugar cookies or spooky Halloween delights.
Nutritional Benefits & Advantages
While these are undeniably a treat, homemade Sugar Cookies allow for control over ingredients. Using real butter and eggs provides essential nutrients like vitamin A, D, and protein, in contrast to processed store-bought versions often laden with artificial ingredients and unhealthy fats. They are also a wonderful source of joy and a creative outlet!
Tips Variations & Cooking Advice
- Flavor Boosts: Add lemon zest, orange zest, or a pinch of cinnamon for different flavor profiles.
- Gluten-Free: Substitute all-purpose flour with a 1:1 gluten-free baking flour blend for a gluten-free version.
- Dairy-Free: Use a good quality plant-based butter substitute and dairy-free milk for the icing.
- Thicker Cookies: Roll the dough ¼-inch thick for a softer, chewier cookie. For crispier cookies, roll to ⅛-inch thickness.
- Icing: A simple powdered sugar glaze (powdered sugar + milk + vanilla extract) works wonderfully, or explore royal icing for more intricate designs.
Common Mistakes to Avoid
- Overmixing the Dough: This develops gluten, leading to tough, rather than tender, cookies. Mix just until combined.
- Not Chilling the Dough: Warm dough spreads excessively in the oven, losing its shape. Don’t skip the chill!
- Over-flouring the Surface: Too much flour while rolling can make the cookies dry. Use just enough to prevent sticking.
- Overbaking: This results in hard, dry cookies. Watch for lightly golden edges; the centers might still look slightly soft but will set as they cool.
Storage & Meal Prep Tips
Store undecorated Sugar Cookies in an airtight container at room temperature for up to 5-7 days. Decorated cookies will also keep well for 3-5 days, depending on the icing used. For longer storage, freeze undecorated cookies in an airtight container for up to 3 months. Thaw at room temperature before decorating or serving. You can also freeze the raw dough, wrapped tightly, for up to 2 months. Thaw in the refrigerator overnight before rolling and baking.
Conclusion
Mastering the art of homemade Sugar Cookies is a truly rewarding experience, opening up a world of creative possibilities. From spooky Halloween Sugar Cookies to festive Christmas sugar cookies, the simple pleasure of baking these delightful treats brings joy to any occasion. By following these detailed steps and heeding our expert tips, you’re well on your way to creating stunning, delicious cookies that will impress everyone. So, preheat your oven, gather your ingredients, and embark on this sweet journey. We encourage you to try this recipe, share your beautiful creations with us in the comments below, and explore the endless variations!
FAQs
Q1: Can I make the dough ahead of time?
A1: Yes, the dough can be made up to 2-3 days in advance and stored tightly wrapped in the refrigerator. This often improves the flavor and texture.
Q2: My cookies are spreading too much. What went wrong?
A2: The most common causes are not chilling the dough sufficiently, the butter being too soft, or too much leavening agent. Ensure your butter is softened, not melted, and always chill the dough for at least 1-2 hours.
Q3: How can I prevent my cookies from sticking to the rolling pin?
A3: Lightly flour your work surface and rolling pin. You can also roll the dough between two sheets of parchment paper for a mess-free solution.
Q4: What’s the best way to get consistent thickness when rolling out the dough?
A4: Use a rolling pin with adjustable guides, or place two rulers or wooden dowels of your desired thickness on either side of the dough as you roll.
Q5: Can I substitute granulated sugar for powdered sugar in the cookie dough?
A5: No, they behave differently. Granulated sugar provides structure and a crispier edge, while powdered sugar would make the dough too crumbly and affect the texture.